Sweet & Spooky Halloween Charcuterie Board
Published Sep 21, 2023
This post may contain affiliate links. Please read our disclosure policy.
This Halloween Charcuterie Board is a sweet and spooky skull-shaped platter filled with deliciously sweet treats for a fun and festive holiday treat that is nut-free and perfect for classrooms, parties, and more!

Table of Contents
What is a Halloween Charcuterie Board?
Traditional charcuterie boards or cheese boards feature a savory array of crackers, semi-soft cheeses like brie, mozzarella, and goat cheese, harder cheeses like gouda or cheddar, small bowls of olives and nuts including almonds, cashews, or walnuts, and cured meats like salami and prosciutto.
The tray or board is then filled with various fruits like grapes, blackberries, raspberries, and various sweets like chocolate candies, dried fruit, and more. It’s popular for its flavors and textures and beautiful display.
While these boards are the perfect accompaniment to many holidays and events, Halloween is all about CANDY! So, I set out to make a Halloween-themed board that is full of spooky sweets and delicious flavors in a skull-shaped Halloween snack board that everyone will love!
What Makes This Recipe Great
Move over, cheese boards! This Sweet and Spooky Halloween Charcuterie Board is the perfect, kid-friendly platter full of festive treats. I love this snack board because it doubles as the perfect decoration and a delicious appetizer for your next Halloween Party or event!
All you need is a wooden serving platter or skull plate and a variety of easy-to-find candy. This nut-free board is perfect for a classroom Halloween party or an after-pumpkin-patch treat. It’s versatile, easy to make, and so fun! Let the spooky sweets commence!
Ingredient Notes

Sourcing ingredients is easy. If you have a Sprouts nearby, check the “bulk bins” for their assortment of candies and chocolates. You can also check the Dollar Tree or 99-cent store for inexpensive candy options. This really is a budget-friendly, easy-to-make treat!
- White chocolate pretzels
- Yogurt covered raisins
- Mini Marshmallows
- White chocolate chips
- Milk chocolate chips
- Kit Kat bar
- Raisins
Step-by-Step Instructions

- Start with a clean and dry large wooden serving platter or skull-shaped plate. Ensure that it’s large enough to accommodate all the ingredients.
- Begin by forming the top of the skull shape using the white pretzels. Arrange them in an oval or circular shape at the top of the platter.
- Use the marshmallows to make your outline for the eyes. The eyes are circular and the nose is triangular.
- Use the chocolate wafers to fill in the eyes.
- Use the raisins to fill in the nose.
- Add the yogurt-covered raisins around the outside of the eyes and nose, filling in any uncovered area mid-face.
- Use marshmallows to create the outline of the mouth. Cut the Kit Kat bar perpendicular to the bars and use it as the “teeth” by positioning it inside the marshmallow outline.
- Use the white chocolate chips to fill the uncovered area around the mouth, completing the lower jaw portion.
- If you have any remaining ingredients, you can use them around the platter to fill any gaps and perfect your skull.
- Your Halloween charcuterie board is now ready to be served! Place it in the center of your table, and your guests can enjoy the sweet and spooky treat.

Mac’s Pro Tips
Expert Tips
- Decoration: Feel free to expand your decorations with plastic spiders, a skeleton hand, candy eyeballs, ghosts, and other spooky Halloween candy around the skeleton platter. Add some color with candy corn, popcorn, and cookies. Use your creativity- you really can’t go wrong!
- Platter: If you don’t have a skull plate, you can use a large wooden cutting board or tray and design the skull yourself using my instructions in the recipe card below.
- Leftover Ingredients: If you have any remaining ingredients, you can use them around the platter to fill any gaps and perfect your skull.
Serving Tips
- Place your Halloween charcuterie board in the center of your table, and your guests can enjoy the sweet and spooky treat.
- Decorate your table with other fun elements if desired!
Storage Tips
- Simply wrap your platter with plastic wrap and store it at room temperature if you have leftovers.

More Halloween Themed Treats!
Kid Friendly
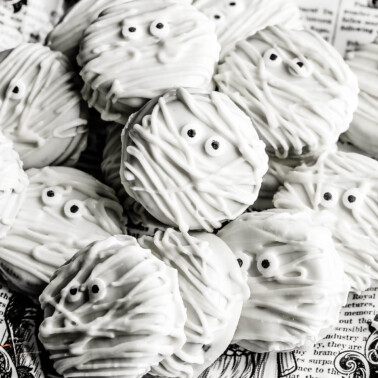
Oreo Mummy Cookies
Appetizers & Snacks
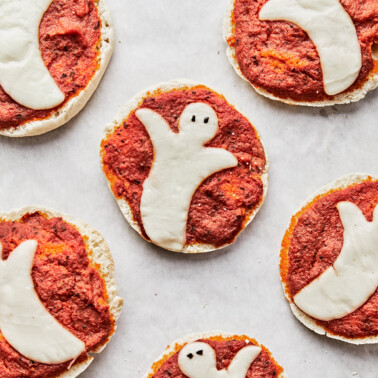
Ghost English Muffin Pizza
Gluten Free
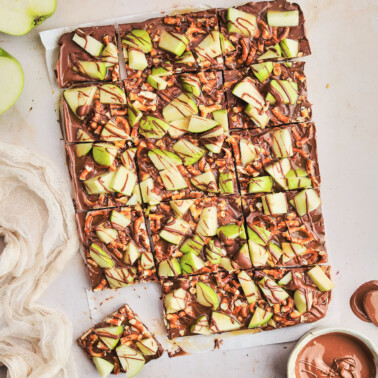
Caramel Apple Bark With Pretzels
Fall/Thanksgiving
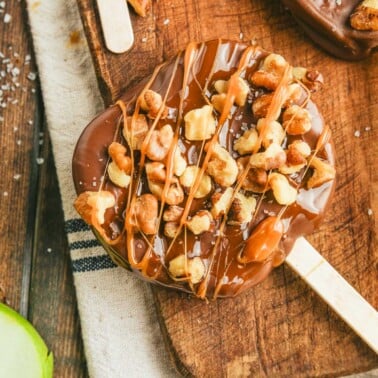
Chocolate Turtle Apple Slices
Follow on Instagram
If you love this recipe, please give it a star rating and leave a comment below! Follow me on Pinterest, Facebook, and Instagram for more!


Spooky & Sweet Skull Halloween Charcuterie Board
Ingredients
- Large wooden Serving Platter or Skull Plate
- 3 cups White Chocolate pretzels For Skull
- 2 cups White yogurt-covered raisins Face
- 1/2 cup Mini Marshmallows
- 1 cup White chocolate chips Face
- 1 cup milk chocolate waffers Eyes
- 1 large Kit Kat bar for the “teeth”
- 1/4 cup Raisins for Nose
Instructions
- Start with a clean and dry large wooden serving platter or skull-shaped plate. Ensure that it’s large enough to accommodate all the ingredients.
- Begin by forming the top of the skull shape using the white pretzels. Arrange them in an oval or circular shape at the top of the platter.
- Use the marshmallows to make your outline for the eyes. The eyes are circular and the nose is triangular.
- Use the chocolate wafers to fill in the eyes.
- Use the raisins to fill in the nose.
- Add the yogurt-covered raisins around the outside of the eyes and nose, filling in any uncovered area mid-face.
- Use marshmallows to create the outline of the mouth. Cut the Kit Kat bar perpendicular to the bars and use it as the “teeth” by positioning it inside the marshmallow outline.
- Use the white chocolate chips to fill the uncovered area around the mouth, completing the lower jaw portion.
- If you have any remaining ingredients, you can use them around the platter to fill any gaps and perfect your skull.
- Your board is now ready to be served! Place it in the center of your table, and your guests can enjoy the sweet and spooky treat.
Notes
Expert Tips
-
- Decoration: Feel free to expand your decorations with plastic spiders, a skeleton hand, candy eyeballs, ghosts, and other spooky Halloween candy around the skeleton platter. Add some color with candy corn, popcorn, and cookies. Use your creativity- you really can’t go wrong!
-
- Platter: If you don’t have a skull plate, you can use a large wooden cutting board or tray and design the skull yourself using my instructions in the recipe card below.
-
- Leftover Ingredients: If you have any remaining ingredients, you can use them around the platter to fill any gaps and perfect your skull.
Serving Tips
-
- Place your board in the center of your table, and your guests can enjoy the sweet and spooky treat.
-
- Decorate your table with other fun elements if desired!
Storage Tips
-
- Simply wrap your platter with plastic wrap and store it at room temperature if you have leftovers.
Nutrition
Nutrition information is automatically calculated, so should only be used as an approximation.