Peanut Butter Pie Dairy-Free
Published Jun 20, 2023 Updated Dec 11, 2023
This post may contain affiliate links. Please read our disclosure policy.
Indulge in the irresistible taste of a dairy and gluten-free peanut butter pie. This luscious dessert recipe will satisfy your sweet tooth without compromising your dietary restrictions. Discover the perfect blend of graham cracker crust paired with the velvety peanut butter filling that’s luscious and rich. It will keep you satisfied with every bite.
What Makes This Recipe Great?
Are you on a dairy-free or gluten-free diet but still crave a delectable dessert? Look no further! This Dairy and Gluten-Free Peanut Butter Pie is here to save the day. With this guilt-free recipe, you can enjoy a creamy and satisfying pie without compromising your dietary preferences. This pie requires minimal and healthy ingredients and is super easy to make. Whether you’re following a dairy-free or gluten-free lifestyle, have specific allergies, or just want a delicious dessert, this recipe will satisfy your cravings. Treat yourself!

Ingredient Notes
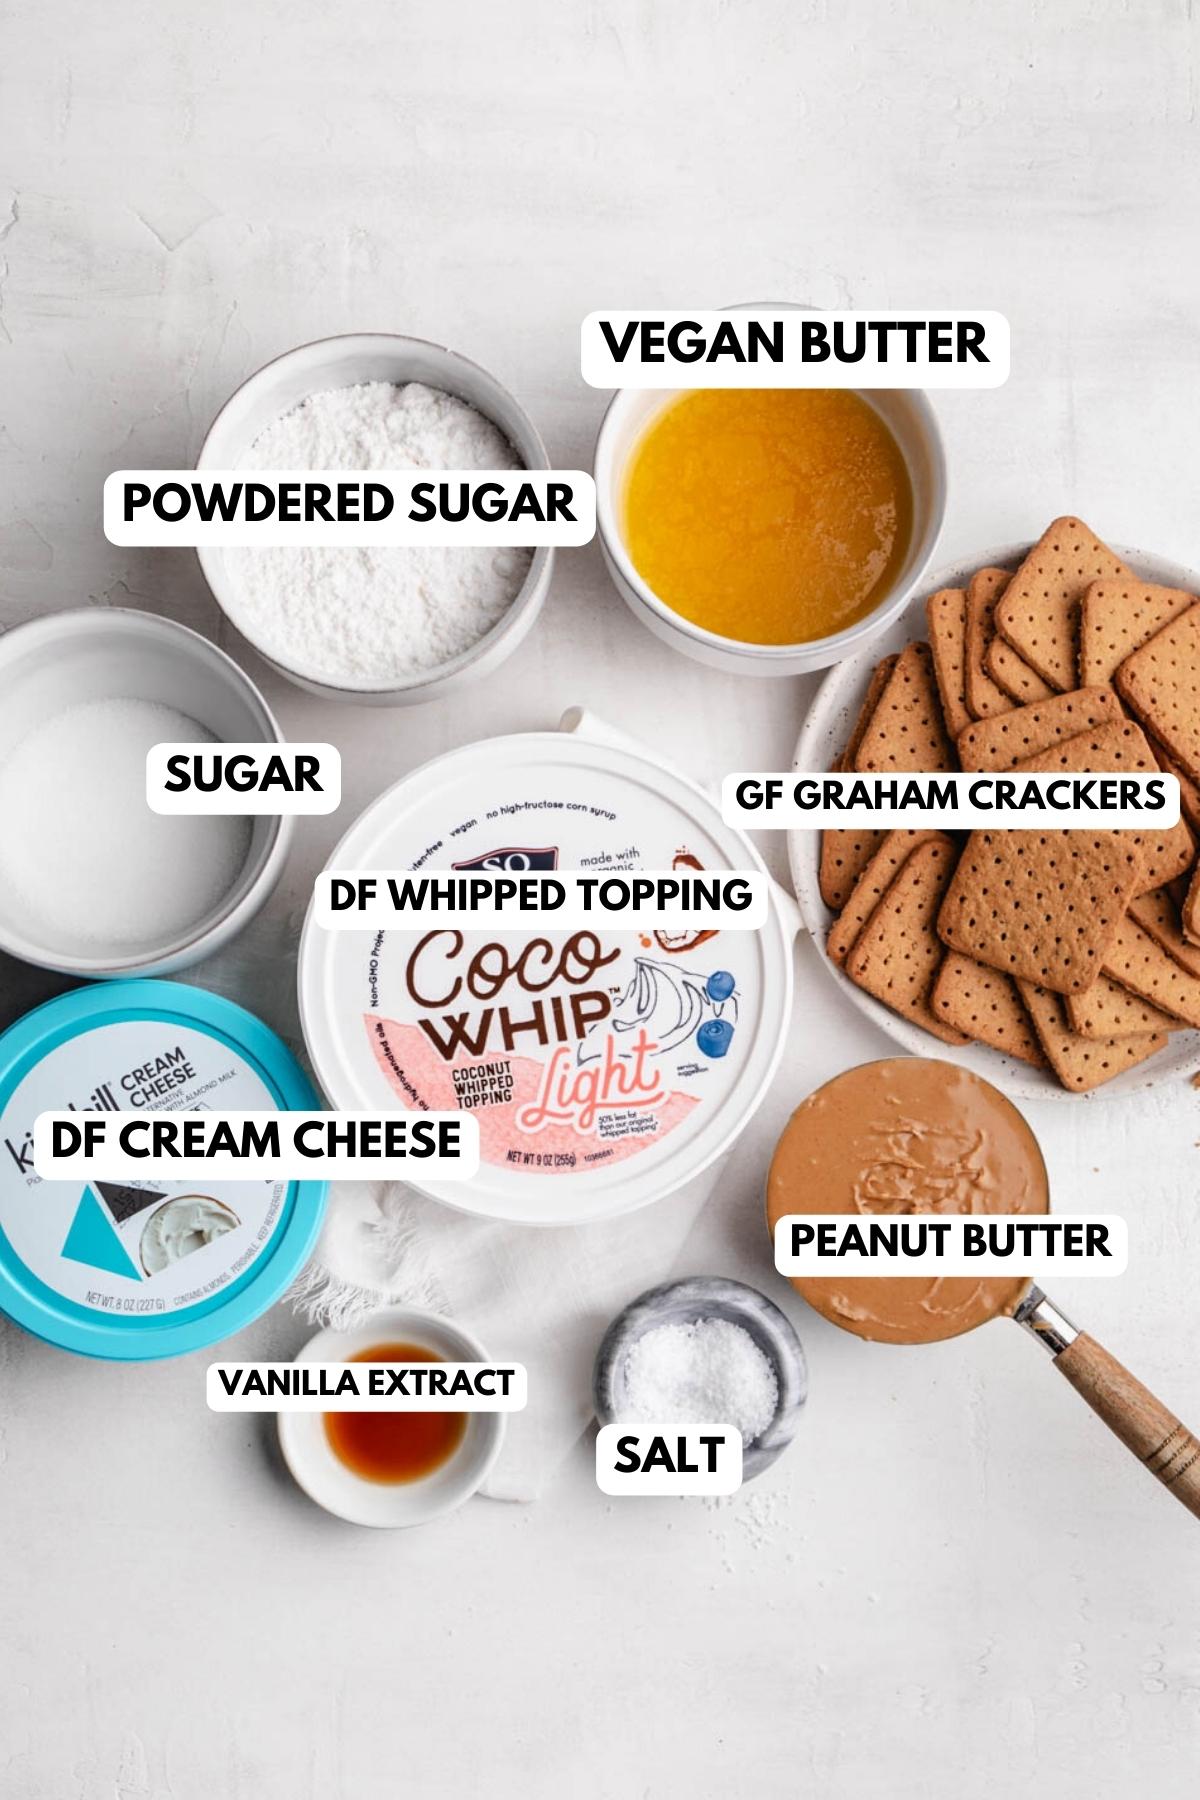
- Gluten-Free Graham Cracker Crumbs: buy either store bought or make my homemade version located in the recipe card. I used Schar because that brand is dairy-free. The Kinnikinnick brand is also gluten-free.
- Dairy-Free Cream Cheese Alternative: Look for a dairy-free cream cheese alternative that is specifically labeled as such. My favorite brand I always use is Kite Hill. It always gives the best results.
- Dairy and Gluten-Free Peanut Butter: Choose a smooth peanut butter that is specifically labeled as both dairy and gluten-free. Regular peanut butter often contains added ingredients like hydrogenated oils or stabilizers, which may contain gluten or dairy.
- Dairy-Free Whipped Topping or Coconut Whipped Cream: My favorite brand to use is So Delicious. Do make sure to completely thaw before using.
- Crushed Peanuts: Used for garnish. I love the crunch these give to the top of the pie.
- Dairy-Free Chocolate Shavings: Hu Kitchen and Enjoy Life are my favorite dairy free chocolate.
- Coconut Sugar or Granulated Monk Fruit Sweetener: If you are looking to cut the sugars, use Granulated Monk Fruit, if you are not concerned on the sugar count, feel free to use coconut sugar or sugar of choice.
- Swerve Powdered Sugar OR Regular Powdered Sugar: If you are looking to cut the sugars, use Swerve Powdered Sugar, if you are not concerned on the sugar count, feel free to use the real thing.
- Butter: Make sure to buy dairy free or plant based.
- Vanilla Extract
Step-by-Step Instructions

- In a mixing bowl or food processor combine the graham cracker crumbs, melted butter, and granulated sugar. Stir or pulse until the crumbs are evenly coated with the butter and sugar are completely combined.
- Press the graham cracker mixture into the bottom and up the sides of a 9-inch pie dish, forming an even crust. Use the back of a spoon or a flat-bottomed glass to press it firmly.
- Place the crust in the refrigerator for about 30 minutes to allow it to set. OR I like to bake mine in a 350F oven for 8 minutes unfilled. Baking makes it more stable and less fragile.
- In another mixing bowl, combine the creamy peanut butter, dairy-free cream cheese (or regular cream cheese), powdered sugar, and vanilla extract. Mix well until smooth and creamy.
- Fold in the dairy-free whipped topping (or regular whipped topping) into the peanut butter mixture until fully incorporated. Be gentle to maintain the fluffiness of the filling.
- Pour the peanut butter filling into the chilled graham cracker crust, spreading it out evenly. Place the pie in the refrigerator and let it chill for at least 4 hours, or until it is firm.
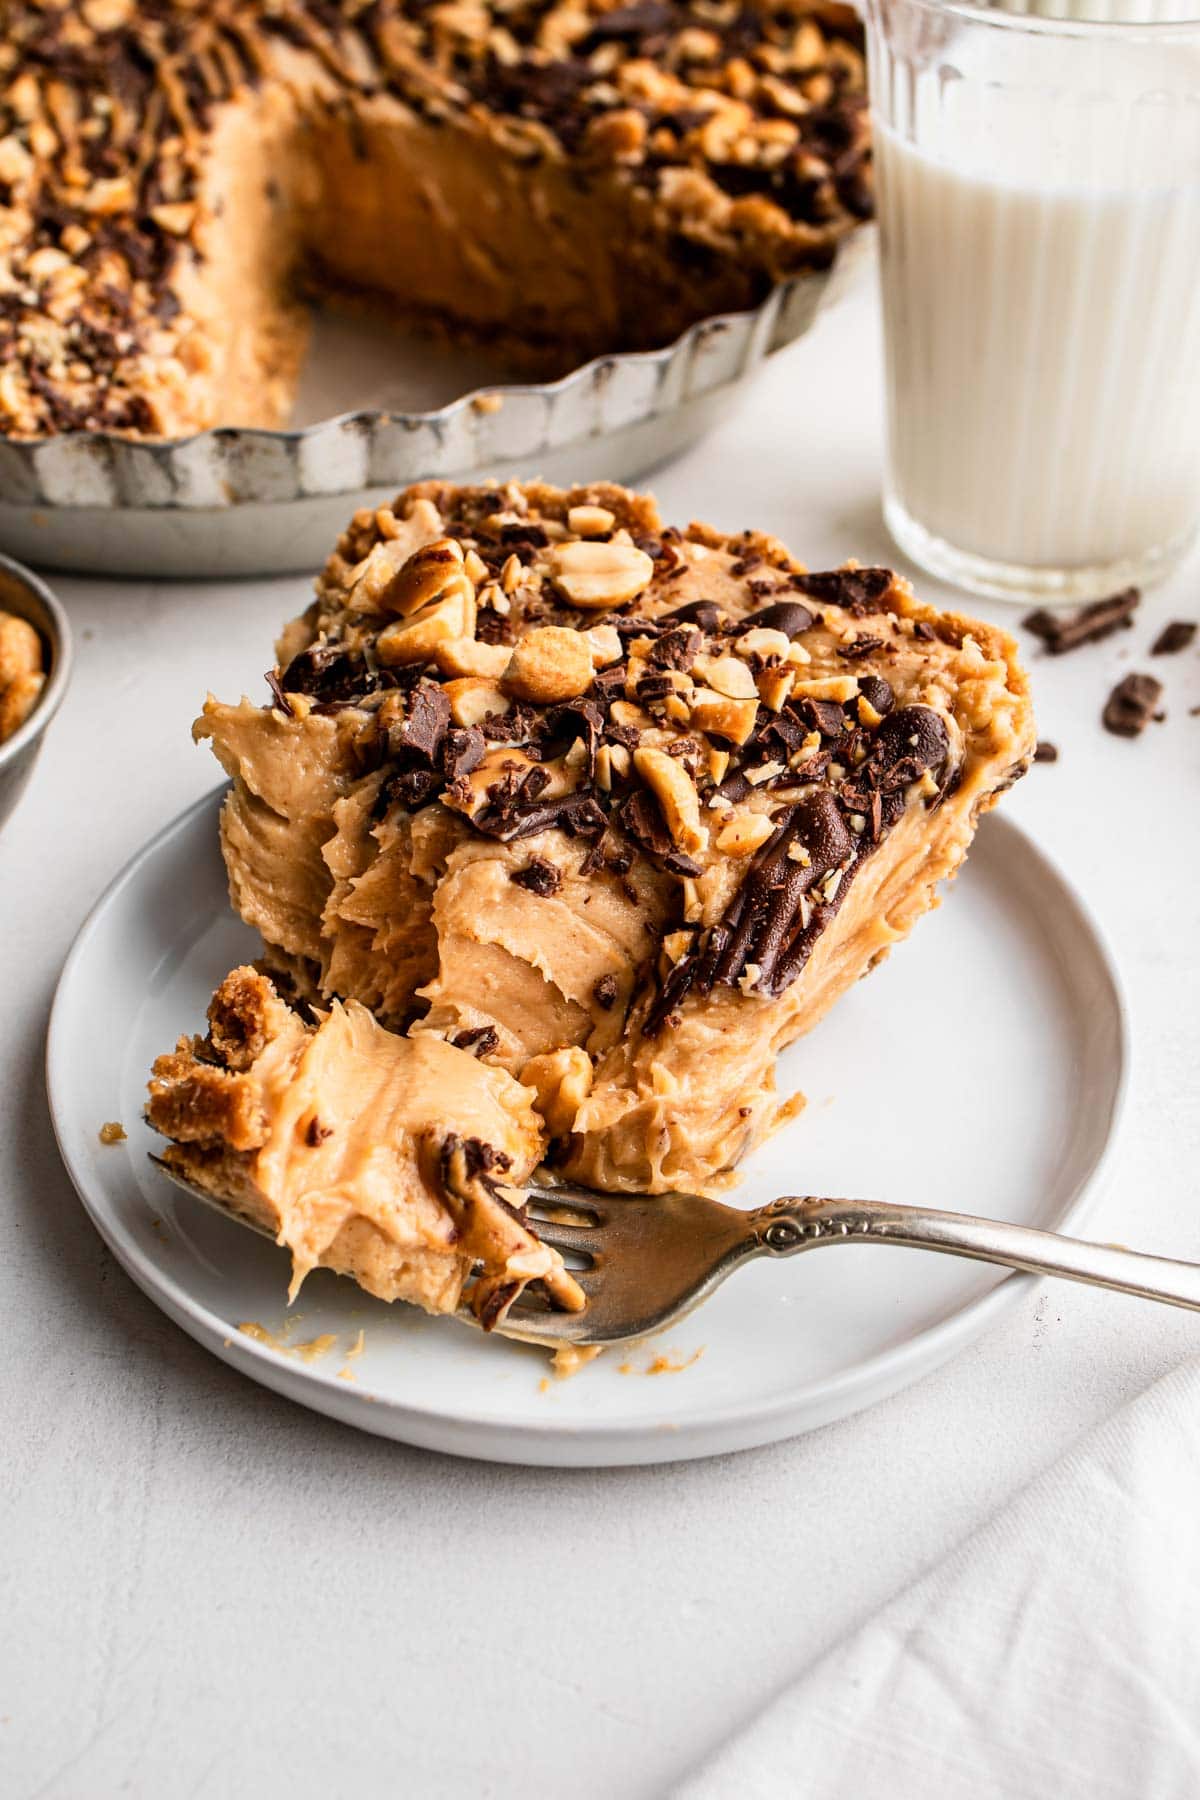
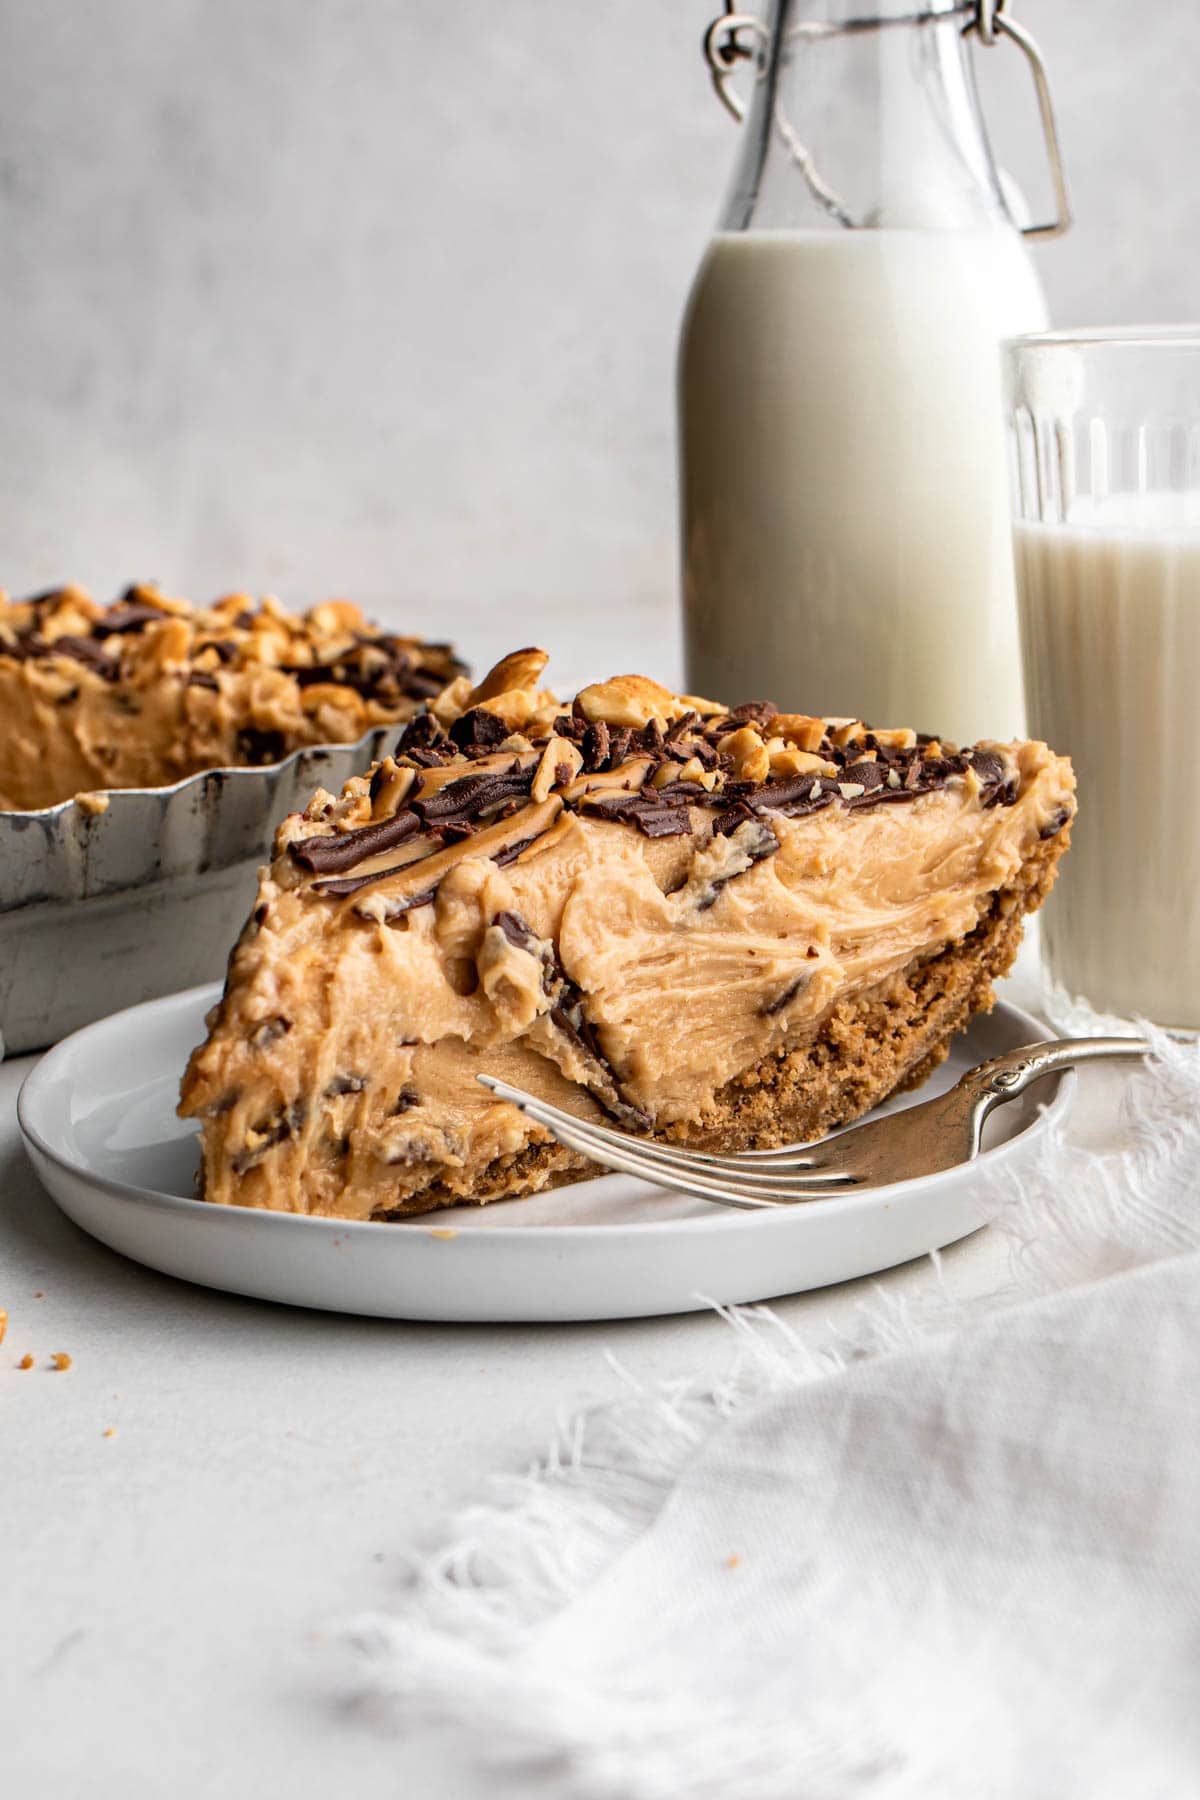
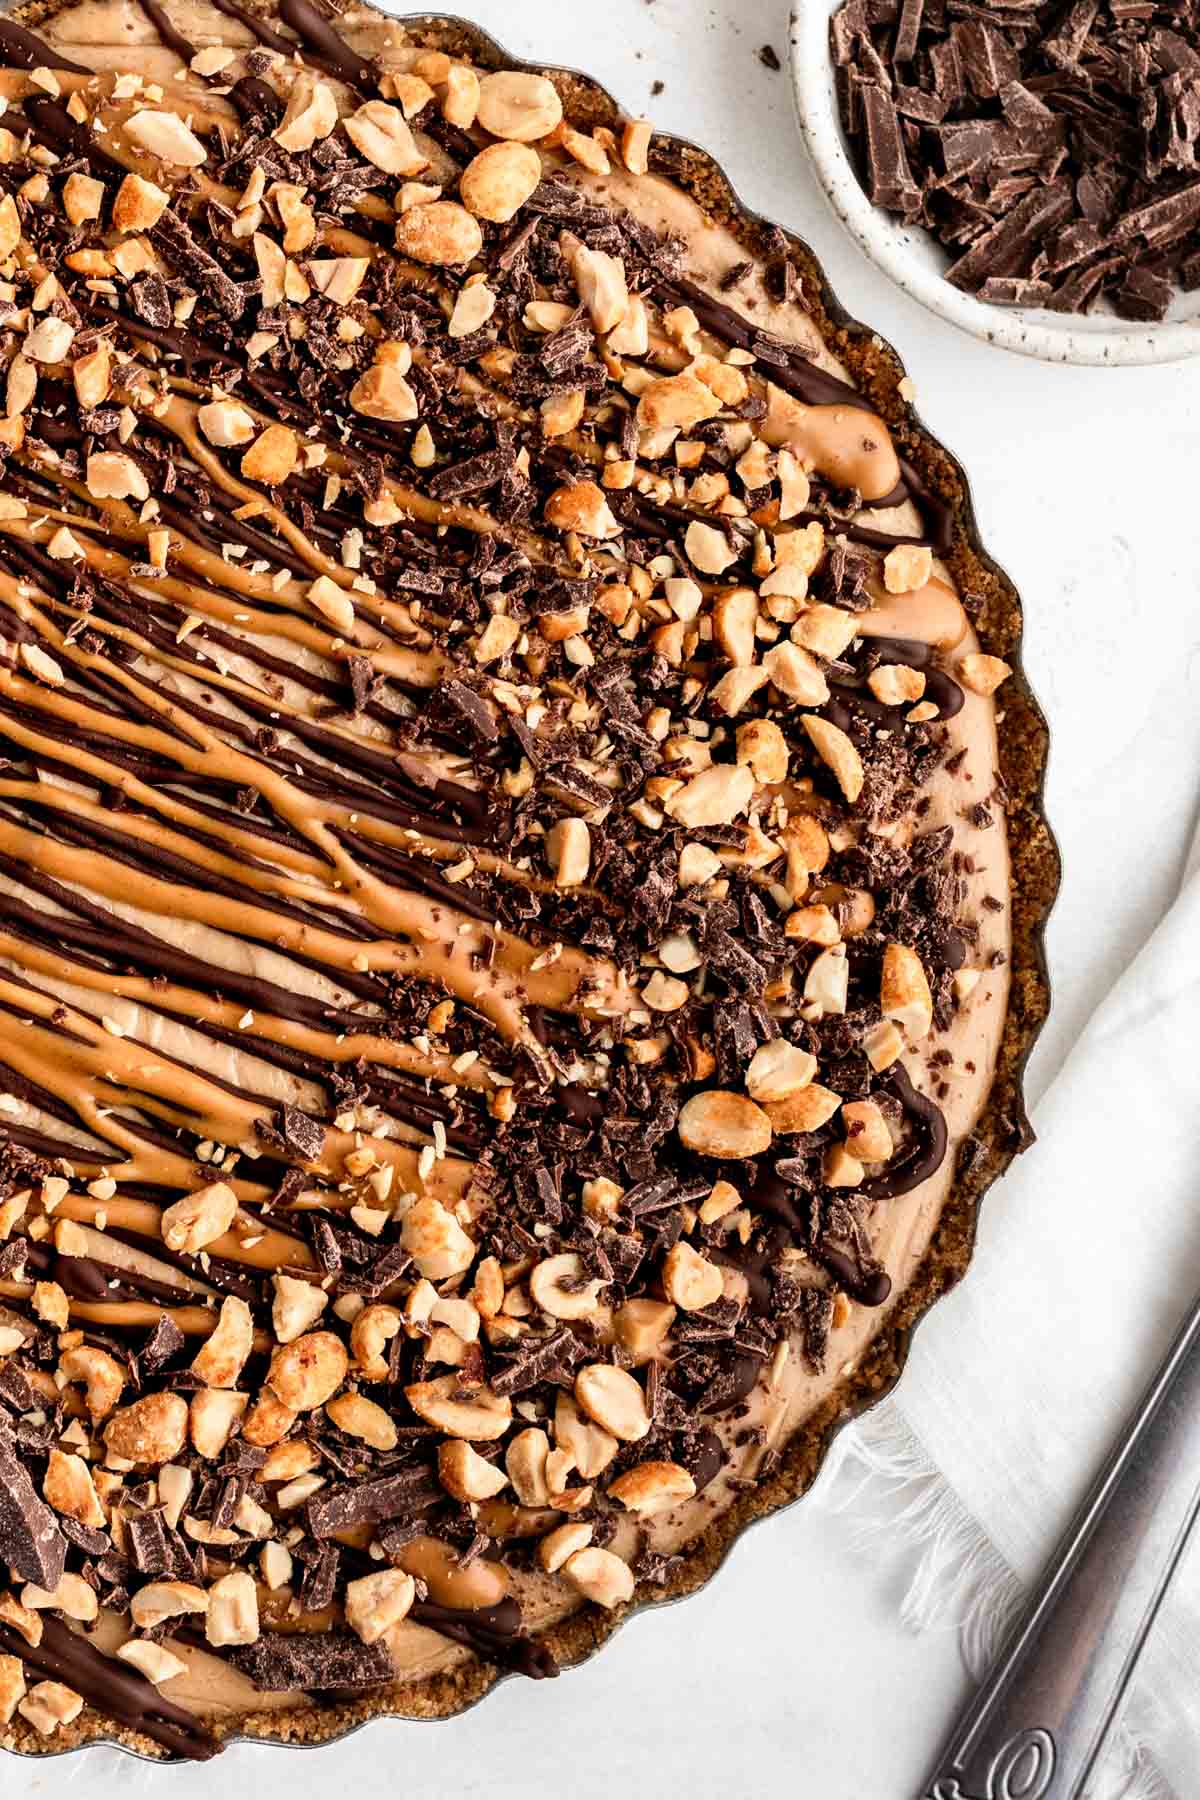
- Before serving, you can optionally garnish the pie with melted chocolate and peanut butter drizzle, crushed peanuts, and crushed dairy free chocolate. Enjoy!
Mac’s Pro Tip
Let the Pie Set Properly
To achieve the best results, refrigerate the peanut butter pie for at least 4 hours, or preferably overnight, to allow it to set properly. This will ensure a firm and sliceable pie that holds its shape when serving.
Adjust Sweetness to Taste
Different brands of dairy-free and gluten-free peanut butter can vary in sweetness. Taste the peanut butter filling mixture before adding the sweetener and adjust the amount of maple syrup or agave nectar accordingly. Add more sweetener if desired, or reduce it if the peanut butter is already sweet enough.
Garnish with Care
When garnishing the pie with toppings such as dairy-free whipped cream, crushed peanuts, or chocolate shavings, add them just before serving to maintain freshness and prevent them from sinking into the filling. This will enhance the visual appeal and provide additional flavors and textures.
Serving
Dairy and gluten-free peanut butter pie is best served chilled. The cool temperature enhances the creaminess and allows the flavors to meld together. Keep the pie refrigerated until ready to serve and store any leftovers in the refrigerator.
Peanut Butter Pie FAQs
For sure! It will be a 1:1 swap with real dairy products
There are various gluten-free alternatives you can use for the crust, such as gluten-free graham crackers or cookies, crushed gluten-free pretzels, or a mixture of ground nuts and gluten-free oats. You can experiment with different options to find the texture and flavor you prefer.
Absolutely! In fact, it is recommended to refrigerate the pie for at least 4 hours, or preferably overnight, to allow it to set properly. Making the pie ahead of time allows the flavors to meld together, resulting in a more delicious and cohesive dessert.
Yes, you can freeze dairy and gluten-free peanut butter pie. It is recommended to wrap it tightly with plastic wrap or place it in an airtight container to prevent freezer burn. Thaw the pie in the refrigerator before serving.
Want More Delicious Desserts?


Peanut Butter Pie (Dairy & Gluten Free)
Ingredients
Peanut Butter Filling
- 1 1/4 cup creamy peanut butter
- 8 oz dairy-free cream cheese, softened I used Kite Hill
- 1 cup + 2 tbsp powdered sugar or powdered Swerve
- 8 oz container dairy free whipped topping, thawed I used So Delicious
- 1 tsp vanilla extract
Gluten-Free Graham Cracker Crust
- 2 cups gluten-free graham cracker crumbs I used Schar (about 1 1/3 boxes, 7 oz total)
- 1/4 cup coconut sugar or granulated Monk Fruit
- 5 tbsp dairy-free or vegan butter melted
- pinch of salt
Instructions
Crust
- In a mixing bowl or food processor combine the graham cracker crumbs, melted butter, salt and granulated sugar. Stir or pulse until the crumbs are evenly coated with the butter and sugar are completely combined.
- Press the graham cracker mixture into the bottom and up the sides of a 9-inch pie dish, forming an even crust. Use the back of a spoon or a flat-bottomed glass to press it firmly. Place the crust in the refrigerator for about 30 minutes to allow it to set OR bake in a 350F oven for 8 minutes unfilled. Baking makes it more stable and less fragile.
Peanut Butter Filling
- In another mixing bowl, combine the creamy peanut butter, dairy-free cream cheese (or regular cream cheese), powdered sugar, and vanilla extract. Mix well until smooth and creamy. Fold in the dairy-free whipped topping (or regular whipped topping) into the peanut butter mixture until fully incorporated. Be gentle to maintain the fluffiness of the filling.
- Pour the peanut butter filling into the chilled graham cracker crust, spreading it out evenly. Place the pie in the refrigerator and let it chill for at least 4 hours, or until it is firm.
- Optional: Before serving, garnish the pie with melted chocolate and melted peanut butter drizzle, crushed peanuts, and crushed dairy free chocolate.
Notes
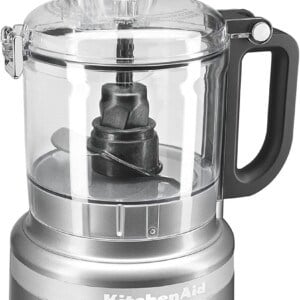
Equipment

Nutrition information is automatically calculated, so should only be used as an approximation.


You won’t believe this recipe is dairy-free. It is so rich and creamy and the perfect dessert!
I made this for Thanksgiving dessert and it was everyone’s FAVORITE. Mine wasn’t as beautiful as your photos but everyone thought it was store bought and made by a professional.
Cathy, this is so extremely nice. Thank you so much!