Sue Sue’s Cheese Stuffed Chicken Breasts Recipe
Published Apr 03, 2024
This post may contain affiliate links. Please read our disclosure policy.
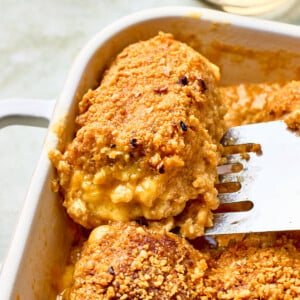
An old family recipe made healthier, these Cheese Stuffed Chicken Breasts are stuffed with cheddar cheese and coated in a simple gluten-free cheese cracker crust. Browned on the stovetop, then baked to perfection, this recipe takes just over 30 minutes, is packed with protein, and even the kids will love it!
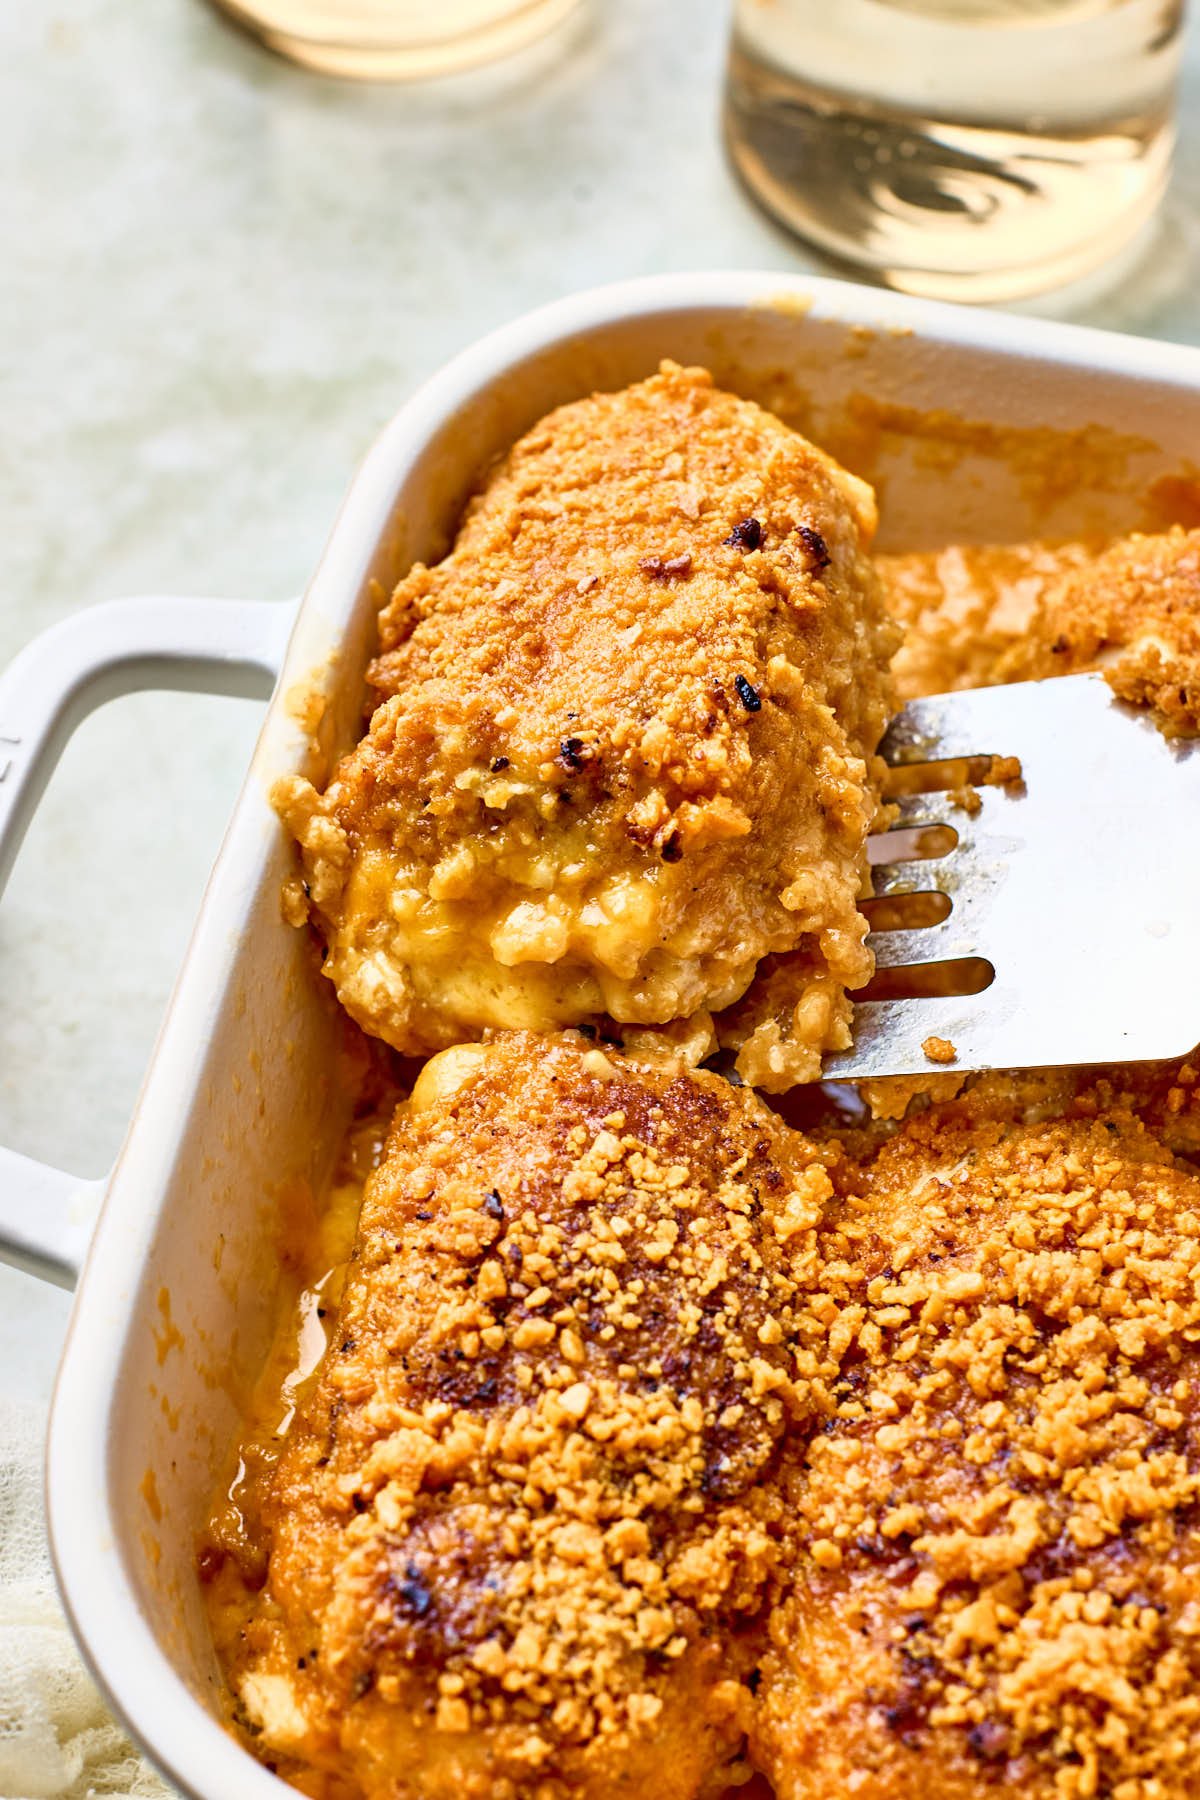
Table of Contents
What Makes This Recipe Great
I’ve been on a roll going through my grandmother’s old Southern recipes and recreating them with healthy twists. It’s been a blast for me to do, and I’m so excited to share this one with you today! Enter, Sue Sue’s Cheez It Crusted Cheese Stuffed Chicken Breast Recipe! A mouthful to say, and an even more delicious one to eat!
Cheez-its are not gluten-free and aren’t the healthiest crackers out there, so I swapped them for Simple Mills farmhouse cheddar almond flour crackers– which transform these stuffed chicken breasts into a delicious cheese-stuffed dish with a gluten-free cracker crust! If you’re not gluten-free, feel free to use whatever cheese crackers you have on hand!
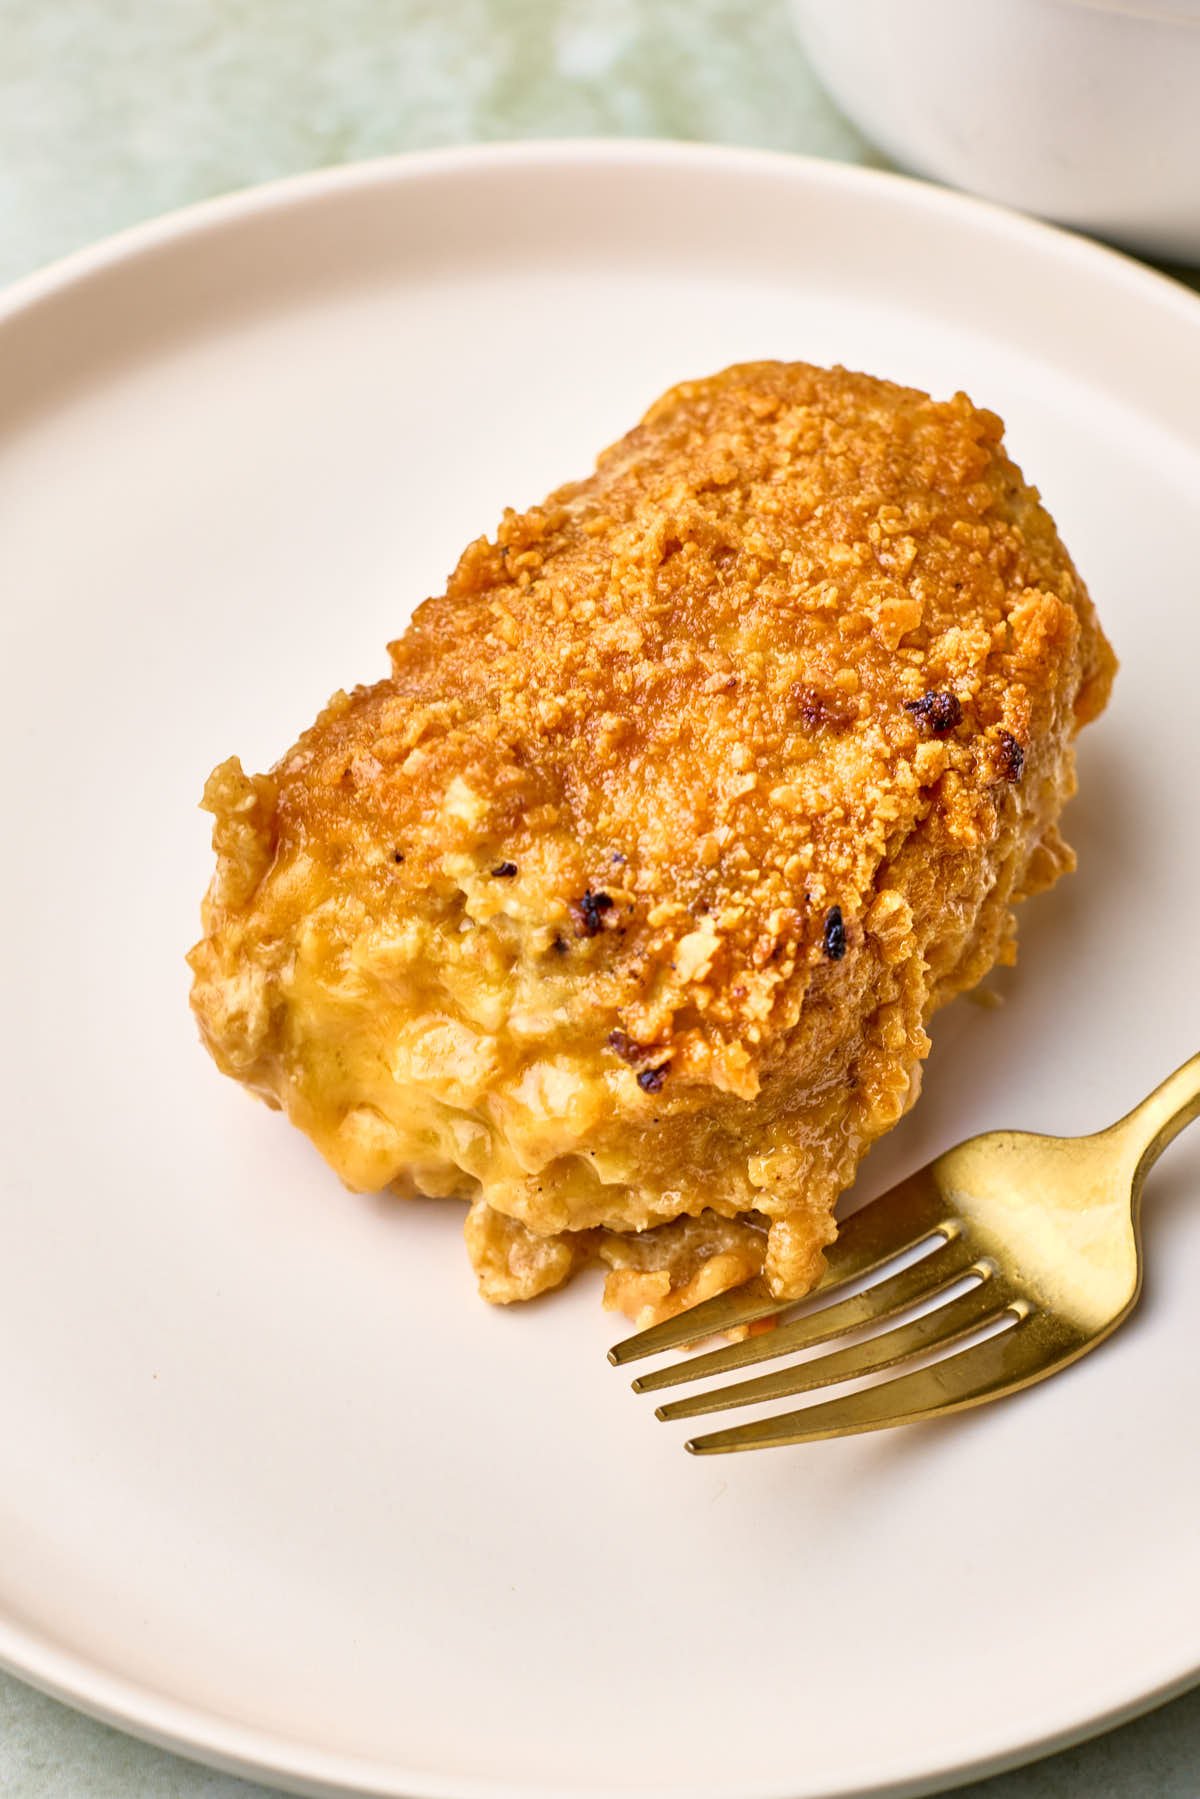
Imagine tender, juicy chicken with a sharp cheddar stuffing and a crispy cheese cracker crust– full of wonderful flavors and textures and just another wonderful recipe created by my dear Sue Sue.
If you’re looking for more of Sue Sue’s recipes try these Air Fryer Chicken Cutlets, her famous Fruit Salad, or these Creamy Chicken & Spinach Enchiladas
Ingredient Notes
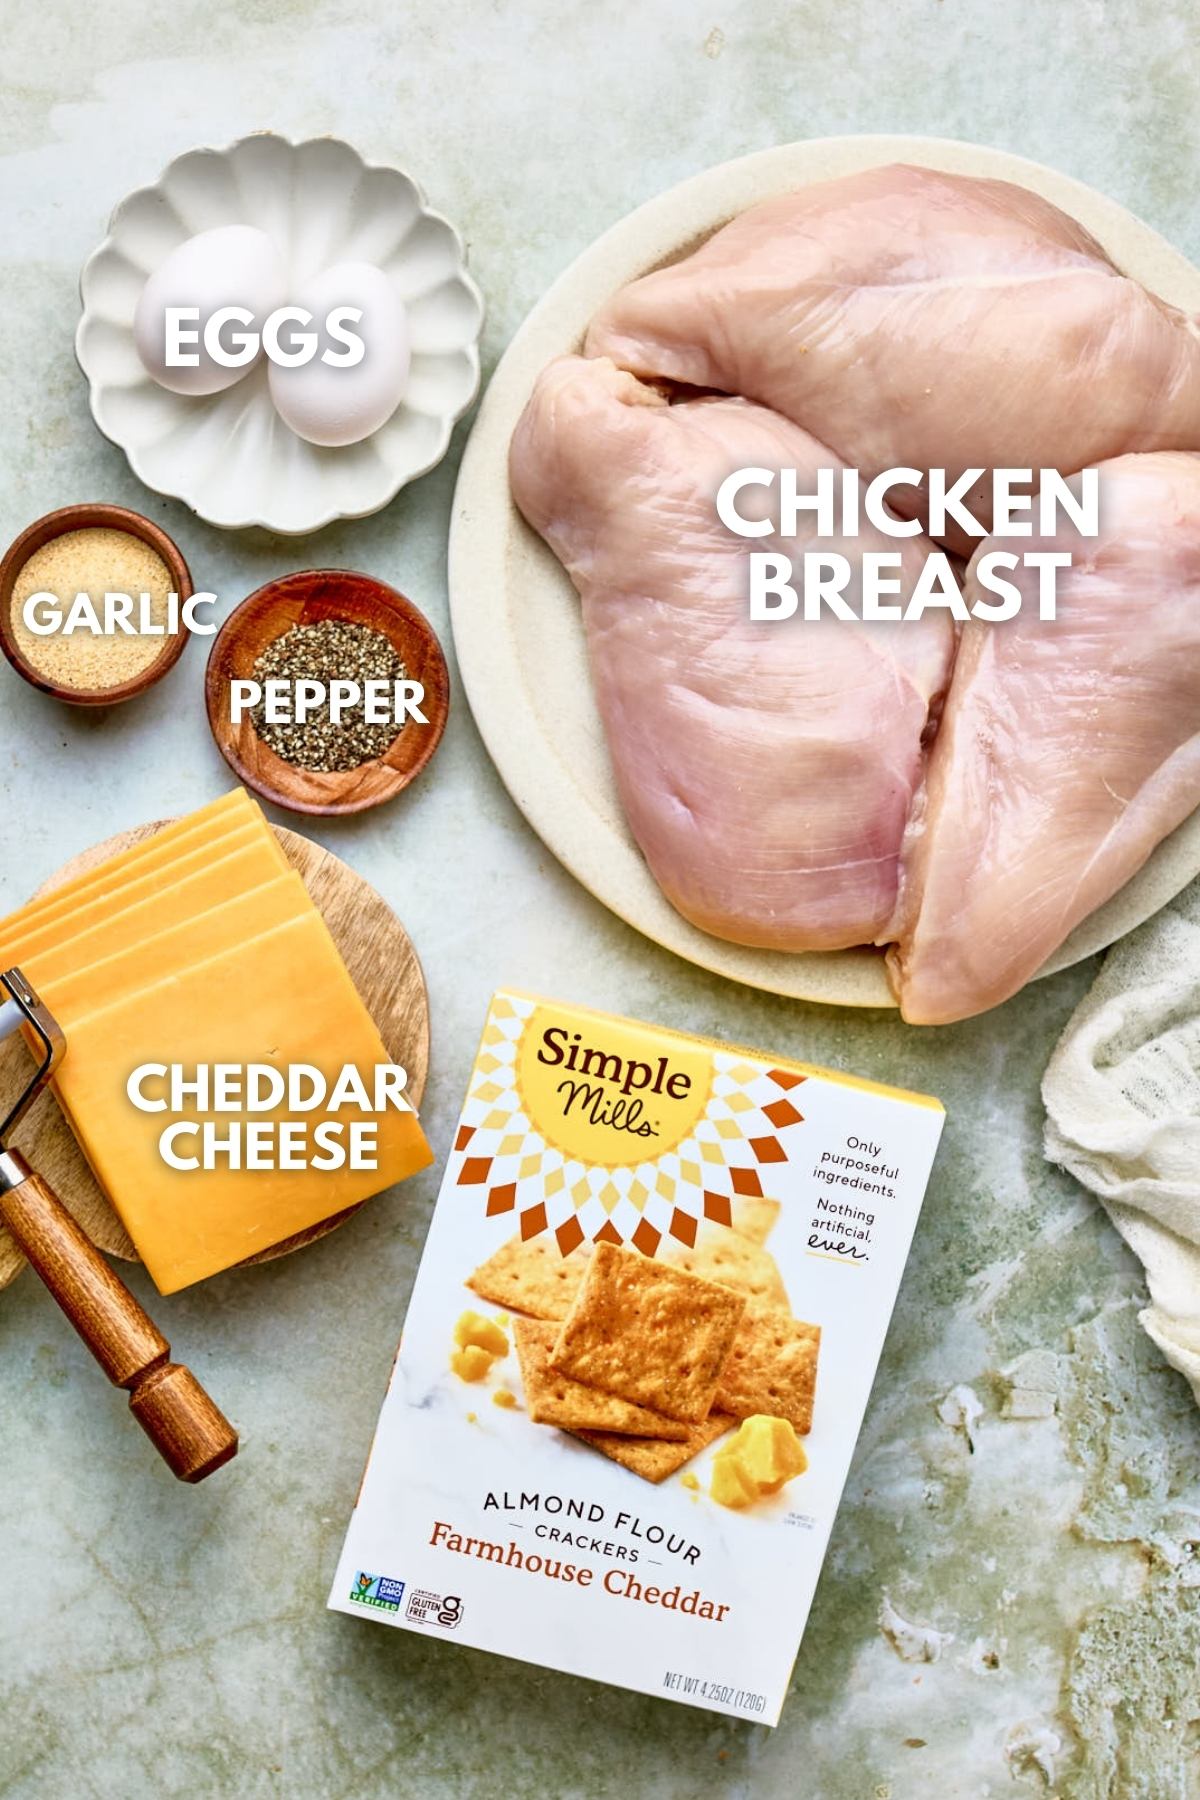
With a few simple ingredients and 30 minutes to cook, this baked chicken recipe will win over the whole family!
- Boneless skinless chicken breasts
- Sharp cheddar cheese: Or cheese of choice. Mozzarella cheese, parmesan cheese, mild cheddar, really any cheese would work here.
- Large eggs
- Avocado oil
- Cheese crackers: I used Simple Mills Farmhouse Cheddar crackers to make it a little healthier and gluten-free, but my grandmother’s original recipe included Cheez-It crackers. Crush into crumbs for the coating.
- Black pepper
- Garlic powder
- Salt: Optional. The crackers are salty enough in my opinion, so no additional salt is needed, but use it to taste.
Step-by-Step Instructions
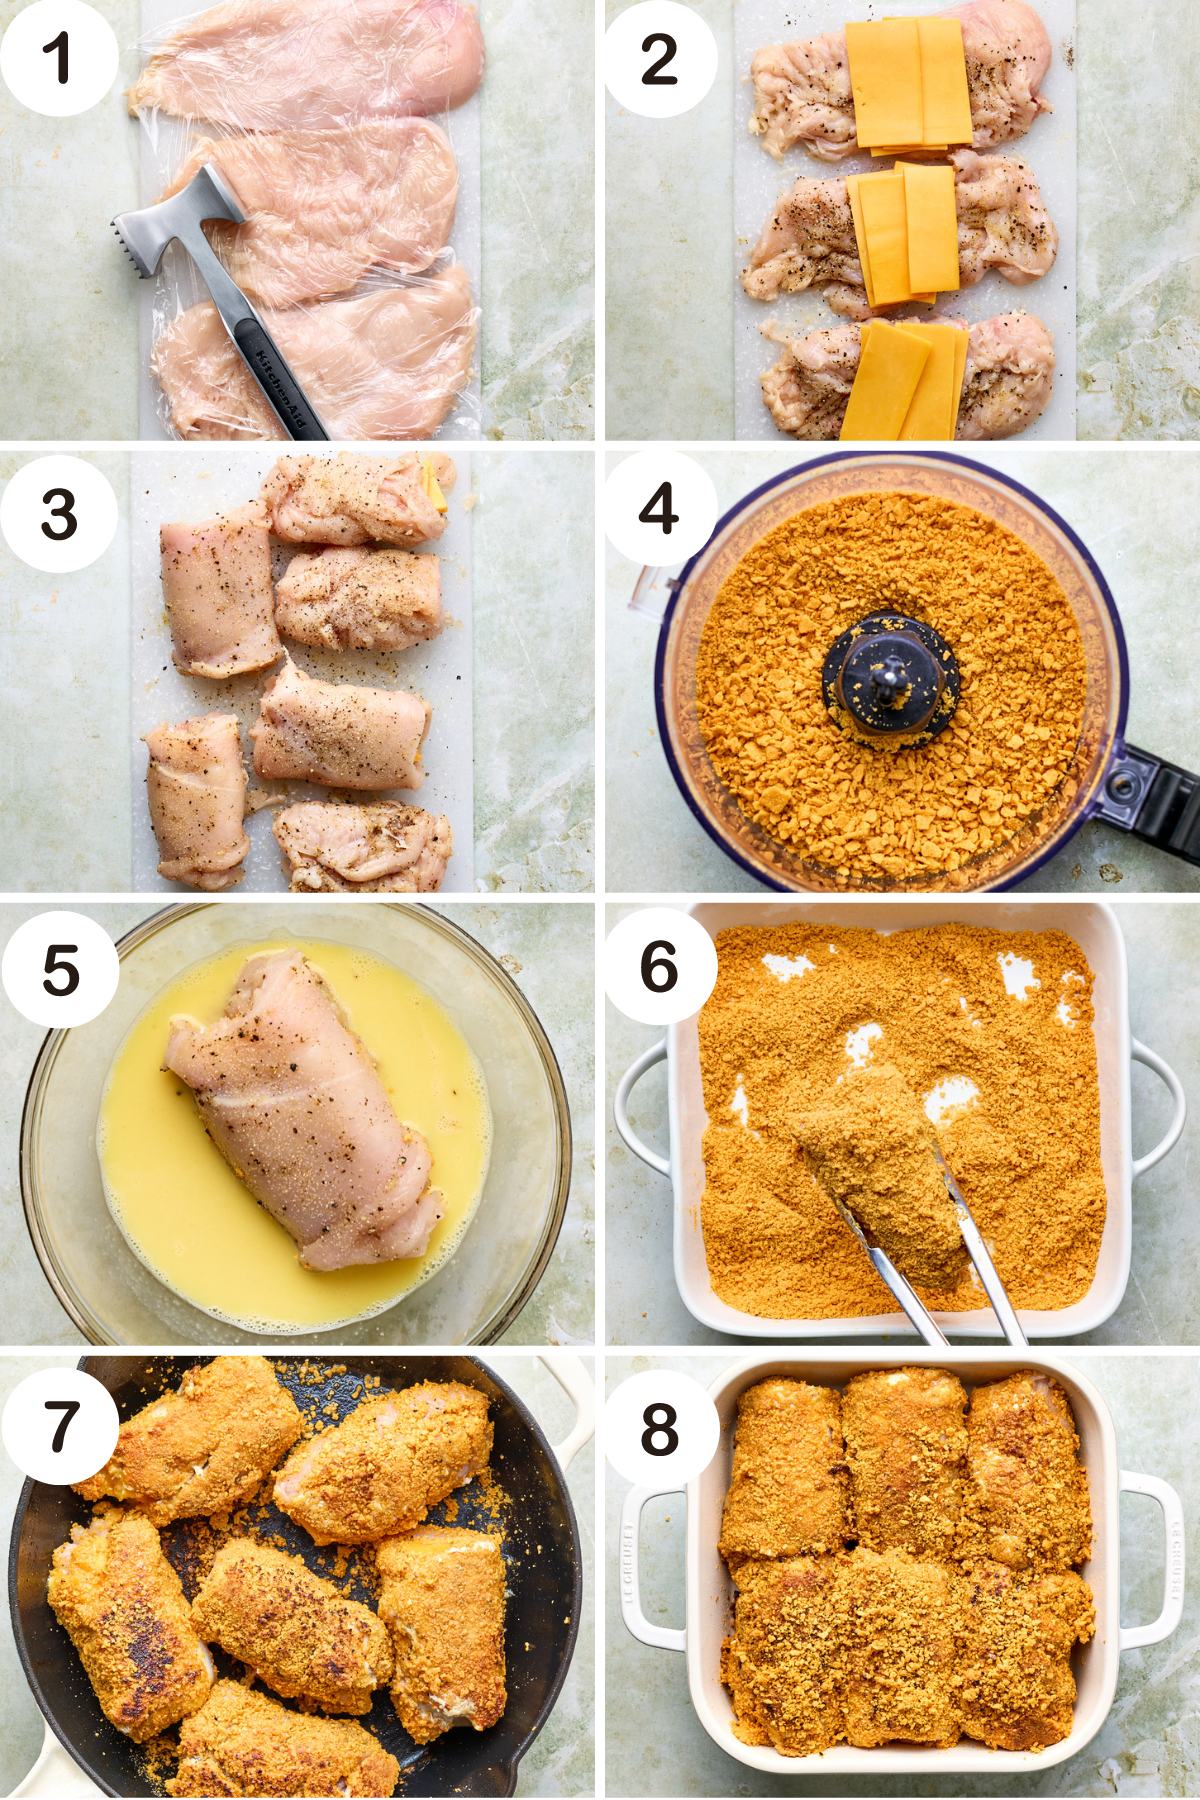
- Preheat your oven to 375°F. Place a chicken breast between two sheets of plastic wrap or parchment paper on a cutting board.
- Use a meat mallet to gently pound the chicken breast until it’s about ¼ inch thick. Season the pounded chicken breast with garlic powder and pepper.
- Add 3 slices of cheese to the middle of each chicken breast. Starting from one end, roll up the chicken breast tightly, ensuring the cheese stays inside.
- Secure the rolled chicken breast with toothpicks. Repeat the process with the remaining chicken breasts.
- In a shallow dish, beat the eggs together. Place the crushed cheese crackers in another shallow dish.
- Dip each rolled chicken breast into the beaten eggs, coating both sides. Next, coat the chicken breasts with the crushed cheese crackers, pressing gently to adhere.
- Heat oil in a cast iron skillet or other large skillet over medium-high heat. Once the oil is hot, add the rolled coated chicken breasts and cook for 3-4 minutes on each side, until the crust is golden brown.
- Transfer the browned chicken breasts to a baking dish and place them in the preheated oven.
- Bake for 25-30 minutes, or until the chicken is cooked through to an internal temperature of 165 degrees F and the cheese is melted. Remove from the oven and let it rest for a few minutes before serving!

Mac’s Pro TipS
Expert Tips
- I used Simple Mills Farmhouse Cheddar crackers to make it a little healthier, but my grandmother’s original recipe included Cheez-It crackers. Crush into crumbs for the coating.
- Because of the oil from the cheese, there will be extra liquid in the baking dish after cooking. Don’t worry! This is normal and adds a ton of flavor to the chicken.
- The tops of the chicken should be super crispy, but the bottoms will have a bit of moisture after cooking.
- If your chicken breasts are too thick, use a sharp knife to butterfly them down the center and then pound them with the meat mallet to make them even thinner.
- Use a meat thermometer inserted into the thickest part of the chicken. The internal temperature should be 165 degrees F when cooked.
Serving Tips
Serve with a side of green beans, a side salad, roasted corn, or one of your favorite side dishes.
Storage Tips
Store any leftover cheese stuffed chicken breasts in an airtight container in the refrigerator for up to 4 days. Reheat in the oven, stovetop, or air fryer to crisp up the coating and warm the chicken.
Recipe FAQs
This is where the toothpicks and meat mallet come in handy! Thin your chicken out with the meat mallet, then stuff with the cheese and roll tightly. Use the toothpicks to secure the chicken in place and you shouldn’t have any issues with cheese oozing out of the sides.
Yes, my grandmother and mother always used regular Cheez-Its. However, you can make them gluten-free and a little healthier by swapping out Cheez-Its for Simple Mills Farmhouse Cheddar crackers.

More Chicken Recipes

Follow on Instagram
If you love this recipe, please give it a star rating and leave a comment below! Follow me on Pinterest, Facebook, and Instagram for more!

Sue Sue’s Cheese Stuffed Chicken Breasts
Ingredients
- 4 boneless skinless chicken breasts
- 12 rectangle slices sharp cheddar cheese or cheese of choice 3 slices in each chicken breast
- 2 eggs beaten
- 2 tbsp Avocado oil
- 3 cups cheese crackers crushed* (1 1/2-2 4 oz boxes) I use Simple Mills for gluten-free
- Pepper and garlic powder for seasoning the chicken
Instructions
- Preheat your oven to 375°F. Place a chicken breast between two sheets of plastic wrap or parchment paper on a cutting board.
- Use a meat mallet or to gently pound the chicken breast until it’s about ¼ inch thick. Season the pounded chicken breast with garlic powder and pepper.
- Add 3 slices of cheese on the middle of each chicken breast. Starting from one end, roll up #chickethe chicken breast tightly, ensuring the cheese stays inside.
- Secure the rolled chicken breast with toothpicks. Repeat the process with the remaining chicken breasts.
- In a shallow dish, beat the eggs together. Place the crushed cheese crackers in another shallow dish.
- Dip each rolled chicken breast into the beaten eggs, coating both sides. Next, coat the chicken breasts with the crushed cheese crackers, pressing gently to adhere.
- Heat oil in a skillet over medium-high heat. Once the oil is hot, add the rolled coated chicken breasts and cook for 3-4 minutes on each side, until the crust is golden brown.
- Transfer the browned chicken breasts to a baking dish and place them in the preheated oven.
- Bake for 25-30 minutes, or until the chicken is cooked through to 165F and the cheese is melted. Remove from the oven and let it rest for a few minutes before serving!
Notes
Expert Tips
- I used Simple Mills Farmhouse Cheddar crackers to make it a little healthier, but my grandmother’s original recipe included Cheez-It crackers. Crush into crumbs for the coating.
- Because of the oil from the cheese, there will be extra liquid in the baking dish after cooking. Don’t worry! This is normal and adds a ton of flavor to the chicken.
- The tops of the chicken should be super crispy, but the bottoms will have a bit of moisture after cooking.
- If your chicken breasts are too thick, use a sharp knife to butterfly them down the center and then pound them with the meat mallet to make them even thinner.
- Use a meat thermometer inserted into the thickest part of the chicken. The internal temperature should be 165 degrees F when cooked.
Serving Tips
Serve with a side of green beans, a side salad, roasted corn, or one of your favorite side dishes.Storage Tips
Store any leftover cheese stuffed chicken breasts in an airtight container in the refrigerator for up to 4 days. Reheat in the oven, stovetop, or air fryer to crisp up the coating and warm the chicken.Nutrition
Nutrition information is automatically calculated, so should only be used as an approximation.