No Spread Gluten-Free Sugar Cookies (Easy Recipe!)
Published Dec 18, 2022 Updated Dec 13, 2024
This post may contain affiliate links. Please read our disclosure policy.
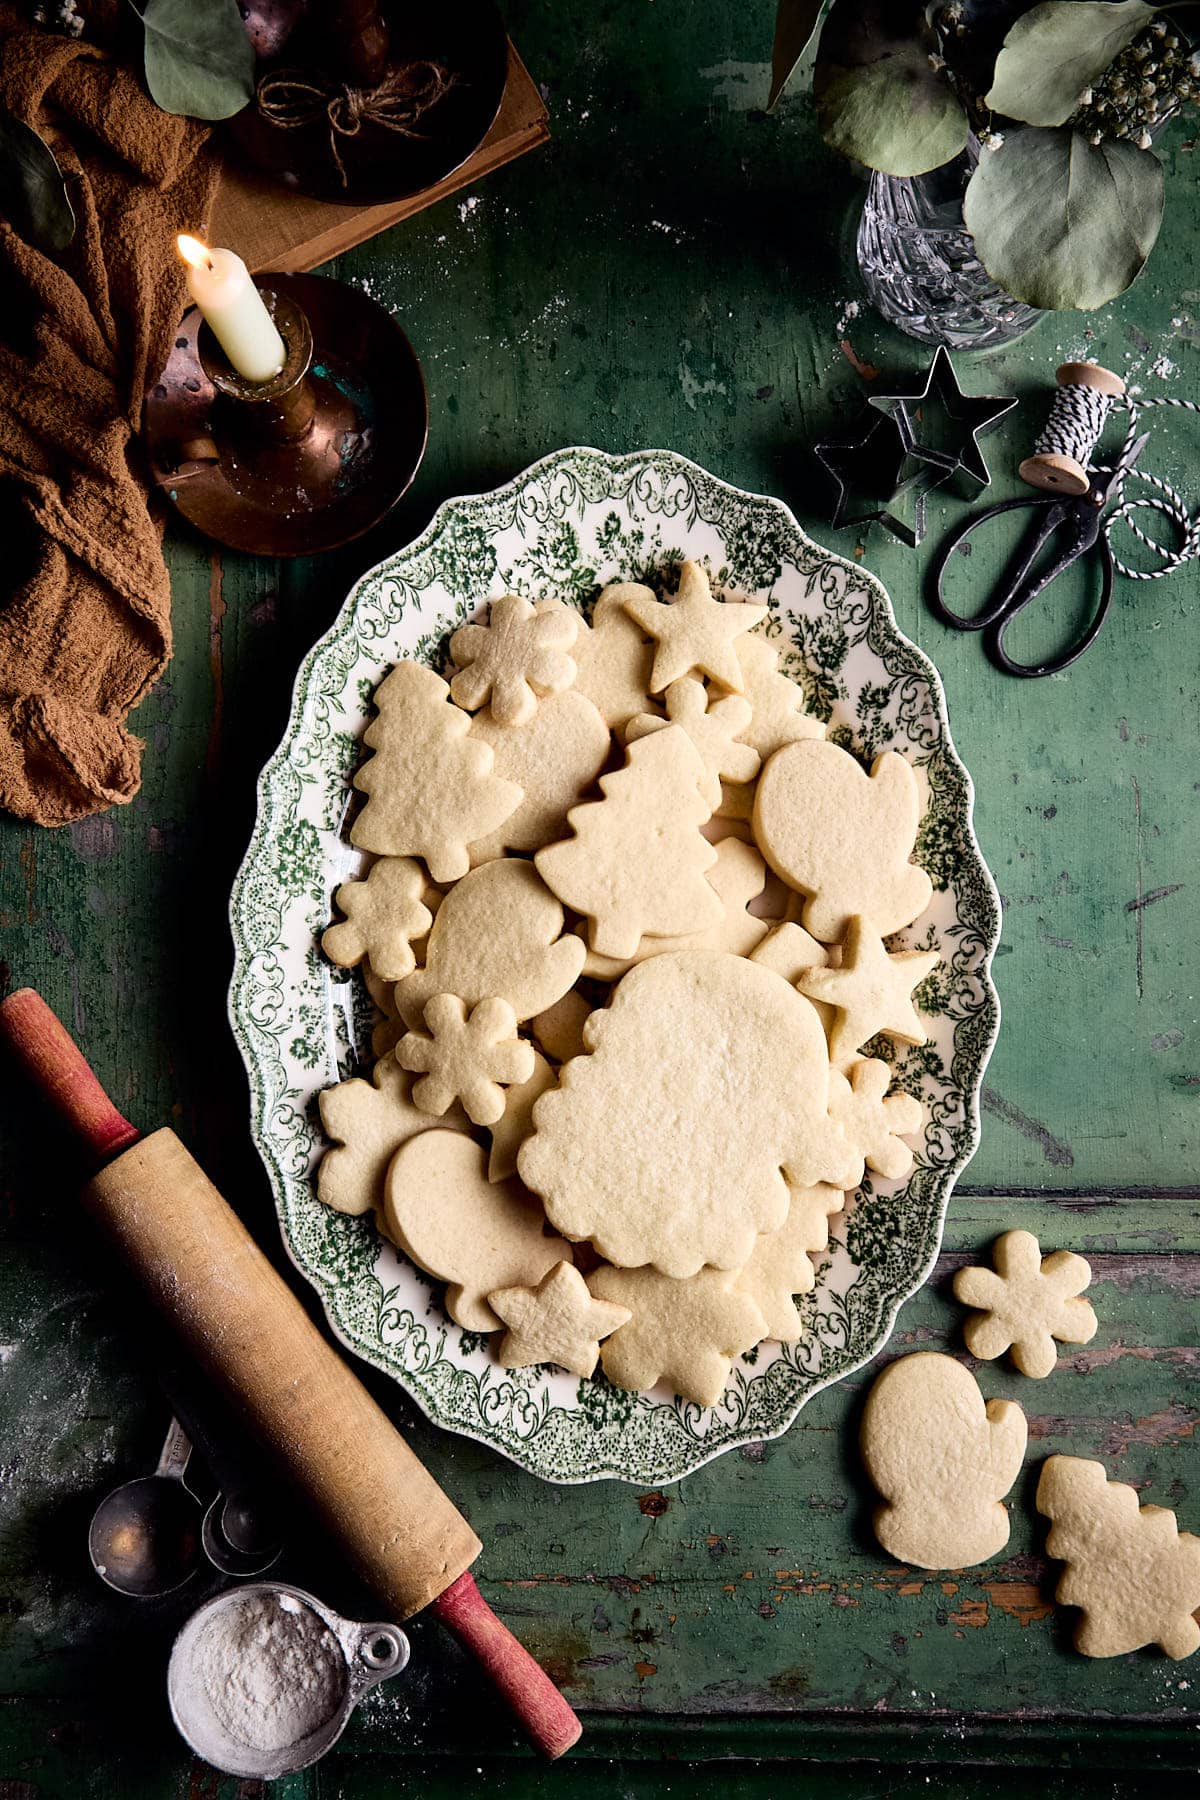
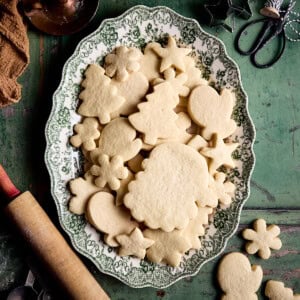
Introducing the BEST Gluten-Free Sugar Cookies! These no-spread cut-out cookies make the most delicious treat for any holiday season! Simple ingredients, easy steps, and perfect cookies every single time.
What Makes This Recipe Great
Regardless of the season, baking and decorating sugar cookies is an unforgettable pastime. That should be no different for families and friends who have a gluten allergy. My goal was to make the PERFECT Gluten-Free Sugar Cookies! I have labored over this recipe, testing, and re-testing to make sure it is just right!
Traditional sugar cookies use regular flour that contains gluten. For these gluten-free cookies, I use a gluten-free flour blend that contains xanthan gum to help them keep their shape and texture.
Decorate them to the nines with my famous royal icing, which is just so fun and creative and perfect for big kids, little kids, and adults, too! Now pick up your favorite cookie cutters and get your camera ready- it’s that time of the year for cookie making!
How to Make Gluten-Free Sugar Cookies
The best sugar cookies don’t actually have a ton of ingredients. In fact, while the ingredients matter a ton, it’s the process that really counts this time. These gluten-free sugar cookies are easy to make with a few pro tips to help you out!
I have thought of every last detail to help you re-create this recipe like a pro in your kitchen! I can’t wait to see your sugar cookies cut into cute holiday shapes! Make sure you tag me on Instagram or comment below so I can see your works of art!
My recipe for royal icing is in the printable recipe below, but for more tips & tricks and an awesome how-to video, click here for the full royal icing recipe!
Ingredients
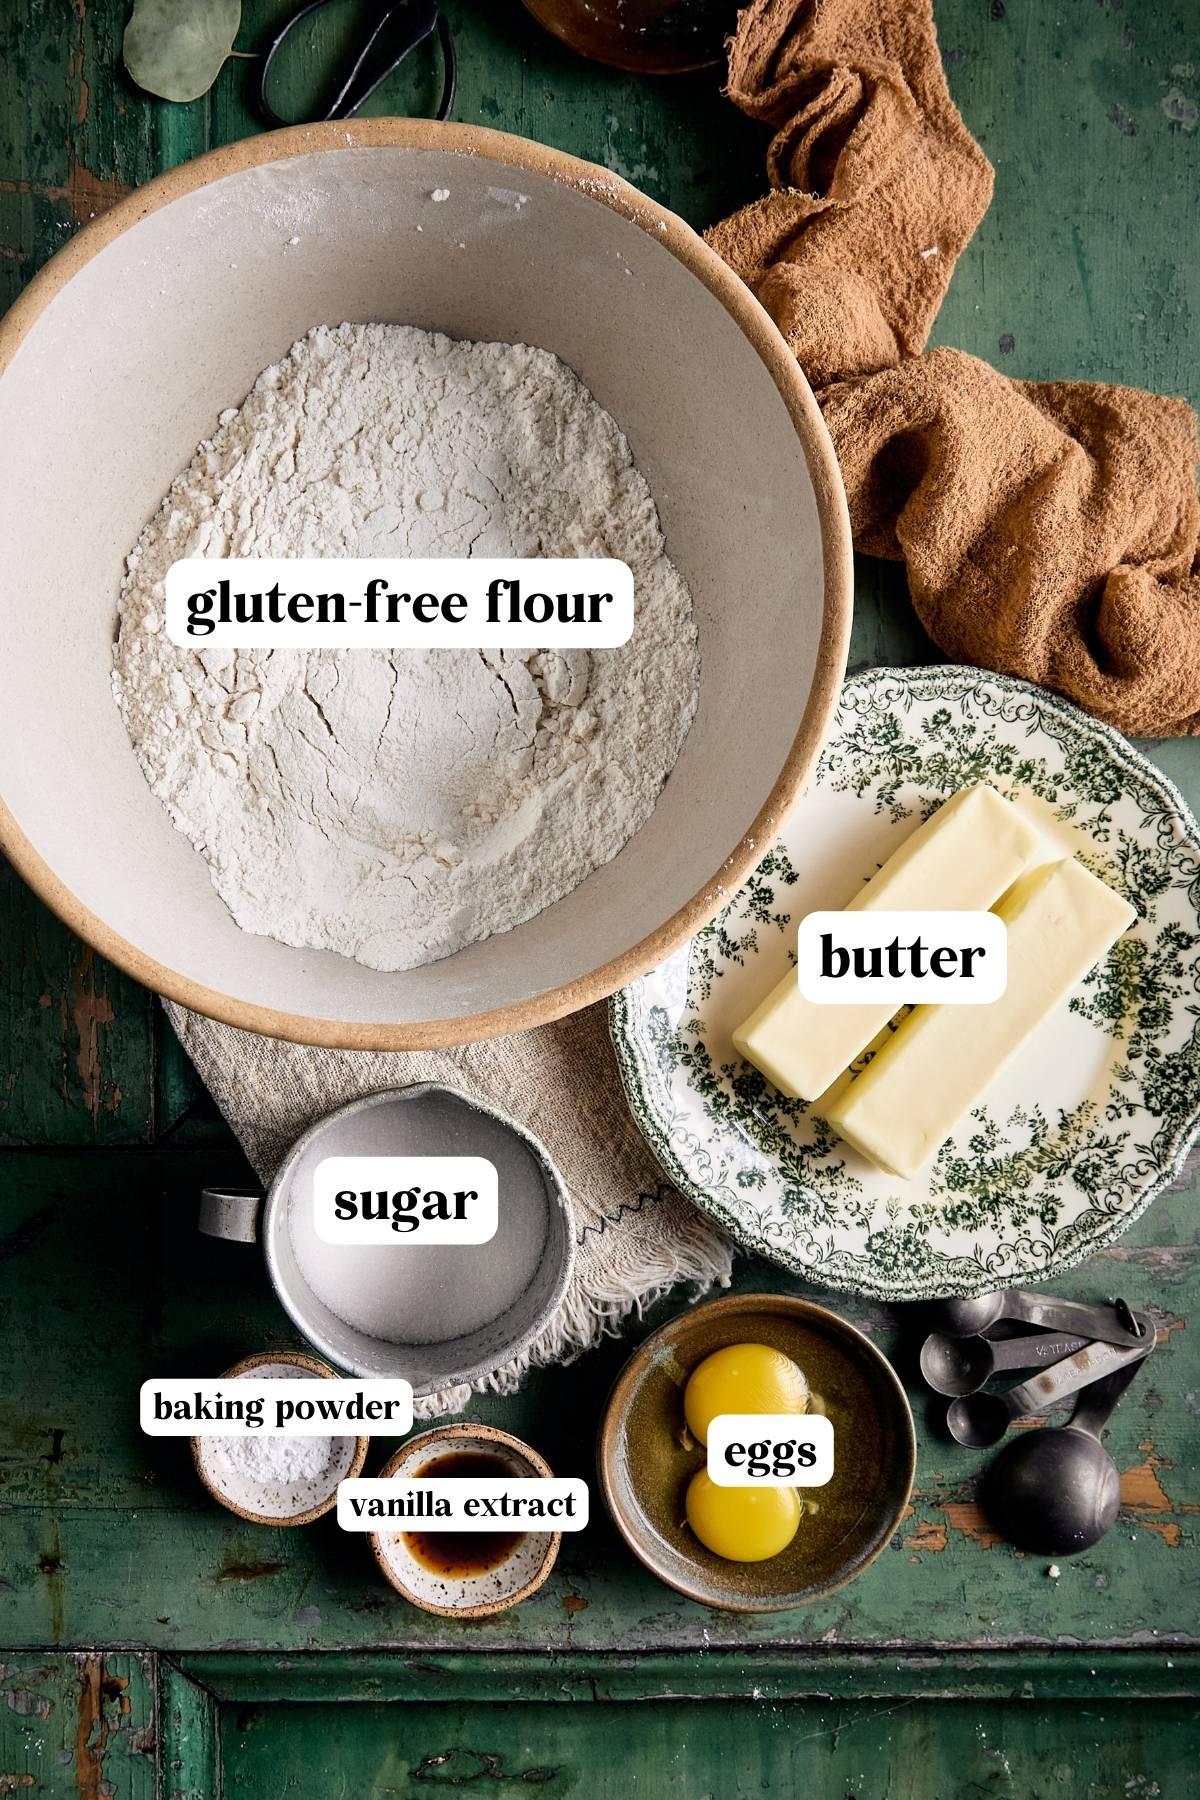
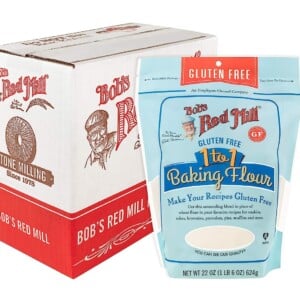
- Bob’s Red Mill Glute-Free 1:1 Baking Flour: Measure the flour exactly. I recommend using a scale. If you do use a measuring cup, be sure not to pack the flour into the measuring cup. Instead, spoon the flour into the cup for more accurate measuring. When you pack it in, you can get a ton of extra flour that will dry out the cookies.
- Salted Butter: Use real butter, as this recipe will not work with margarine. Make sure the butter is softened to room temperature. The butter should sit out at room temp for 45 minutes to an hour before you’re ready to use it. Give it the fingertip test by pressing down on the butter. If it leaves an indention, you are good to go. If the butter comes off onto your fingers, that means it’s too soft. Don’t soften your butter in the microwave, as this can ruin the dough. Make sure you are using salted butter, not unsalted butter!
- Egg: Let your egg come to room temperature before using it in the recipe. This will ensure that the ingredients combine easily in the dough.
- Vanilla Extract: Always use a high-quality vanilla extract. It makes a big difference in the final product and taste. I like buying Simply Organic Madagascar Pure Vanilla Extract that you can find at most grocery stores.
- Baking Powder: I don’t use a lot of this leavening agent because I don’t want my cookies to spread. I use about 1/4 teaspoon.
- Granulated Sugar: I use regular white sugar for this recipe, which I find yields the best results.
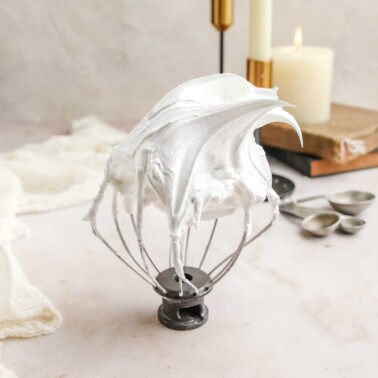
- Royal Icing: Icing your cookies is totally optional, but if you want to see the super helpful how-to video for this icing recipe to decorate your sugar cookies and so many other treats.
Step-by-Step Instructions
As always, more detailed instructions are in the printable recipe card below, but here’s a quick overview of the steps to make these sugar cookies!
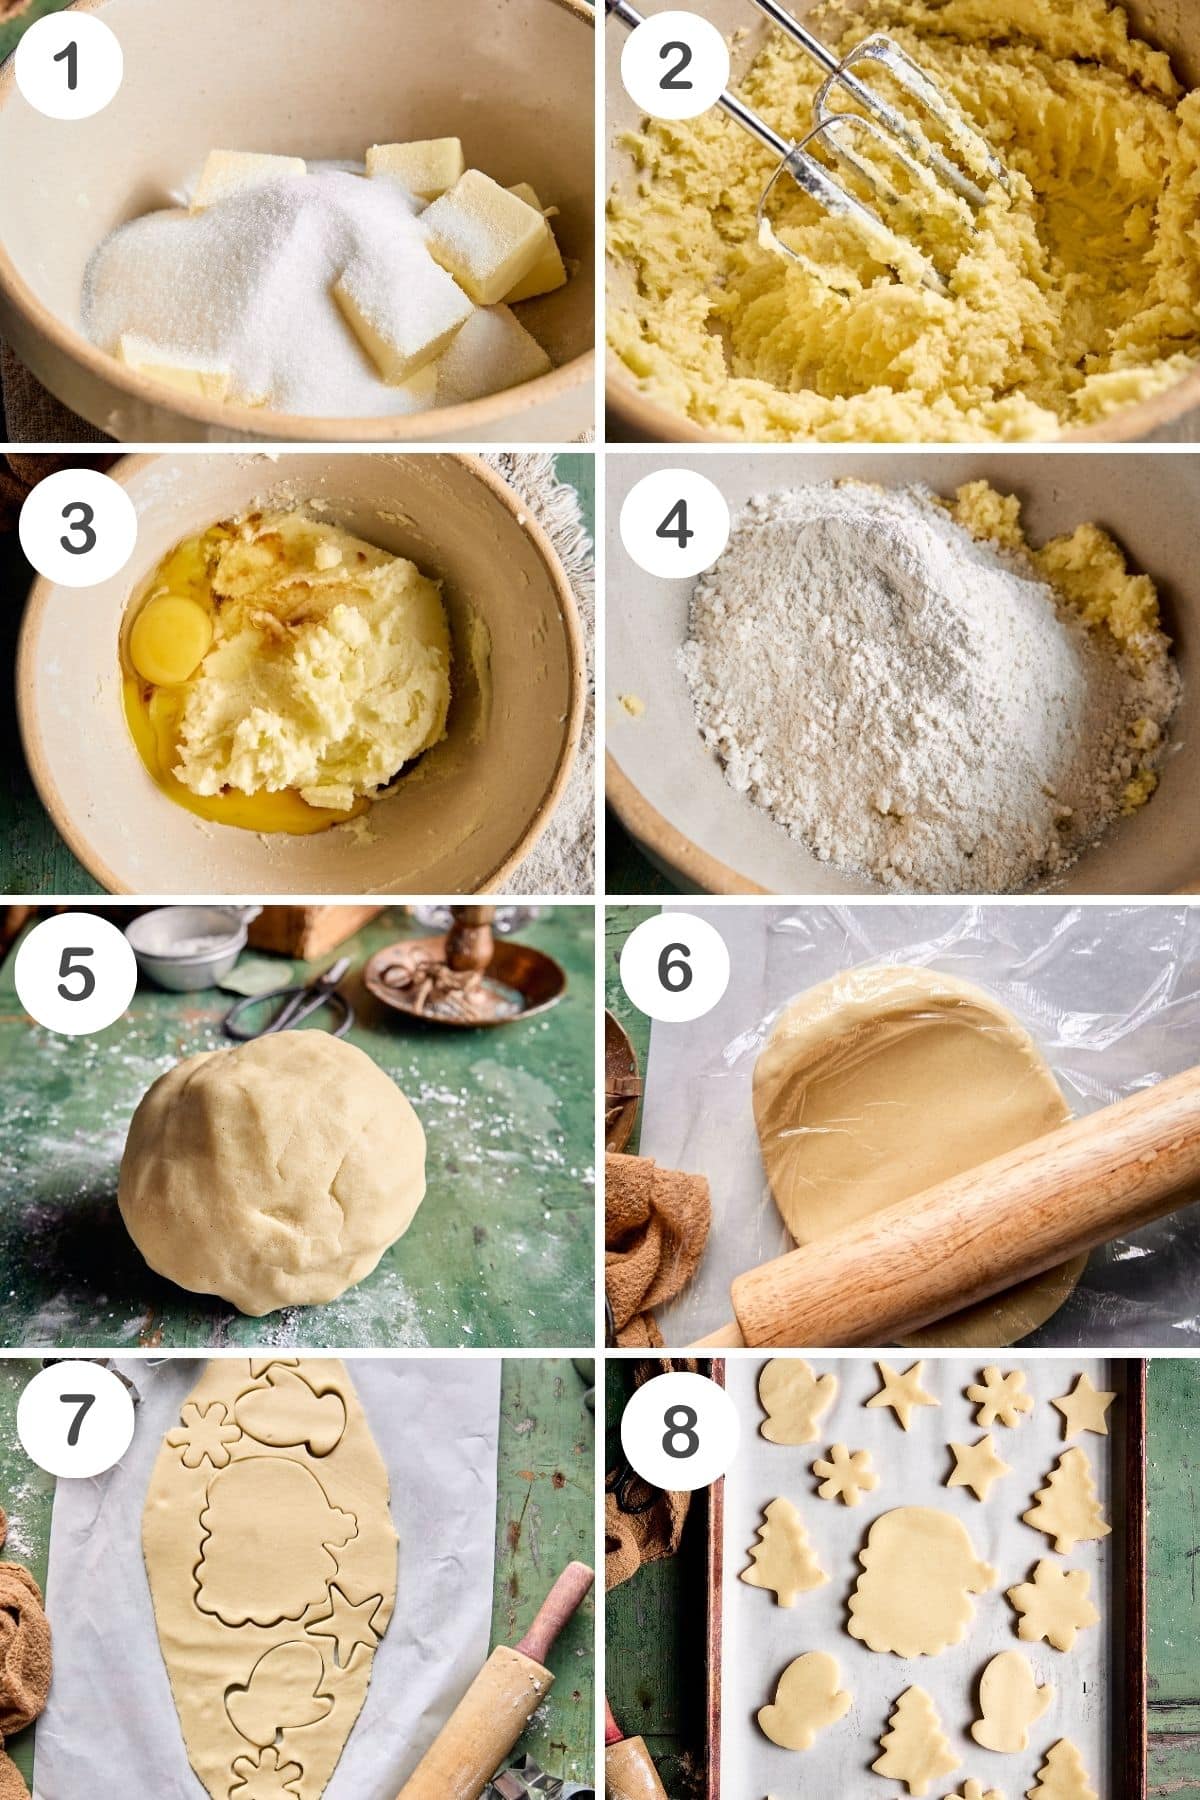
- Make the Dough | Remember, it’s super important to make sure your butter and egg are at room temperature for this step! Also, be careful not to overmeasure any flour, as this will dry out your cookies.
- Cream The Butter: Place the room temperature butter and sugar in a large bowl and beat with standing or handheld mixing until light pale yellow and fluffy, around 3 minutes (This is such an important step; however, make sure not to overbeat because it will warm the butter and make it too soft. It needs to still be cold but light and fluffy after beating together).
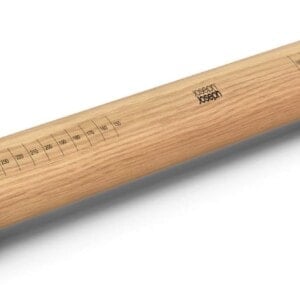
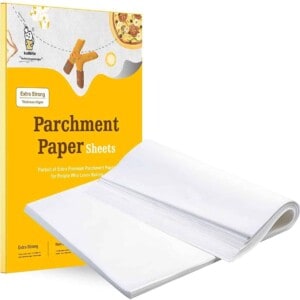
- Roll out your dough | Knead the dough together, and use a little extra flour here if it’s too sticky. Cut the dough in half and place each one on top of a large sheet of parchment paper. Additionally, place a piece of plastic wrap over the top and begin to roll out using a rolling pin. This method will help prevent it from sticking. Remember, the more the dough is rolled, the more it will warm and become soft. Feel free to throw it in the fridge if it’s too soft.
- Chill your dough | After you’ve rolled out your dough, chill it in the refrigerator for 30 minutes.
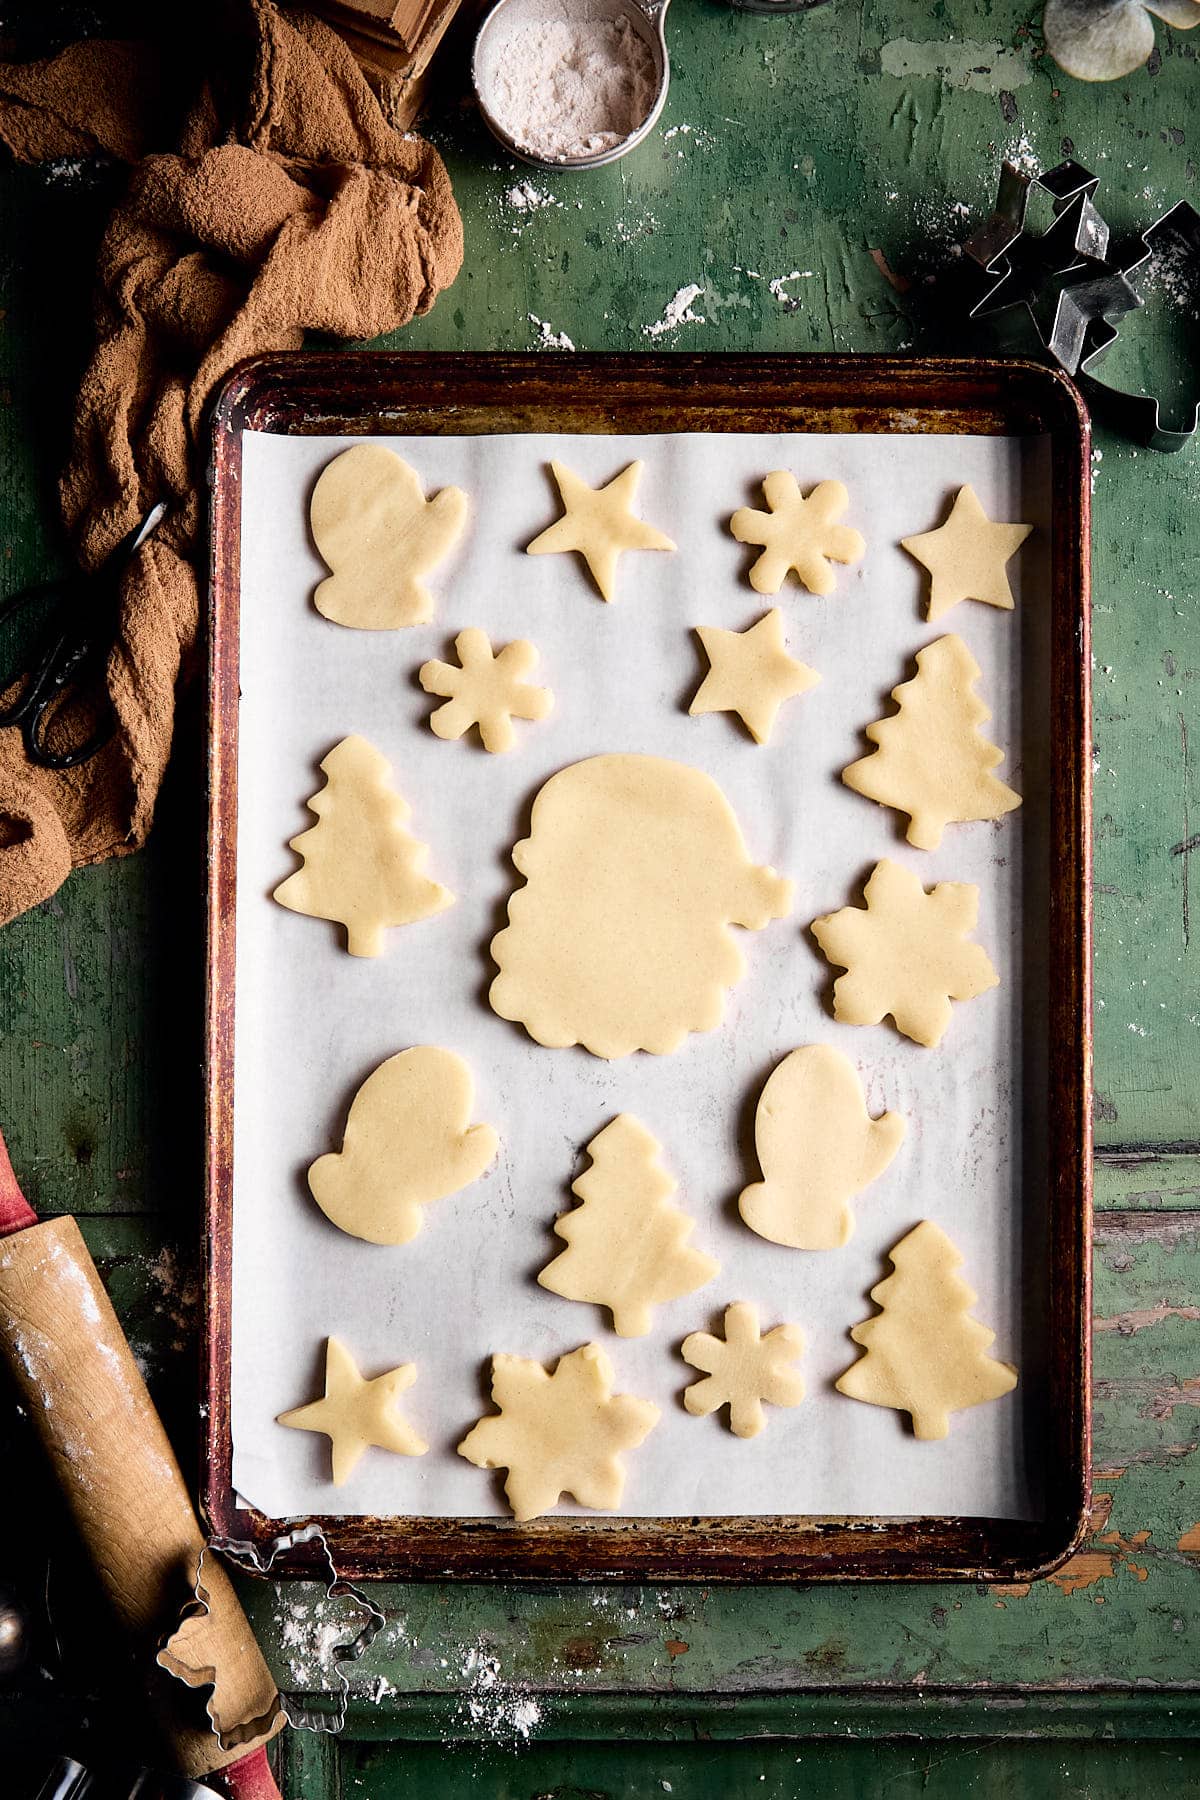
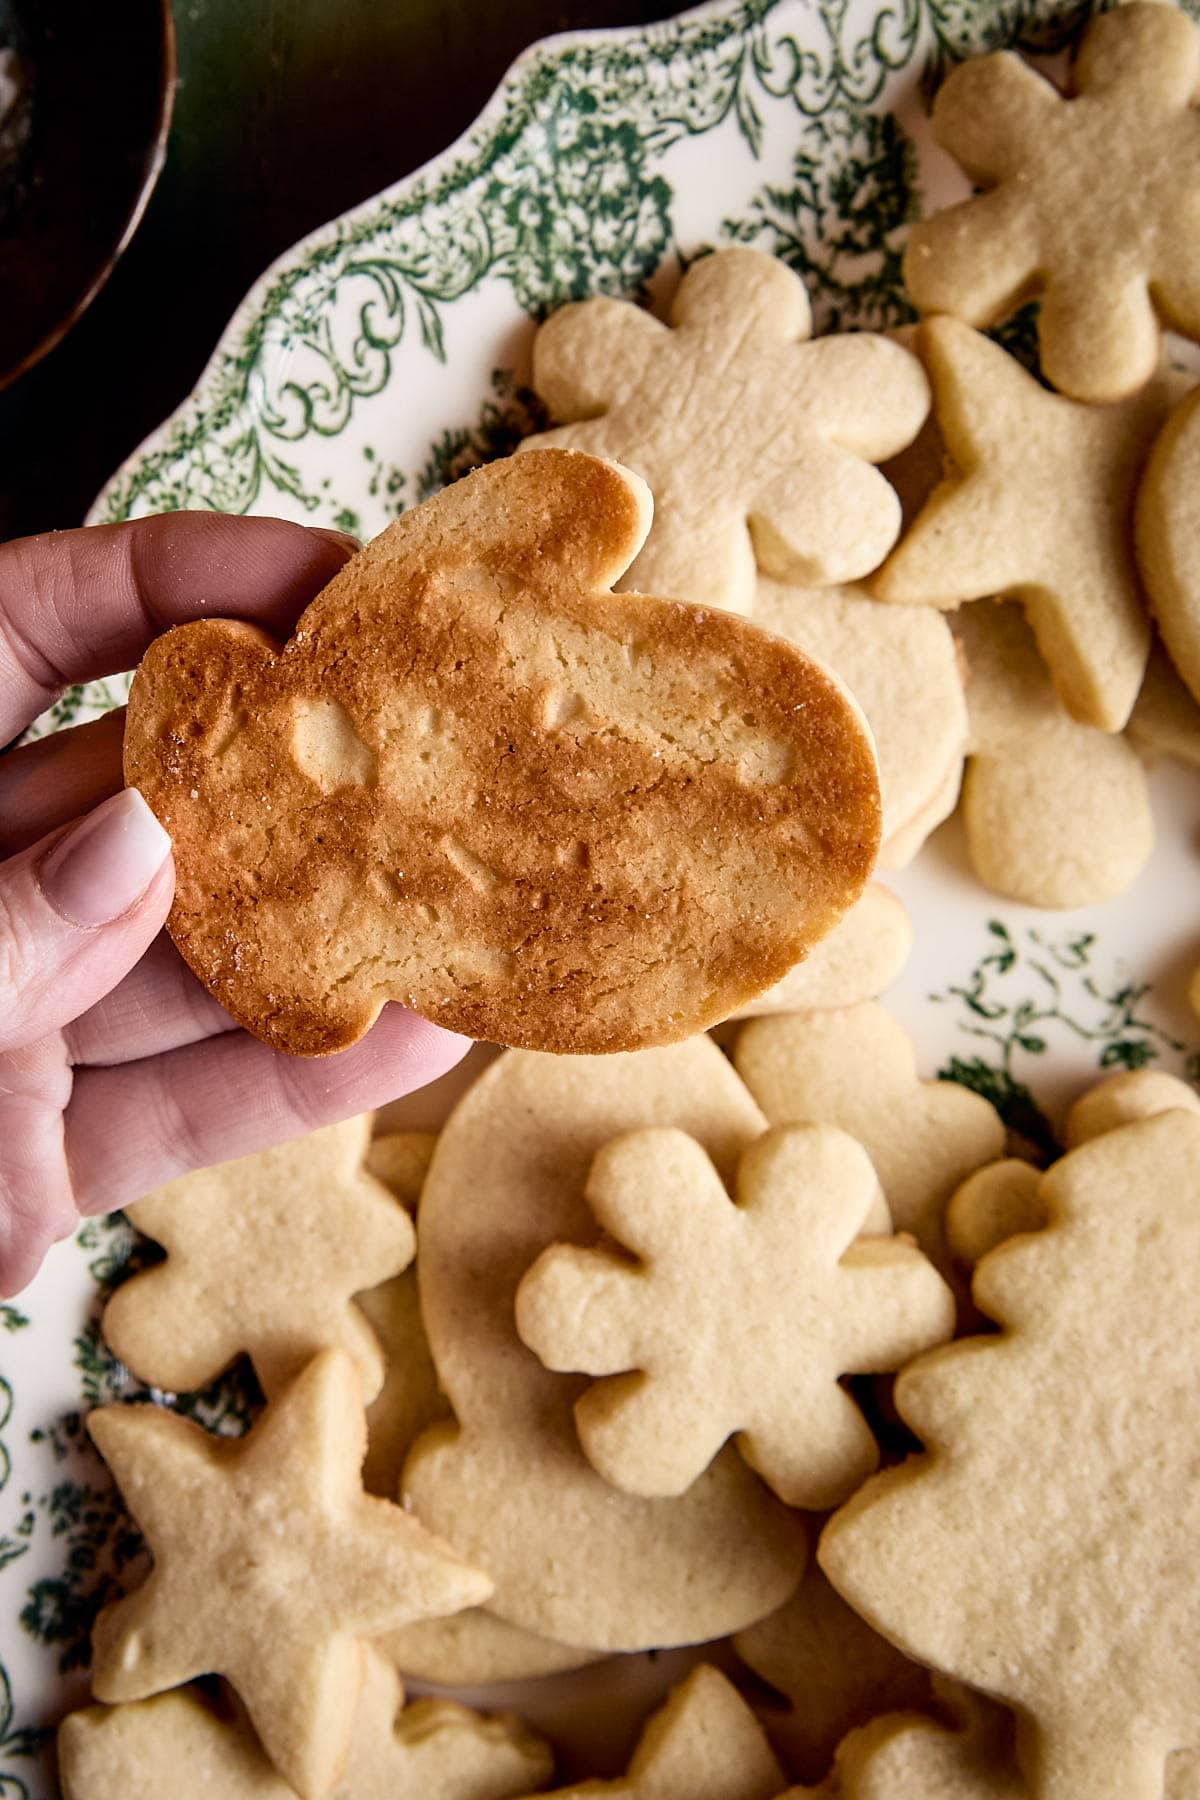
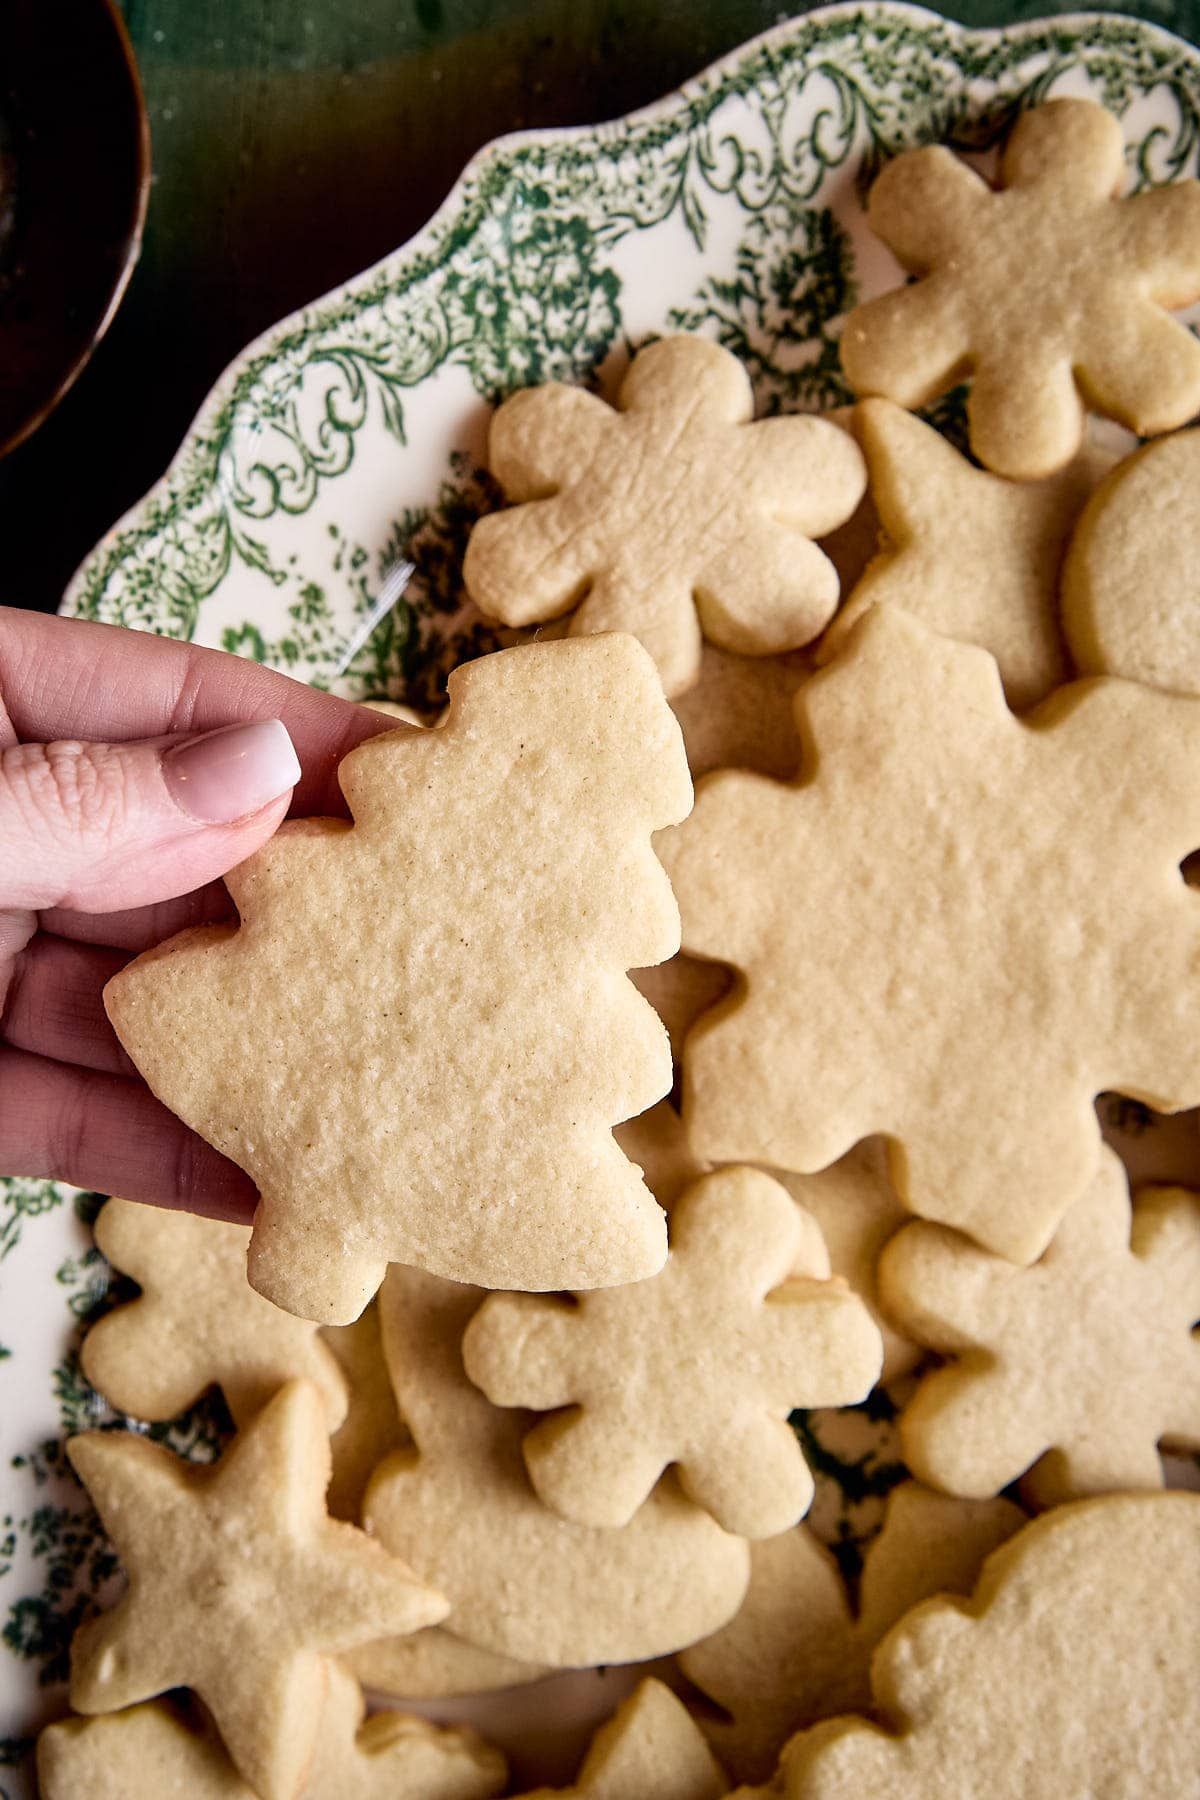
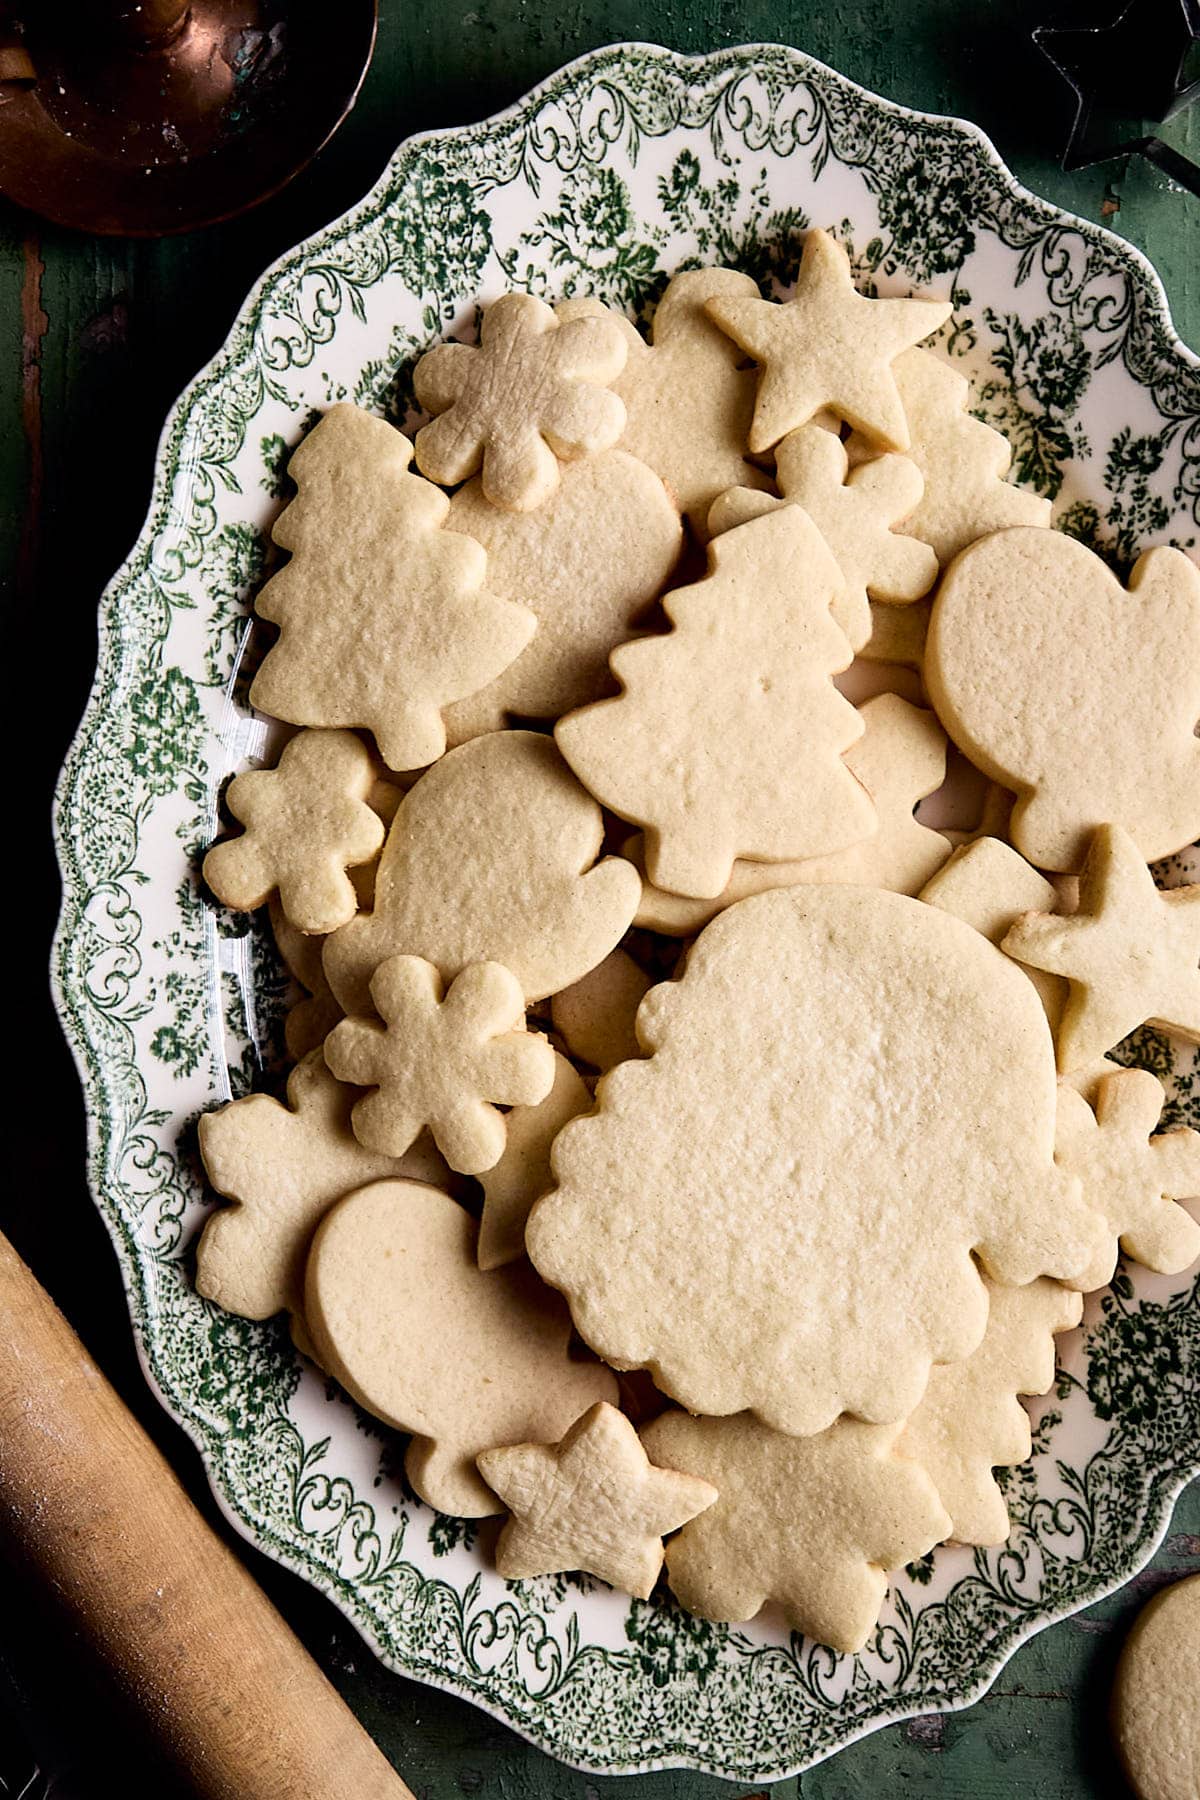
- Cut out shapes | Remove from the fridge or freezer and cut desired shapes using a cookie cutter of choice. These cut-out cookies are so fun!
- Bake your dough | Place all of your beautiful shapes about 1 inch apart on a prepared baking sheet lined with parchment paper and bake for 7-9 minutes! Let cool completely.
- Decorate | Get your family together and decorate your gluten-free sugar cookies with my Royal Icing recipe!

Mac’s Pro TipS
Expert Tips
Making the Dough
- Don’t overmix. As soon as it begins to clump together into a dough, it is ready.
- Don’t over-knead. This will make the cookies spread and not hold their shape. If you over-knead, you will melt the butter, and the dough will become too soft when baking.
- Use parchment paper and plastic wrap for rolling. This will help with sticking. Additionally, add a piece of plastic wrap over the top of the dough to ensure no sticking to the rolling pin.
- Re-roll the dough only once. As you roll, it will begin to warm up and become too soft to work with.
- Roll the dough evenly so you get the same-sized cookies throughout.
- Chill the dough for 30 minutes in the fridge or 15 minutes in the freezer before cutting. This step is super important for getting no-spread cookies.
- Preheat oven: Always make sure your oven is completely preheated before adding in the cookies. This will ensure an even bake.
- Gluten-Free Flour: This sugar cookie recipe has only been tested with Bob’s Red Mill Gluten Free 1:1 Baking Flour. The measurement and weight of other gluten-free flour may differ from Bob’s Red Mill. If you use another brand, it’s possible your flour-to-fat ratio will need slight tweaking. GF flour can weigh between 122g and 148 grams per cup, depending on the brand
- Say NO to cooking spray: Avoid adding cookie spray to your cookie sheet pans or hands. The excess grease can lead to the cookies spreading.
- Don’t substitute! This recipe has been tested and retested to make sure they are absolutely perfect. For best results, I don’t recommend substituting any dry ingredients or wet ingredients for this reason.
Shaping the Dough with Cookie Cutters
- Dip the cookie cutters into flour so they won’t stick and make a mess if you choose not to chill the dough before cutting.
Baking the Cookies
- Don’t Overbake. I always pull my cookies out of the oven at around 8-9 minutes. I watch the edges and take them out before they start turning golden brown because I like my cookies to be a little softer and cake-like.
Storage Tips
Store these gluten-free sugar cookies for up to two weeks in an airtight container on the kitchen counter or pantry. You can also freeze it in an airtight container for 6 months.
To freeze sugar, simply place parchment paper between each layer of the cookies in an airtight container or freezer-safe ziplock bag. Thaw on the counter on top of parchment paper until room temperature. You can freeze decorated or undecorated cookies with this method.
Recipe FAQs
This gluten-free sugar cookie recipe has only been tested with Bob’s Red Mill Gluten Free 1:1 Baking Flour. The measurement and weight of other gluten-free flour may differ from Bob’s Red Mill. If you use another brand, it’s possible your flour-to-fat ratio will need slight tweaking. GF flour can weigh between 122g and 148 grams per cup, depending on the brand.
Gluten-Free cookie dough will last up to 3-5 days in the fridge before cooking. You can wrap the dough in plastic wrap and freeze it for 5-6 months. Be sure to write the date on the wrap. You will know the cookie dough has gone bad by observing the edges. If they are darker than the interior, it’s gone bad. It may also have a bad smell.
Make sure to incorporate the butter at room temperature and have accurate measurements for the other ingredients. Also, cooking the cookies at a higher temp, such as 375F, will allow them to set quicker. Also, no opening the oven and peeking. When you open the oven door, it will lose heat and affect the shape of the cookies.
Most people say 1/4-3/8 of an inch. I like my cookies a little thicker, so I usually go with 1/2 inch or 3/4. I find that they have a cake-like consistency when thicker.
Yes, you can use almond extract, lemon extract, or any of the flavors you would like. I would suggest less is more in this case, as you don’t want the extract to overpower your batter!
If the cookie dough becomes sticky or crumbly when mixing, there is an easy fix. Simply add in a little cornstarch. Start slowly by adding a teaspoon at a time and then combining. You only want to add this in if the dough is a little sticky, not a hot mess sticky.
I recommend using powdered sugar on the surface when rolling dough. If you add a lot of flour, it will change the ratio of the dough, and the cookies will spread.
Yes! On top of a large sheet of parchment paper, add the dough. Additionally, place a piece of plastic wrap over the top of the dough and begin to roll it out using a rolling pin. This will ensure there is no sticking to the rolling pin.
This is such an important step, however, make sure not to overbeat because it will warm the butter and make it too soft. It needs to still be cold but light and fluffy after beating together. I beat them together for 3 minutes on medium speed until the mixture is light pale yellow and fluffy.
Want More Holiday Recipes?


If you love this recipe, please give it a star rating and leave a comment below! Follow me on Pinterest, Facebook, and Instagram for more!

Gluten-Free Sugar Cookies
Ingredients
- 2 1/3 cup gluten-free flour* 345.3 grams I used Bob’s Red Mill 1:1 GF Baking Flour
- 1 cup sugar 220 grams
- 1 teaspoon vanilla extract
- 2 sticks butter 1 cup or 226.8 grams
- 1 large egg + 1 egg yolk
- 1/4 teaspoon baking powder
Instructions
- Preheat + Measure Flour:Heat the oven to 375F. Mix the flour and baking powder in a big bowl. Don't press the flour when measuring. It's better to use a scale for accuracy. Wrong measurements can make cookies spread too much.
- Cream The Butter: Put the soft butter and sugar in a big bowl. Use a mixer (standing or handheld) to beat until it's light in color, about 3-4 minutes. This is such an important step, but be careful not to beat too much because it can make the butter too soft.
- Make The Dough:Add eggs and vanilla extract. Mix well. Turn the mixer to low and slowly add the flour mixture. Mix until it turns into dough.
- Roll The Dough:If it's sticky, use a bit of powdered sugar on the surface. Cut the dough in half. Put each half on parchment paper. Roll it out with a rolling pin. This prevents sticking. Remember, the more you roll, the warmer and softer the dough gets. To avoid this, you can sprinkle powdered sugar on the surface.
- Chill The Dough:Place the rolled dough in the fridge for 30 minutes. Chilling the dough is a MUST.
- Cut & Bake:Take the chilled dough out. Use cookie cutters to make desired shapes. Put the cut-out cookies on a baking sheet, leaving space. Bake for 7 to 9 minutes until the edges start turning brown. If you want softer cookies, take them out at 7 minutes.
- Enjoy:Let the cookies sit on the baking sheet for 1 minute after baking, then move them to a wire rack to cool completely. Serve as is or add icing if you like. Keep them in an airtight container for up to 1 week.
Notes
Expert Tips
Making the Dough
-
- Don’t overmix. As soon as it begins to clump together into a dough, it is ready.
-
- Don’t over-knead. This will make the cookies spread and not hold their shape. If you over-knead, you will melt the butter, and the dough will become too soft when baking.
-
- Use parchment paper and plastic wrap for rolling. This will help with sticking. Additionally, add a piece of plastic wrap over the top of the dough to ensure no sticking to the rolling pin.
-
- Re-roll the dough only once. As you roll, it will begin to warm up and become too soft to work with.
-
- Roll the dough evenly so you get the same-sized cookies throughout.
-
- Chill the dough for 30 minutes in the fridge or 15 minutes in the freezer before cutting. This step is super important for getting no-spread cookies.
-
- Preheat oven: Always make sure your oven is completely preheated before adding in the cookies. This will ensure an even bake.
-
- Gluten-Free Flour: This sugar cookie recipe has only been tested with Bob’s Red Mill Gluten Free 1:1 Baking Flour. The measurement and weight of other gluten-free flour may differ from Bob’s Red Mill. If you use another brand, it’s possible your flour-to-fat ratio will need slight tweaking. GF flour can weigh between 122g and 148 grams per cup, depending on the brand
-
- Say NO to cooking spray: Avoid adding cookie spray to your cookie sheet pans or hands. The excess grease can lead to the cookies spreading.
-
- Don’t substitute! This recipe has been tested and retested to make sure they are absolutely perfect. For best results, I don’t recommend substituting any dry ingredients or wet ingredients for this reason.
Shaping the Dough with Cookie Cutters
-
- Dip the cookie cutters into flour so they won’t stick and make a mess if you choose not to chill the dough before cutting.
Baking the Cookies
-
- Don’t Overbake. I always pull my cookies out of the oven at around 8-9 minutes. I watch the edges and take them out before they start turning golden brown because I like my cookies to be a little softer and cake-like.
Storage Tips
Store these gluten-free sugar cookies for up to two weeks in an airtight container on the kitchen counter or pantry. You can also freeze it in an airtight container for 6 months. To freeze sugar, simply place parchment paper between each layer of the cookies in an airtight container or freezer-safe ziplock bag. Thaw on the counter on top of parchment paper until room temperature. You can freeze decorated or undecorated cookies with this method. *See Recipe FAQs in the post for additional troubleshooting!Equipment


Nutrition
Nutrition information is automatically calculated, so should only be used as an approximation.


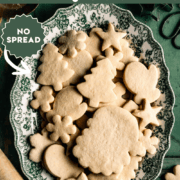
After 6 rounds of tweaking and testing, this is hands down the BEST gluten-free sugar cookies.
Thank you Ashley for the hard work you’ve put in to make this recipe perfect, can’t wait to try it. I’ll will be making a batch for my kids and hopefully one for my husband. My husband is diabetic and thinking of trying it with Lakanto monk fruit sugar, do you think it will work?
Thanks
Would this recipe work with AP flour? Would the cookies still hold their shape so well?
I would not use AP flour with this recipe. The weight of gluten free and AP flour weigh different so the ratios will be off. However, I have a regular sugar cookie recipe using AP flour here
https://healthylittlepeach.com/the-best-sugar-cookies-with-royal-icing/
These are sooooo good! My daughter and I made these today. Hands down the BEST GF sugar cookie and perfect for cutouts! They baked up soft and buttery and maintained their shape. A feat I have not been able to accomplish with GF dough before! Thank you for your hard work in creating this recipe! These tasted like the cookies from my childhood memories! Something I have missed since having to be gluten free. I did not have Bobs Red Mill flour so I used King Arthur measure for measure and it was great!
This is so great to hear. Thank you for the feedback. So glad they were a hit.
I made a double batch today and they are amazing. I used dairy free butter because I can’t have dairy. I was lazy so I rolled out the cookies and cut them before letting them set in the fridge. The shapes were not perfect but still pretty great! Will def be making these every year.
So happy to heat Abbey! I am glad they were a hit. The shapes would have been perfect if the dough was refrigerated for a little bit before cutting. But when I am in a hurry, I totally get it. Have a Merry Christmas.
OMG these are seriously great cookies. My family doesn’t even know they’re gluten free. My husband & son both commented how good they were. I’ll never tell 🙂
They also look beautiful. Kept their shape, and royal icing is delicious!
MAKE THEM NOW
I have a tried and true recipe, but wanted to try a new one. I weighed everything out and the dough was still extremely sticky. Any advice on why?
It seems that the flour was off. If you followed the measurements and weight in the recipe card it shouldn’t be sticky at all. You can add a tablespoon or two of flour to help the dough come together and balance it.
Thank you for working so hard to make these PERFECT! 💗
Thank you so much!!
Can’t wait to make these for my nephew who was newly diagnosed with celiac. Do you use salted or unsalted butter?
Oh my word these didn’t work at all 😥😫 I followed all the directions and even extra chill time and we have a big pile of exploded cookies over here! I’m sorry to leave a negative review, I just feel people should know it doesn’t always work
It sounds like the dough got too warm or the flour wasn’t measured correctly. If you rolled the doll multiple times before cutting, the cookies will spread because the dough gets too warm. I am sorry that they didn’t turn out, even with all the tips I provided. I still 100% stand behind this recipe as it has been tested and tested. There are so many important steps, if even one was missed that can result in cookies that spread. Merry Christmas