Philly Cheesesteak Stuffed Peppers Recipe
Published Mar 11, 2019 Updated Apr 01, 2024
This post may contain affiliate links. Please read our disclosure policy.
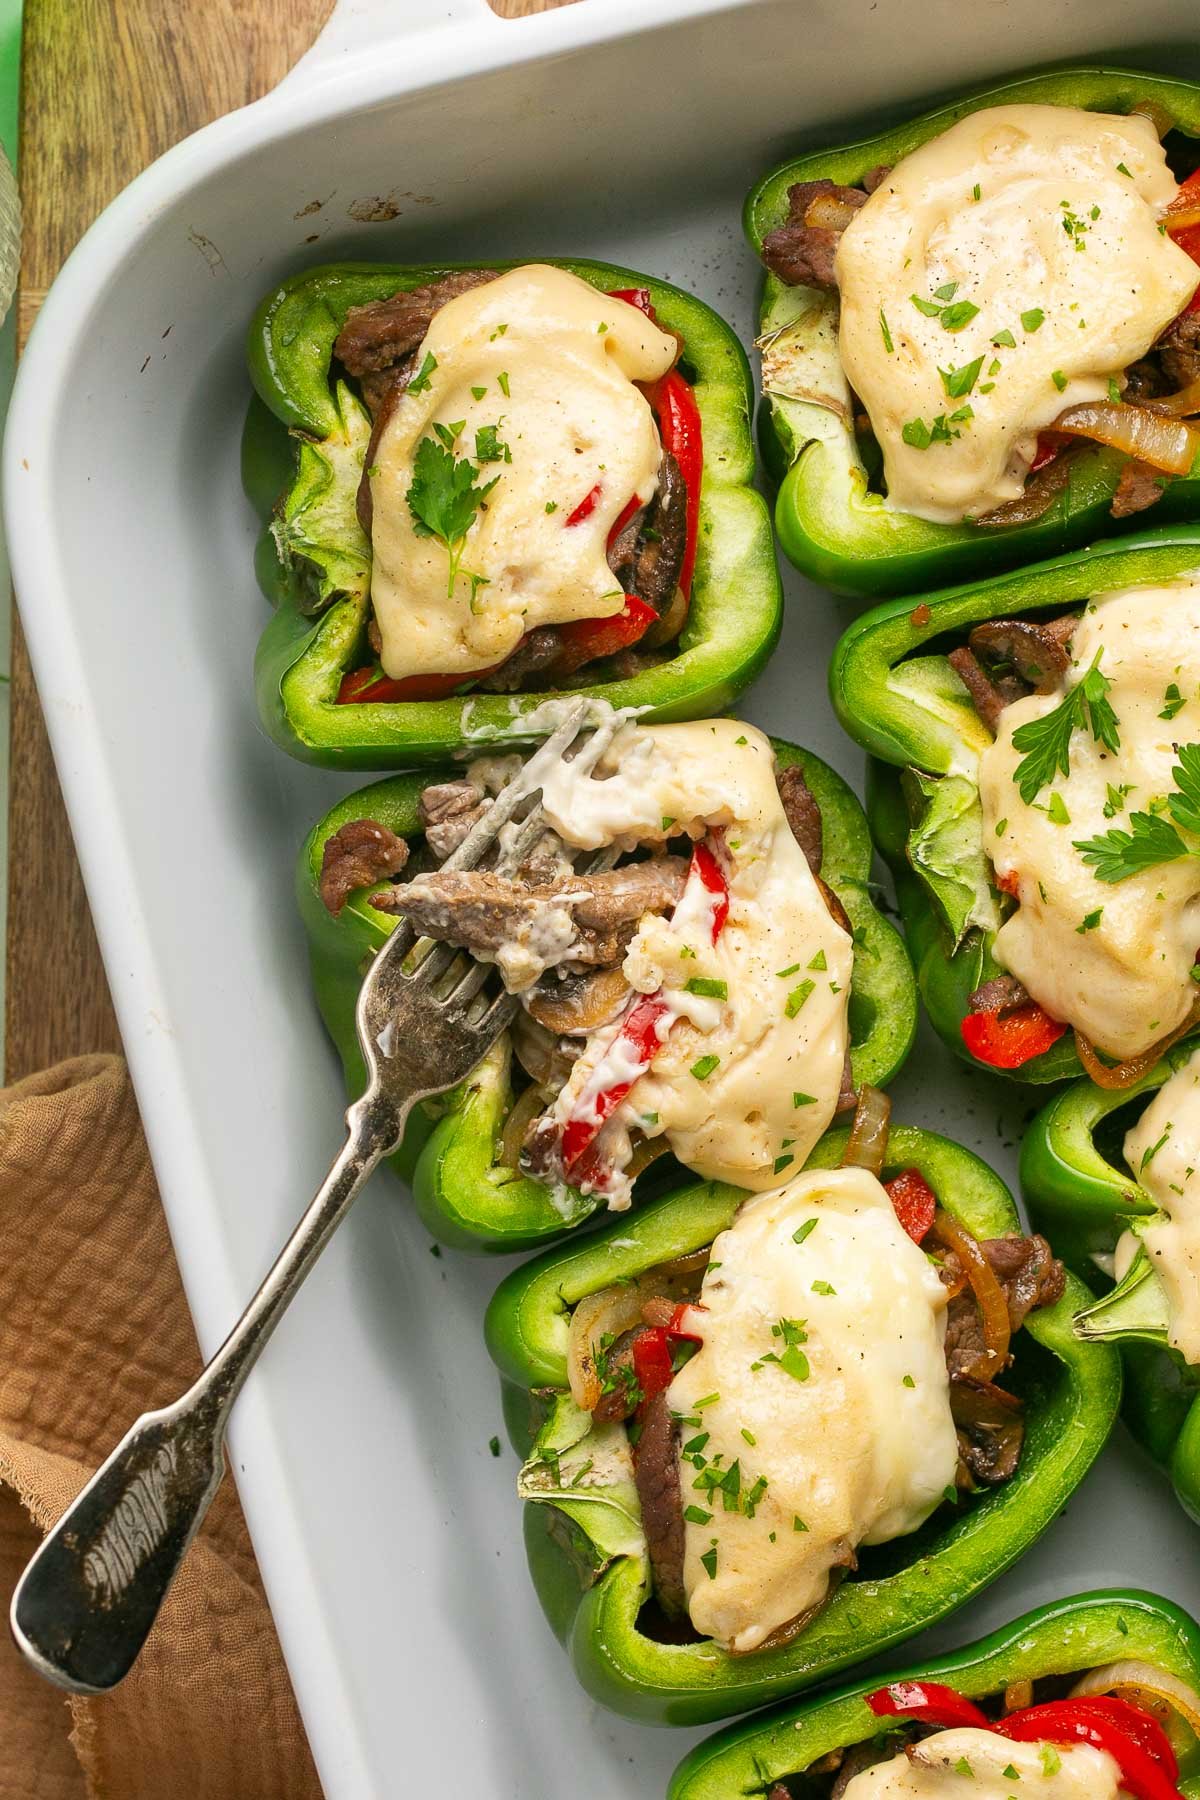
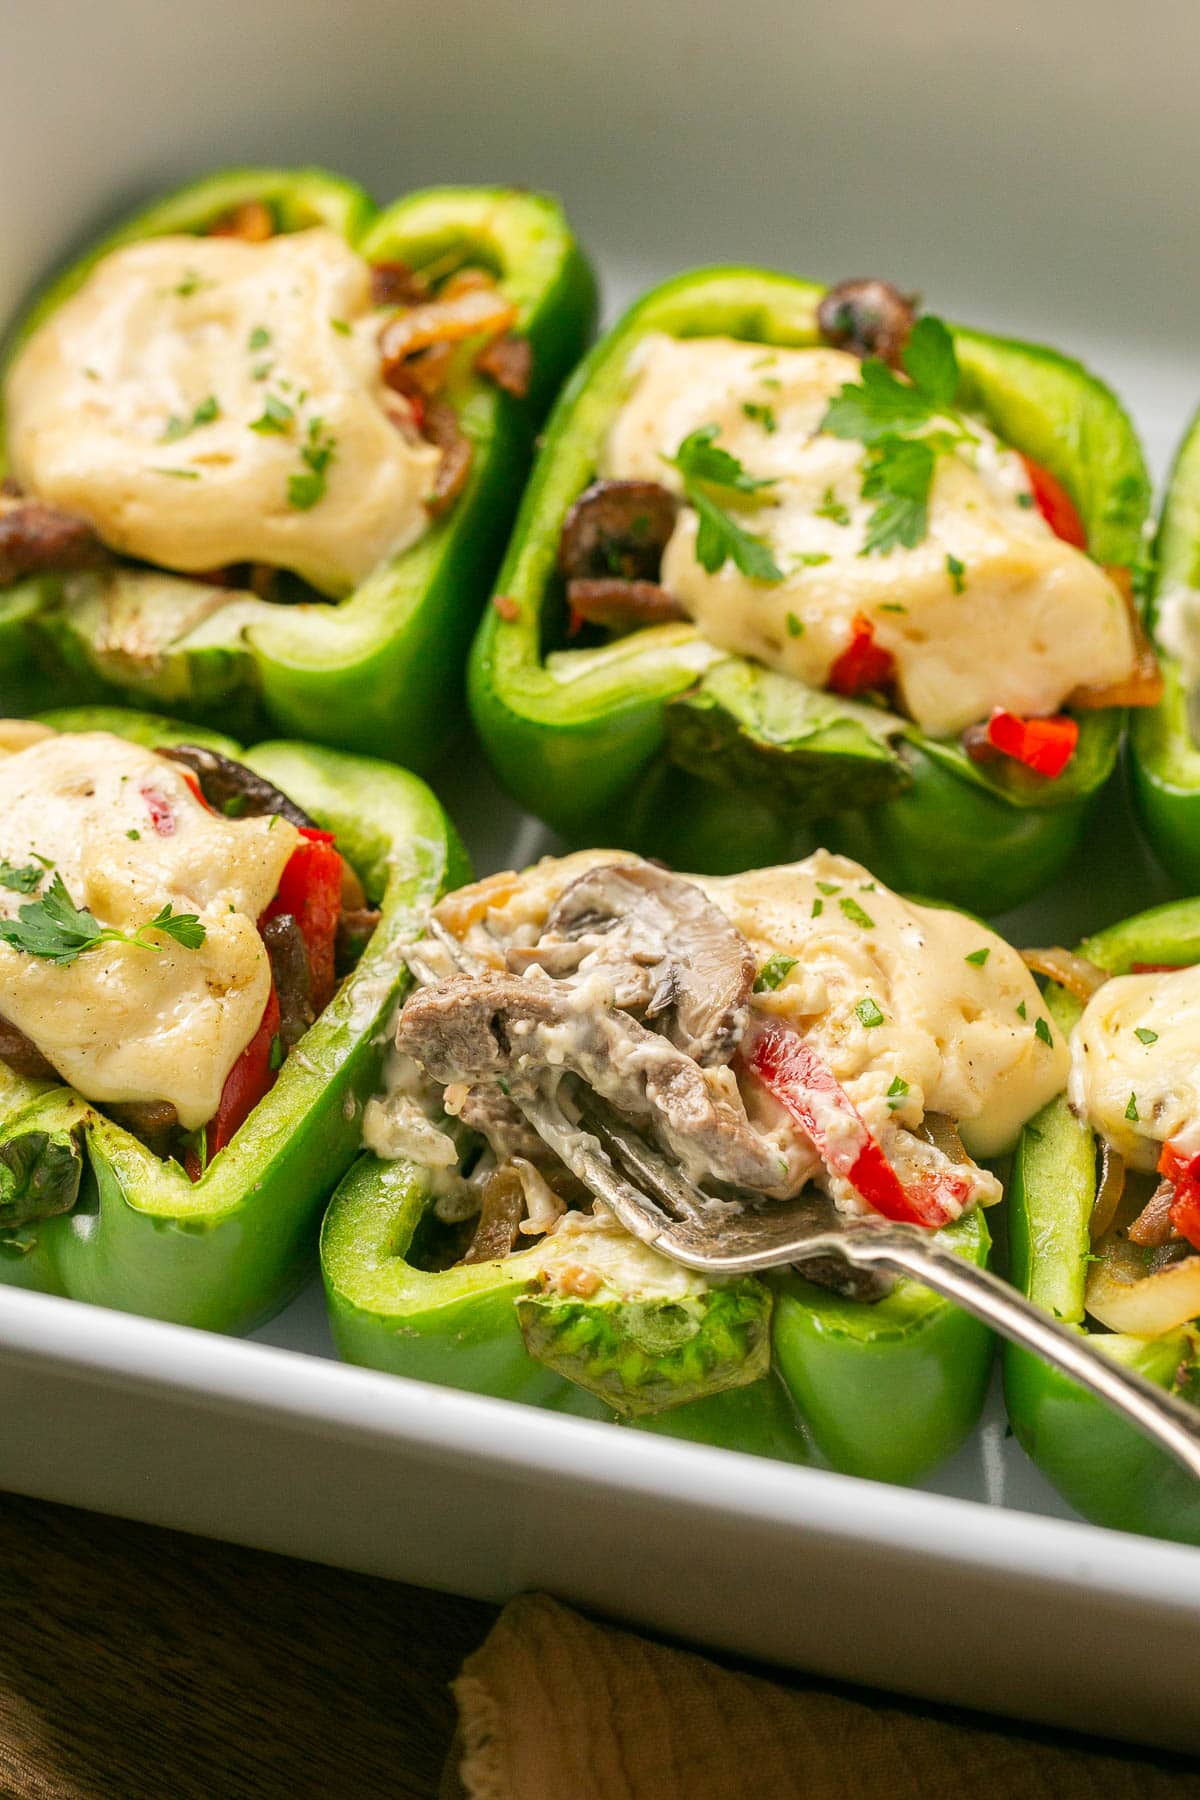
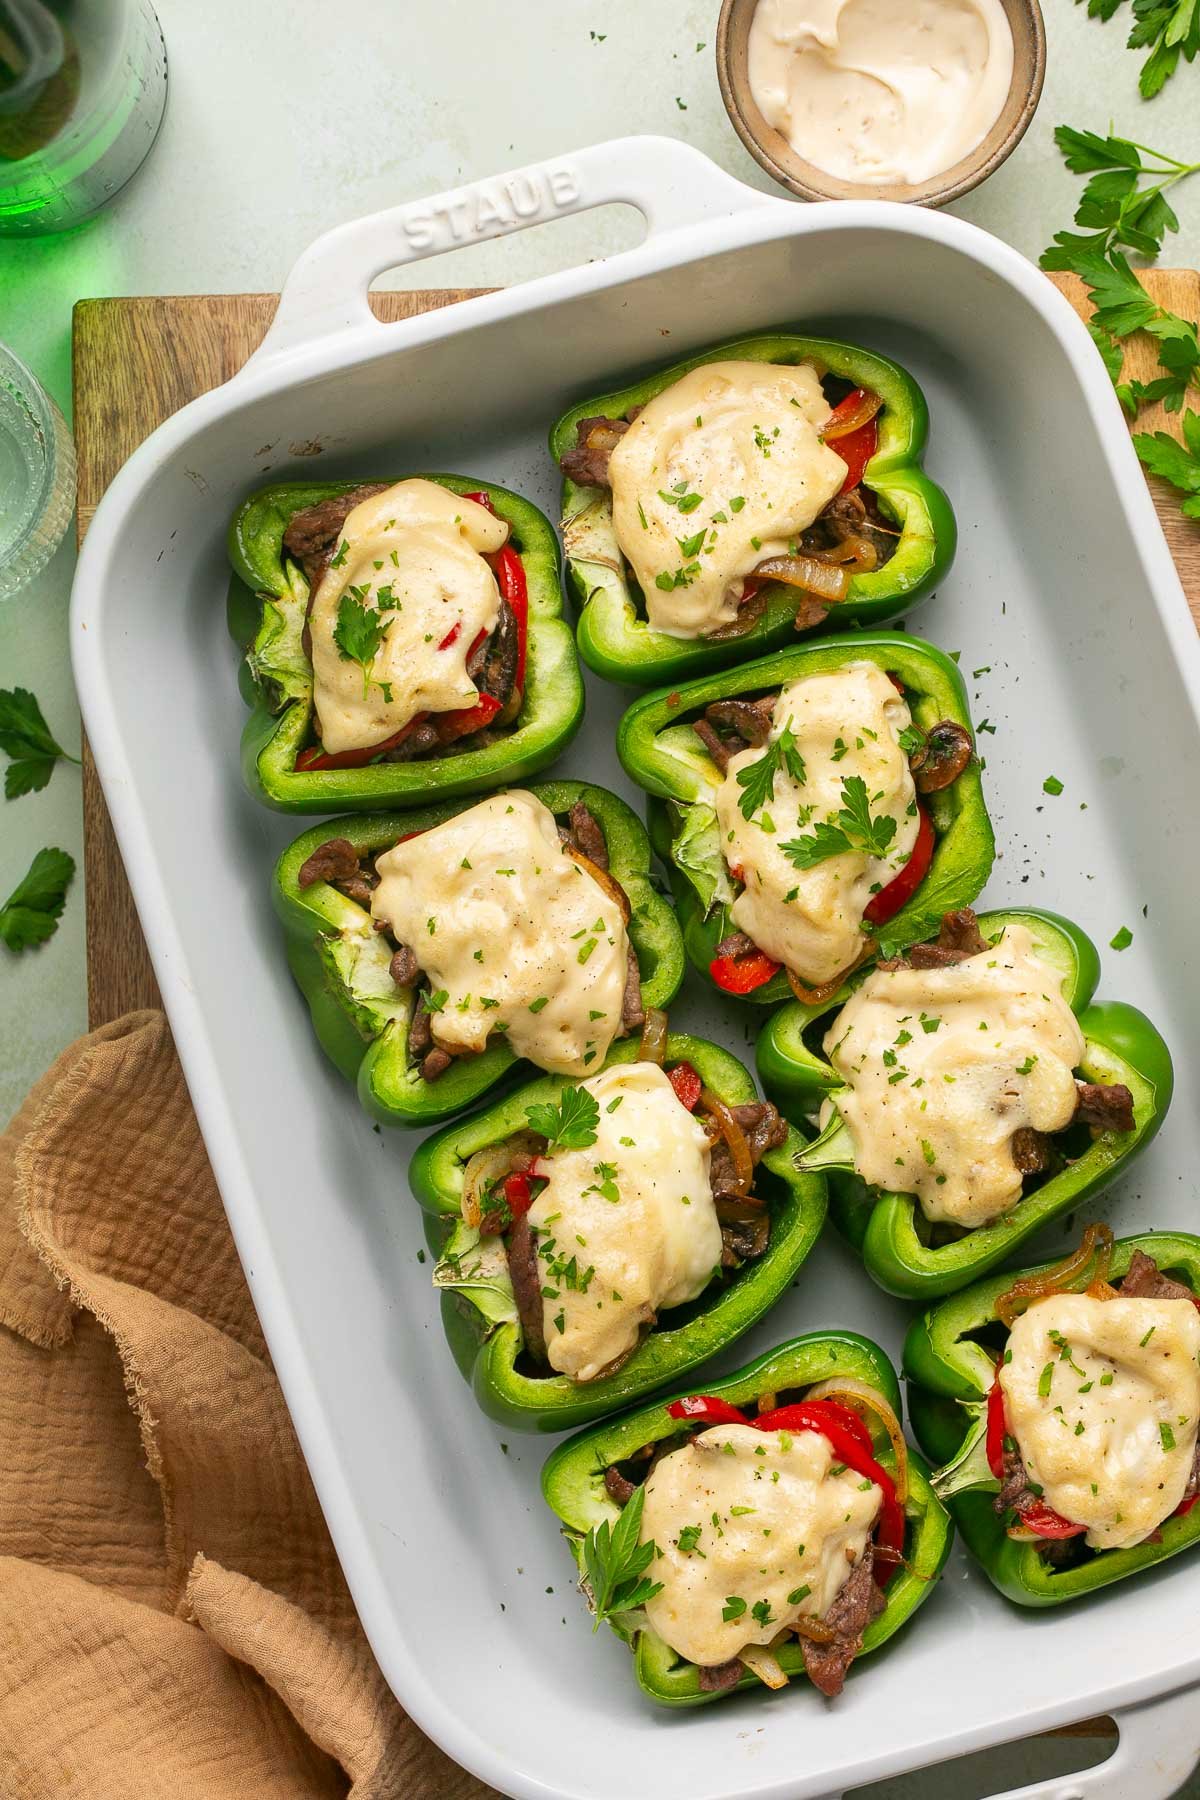
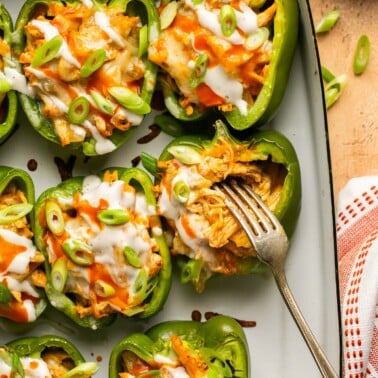
These Philly Cheesesteak Stuffed Peppers feature tender green peppers stuffed with thinly sliced steak, mushrooms, peppers, red onions and topped with a creamy sauce. An easy, low carb weeknight dinner that the whole family will love. This includes both a dairy and dairy-free recipe.
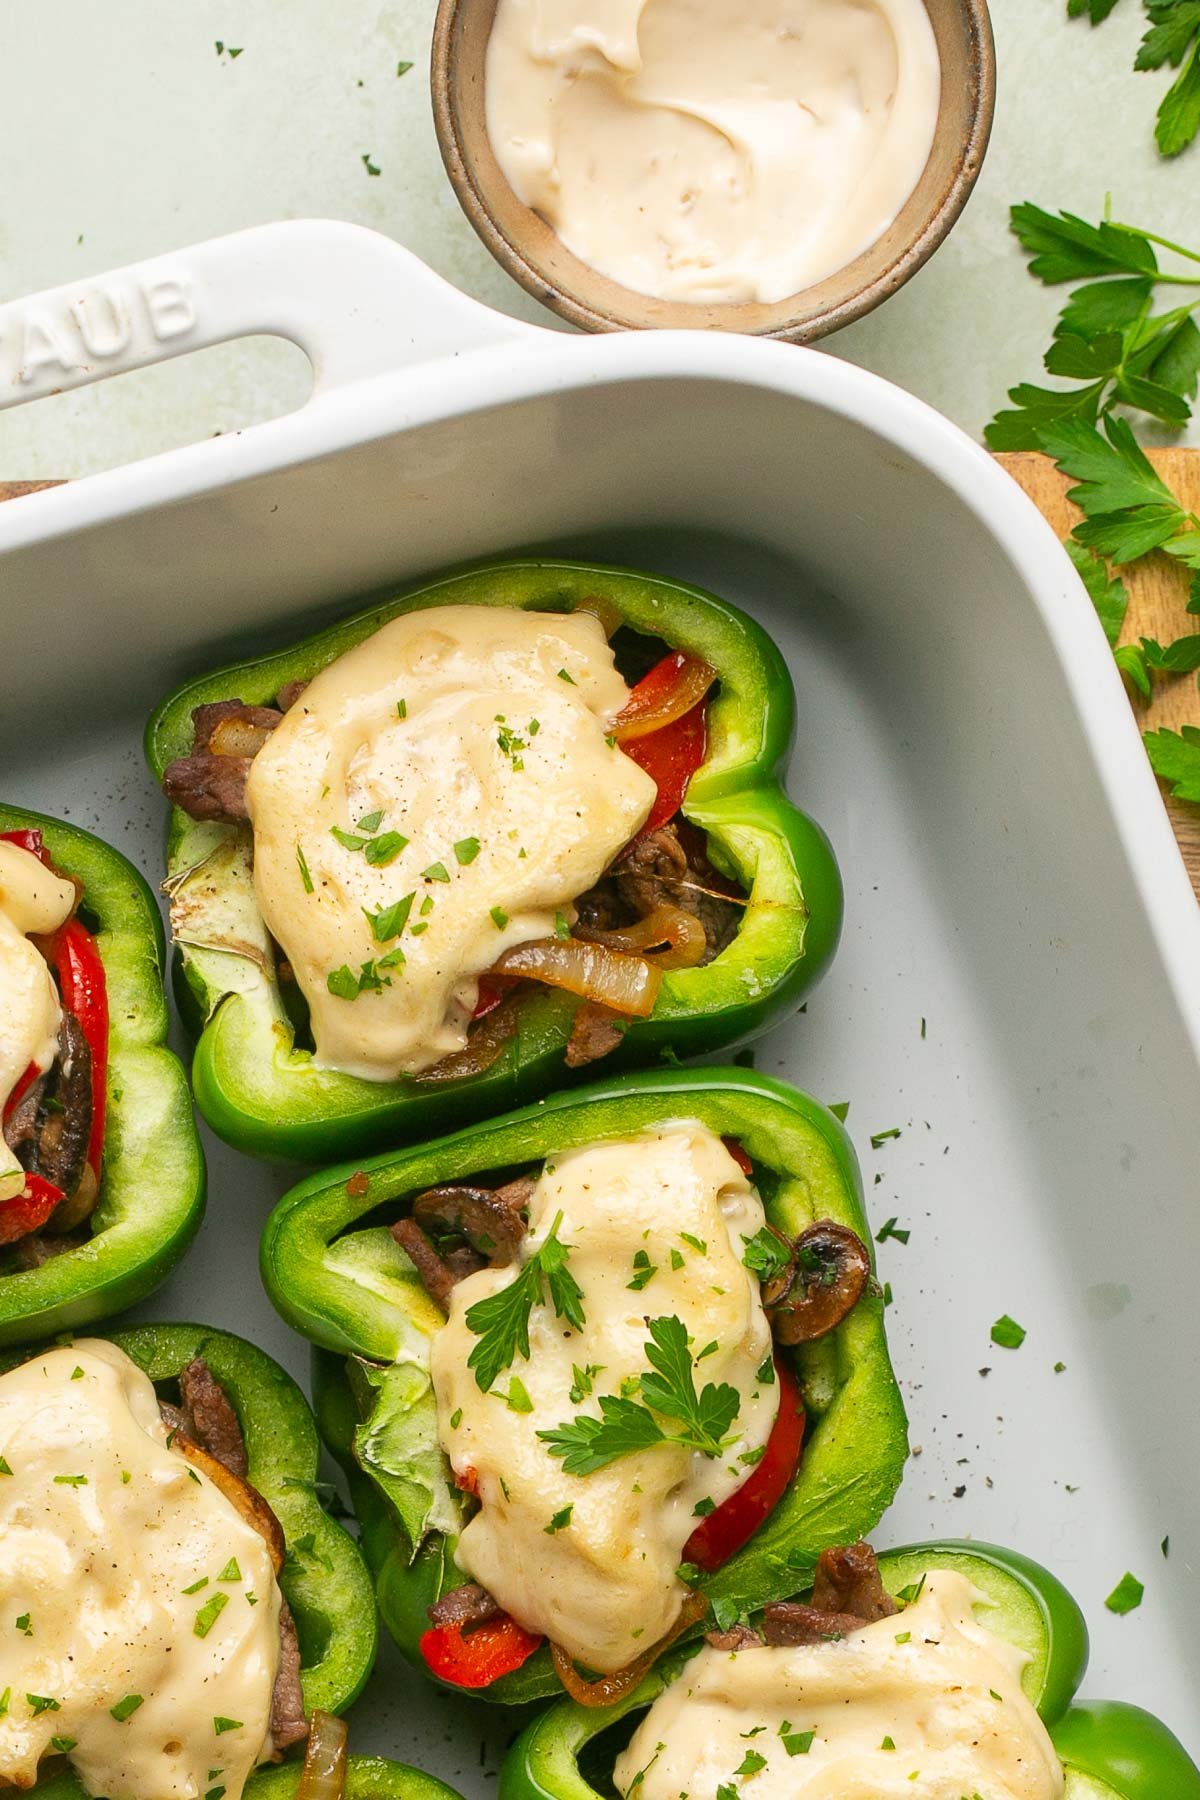
Table of Contents
What Makes This Recipe Great
By now you guys know that I love reinventing comfort food in a healthy and satisfying way. These Philly Cheesesteak Stuffed Peppers are a game changer. They are packed with protein, low in carbohydrates, and absolutely delicious! If you are in the mood to change things up and bring a little life back to your healthy meal planning, you have got to add these to your menu.
What I love about these peppers is that they’re easy to make and customize to your diet and lifestyle. I smother my stuffed peppers with my homemade Mac’s Awesome Sauce. It gives these peppers a “cheesy” and creamy texture without actual dairy. However, you can always substitute your favorite white cheese. If you want some extra veggies, add some cauliflower rice to the bottom of the peppers. And if you’re pressed for time, use deli roast beef instead of steak!
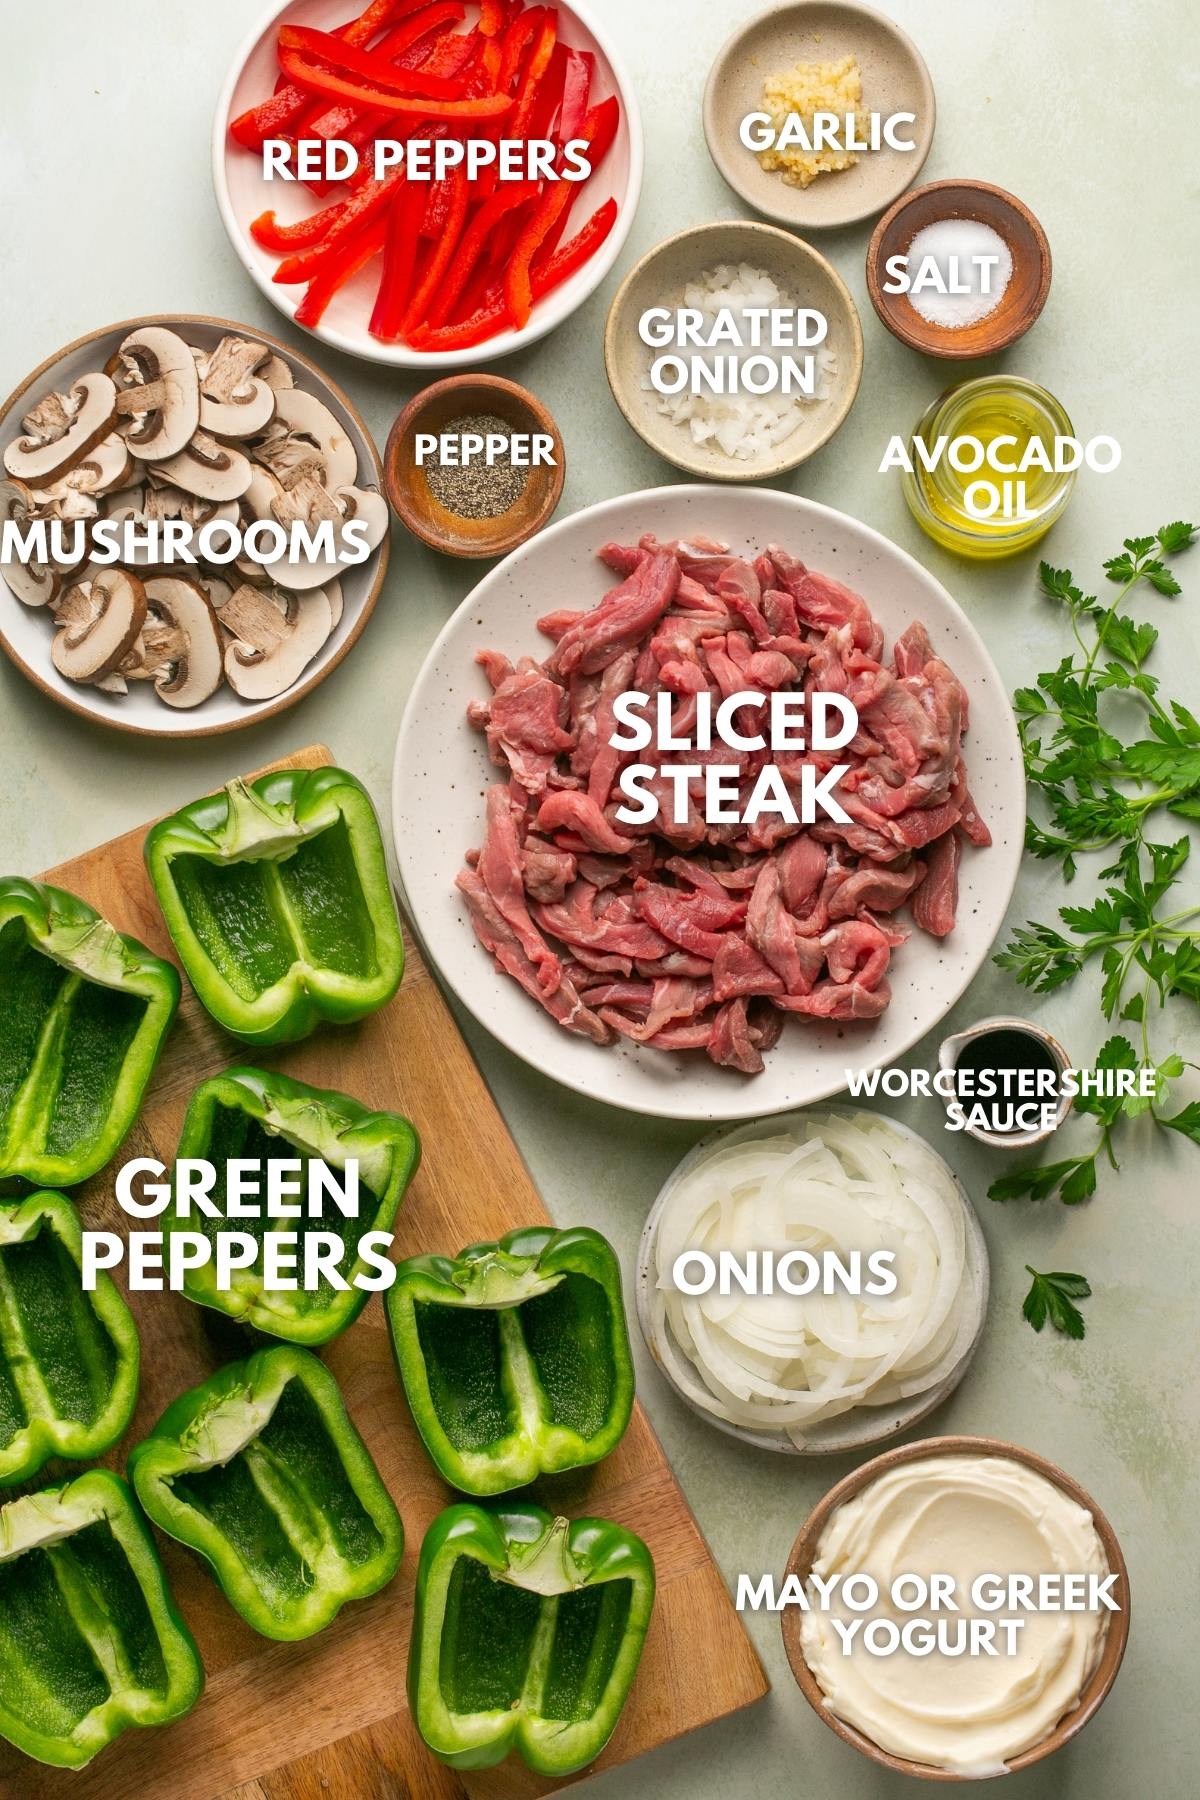
Ingredient Notes
- Sirloin Steak: A traditional Philly Cheesesteak is made with Ribeye steak that is thinly sliced. Ribeyes have great flavor because of the fattiness but they can be a bit pricey. If you want to go the cheaper route you can use a hanger, skirt, flank, or sirloin steak cut thinly. For this recipe, I used sirloin steaks cut thinly and it turned out amazing.
- Green Bell Peppers
- Mushrooms
- Red Bell Pepper
- Red Onion
- Parsley
- Avocado Oil
- Optional: Swap White American cheese, mozzarella cheese, or Provolone cheese for my Mac’s Awesome Sauce.
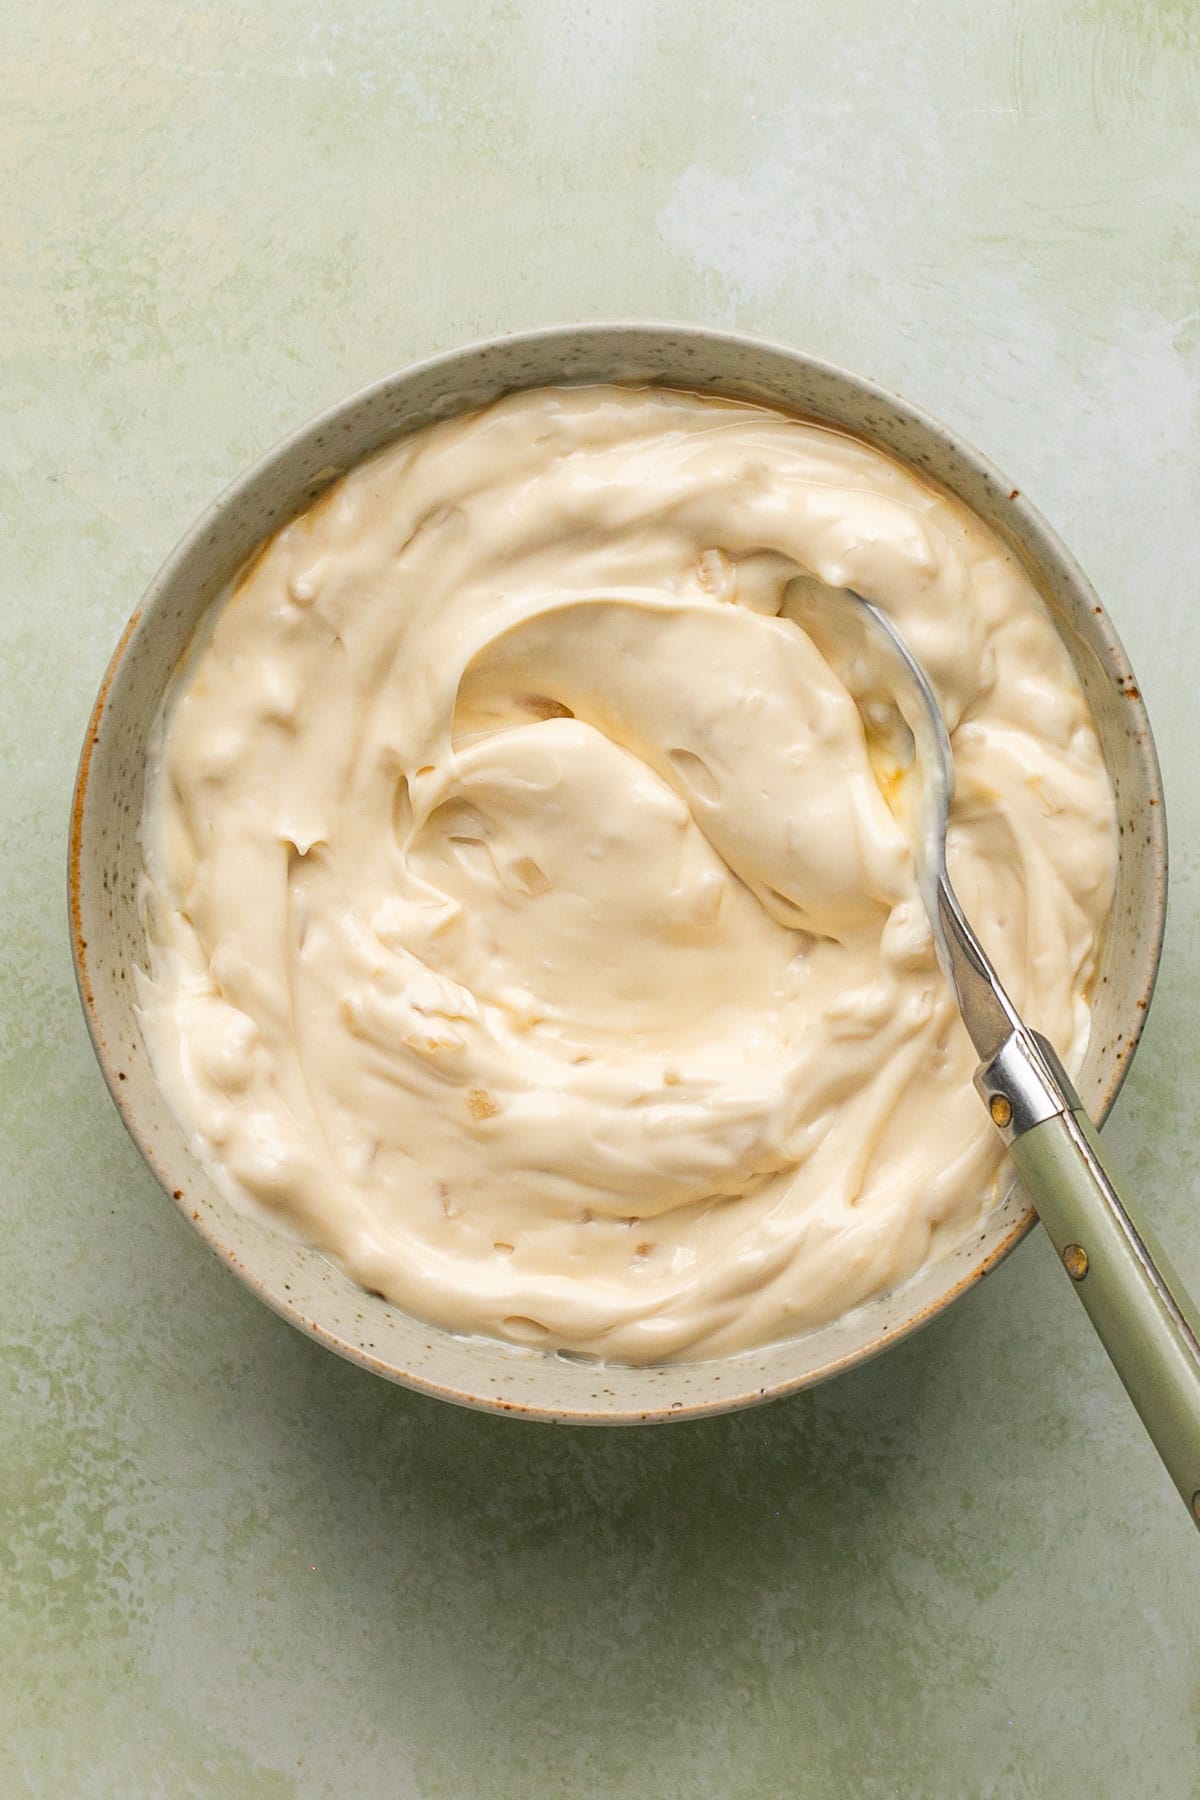
Mac’s Awesome Sauce
- Mayonnaise: Use your favorite store-bought mayo or try my homemade version. You can also sub Greek yogurt if not dairy-free
- Onions
- Worcestershire sauce or sub coconut aminos
- Salt and Black pepper to taste
Step-by-Step Instructions
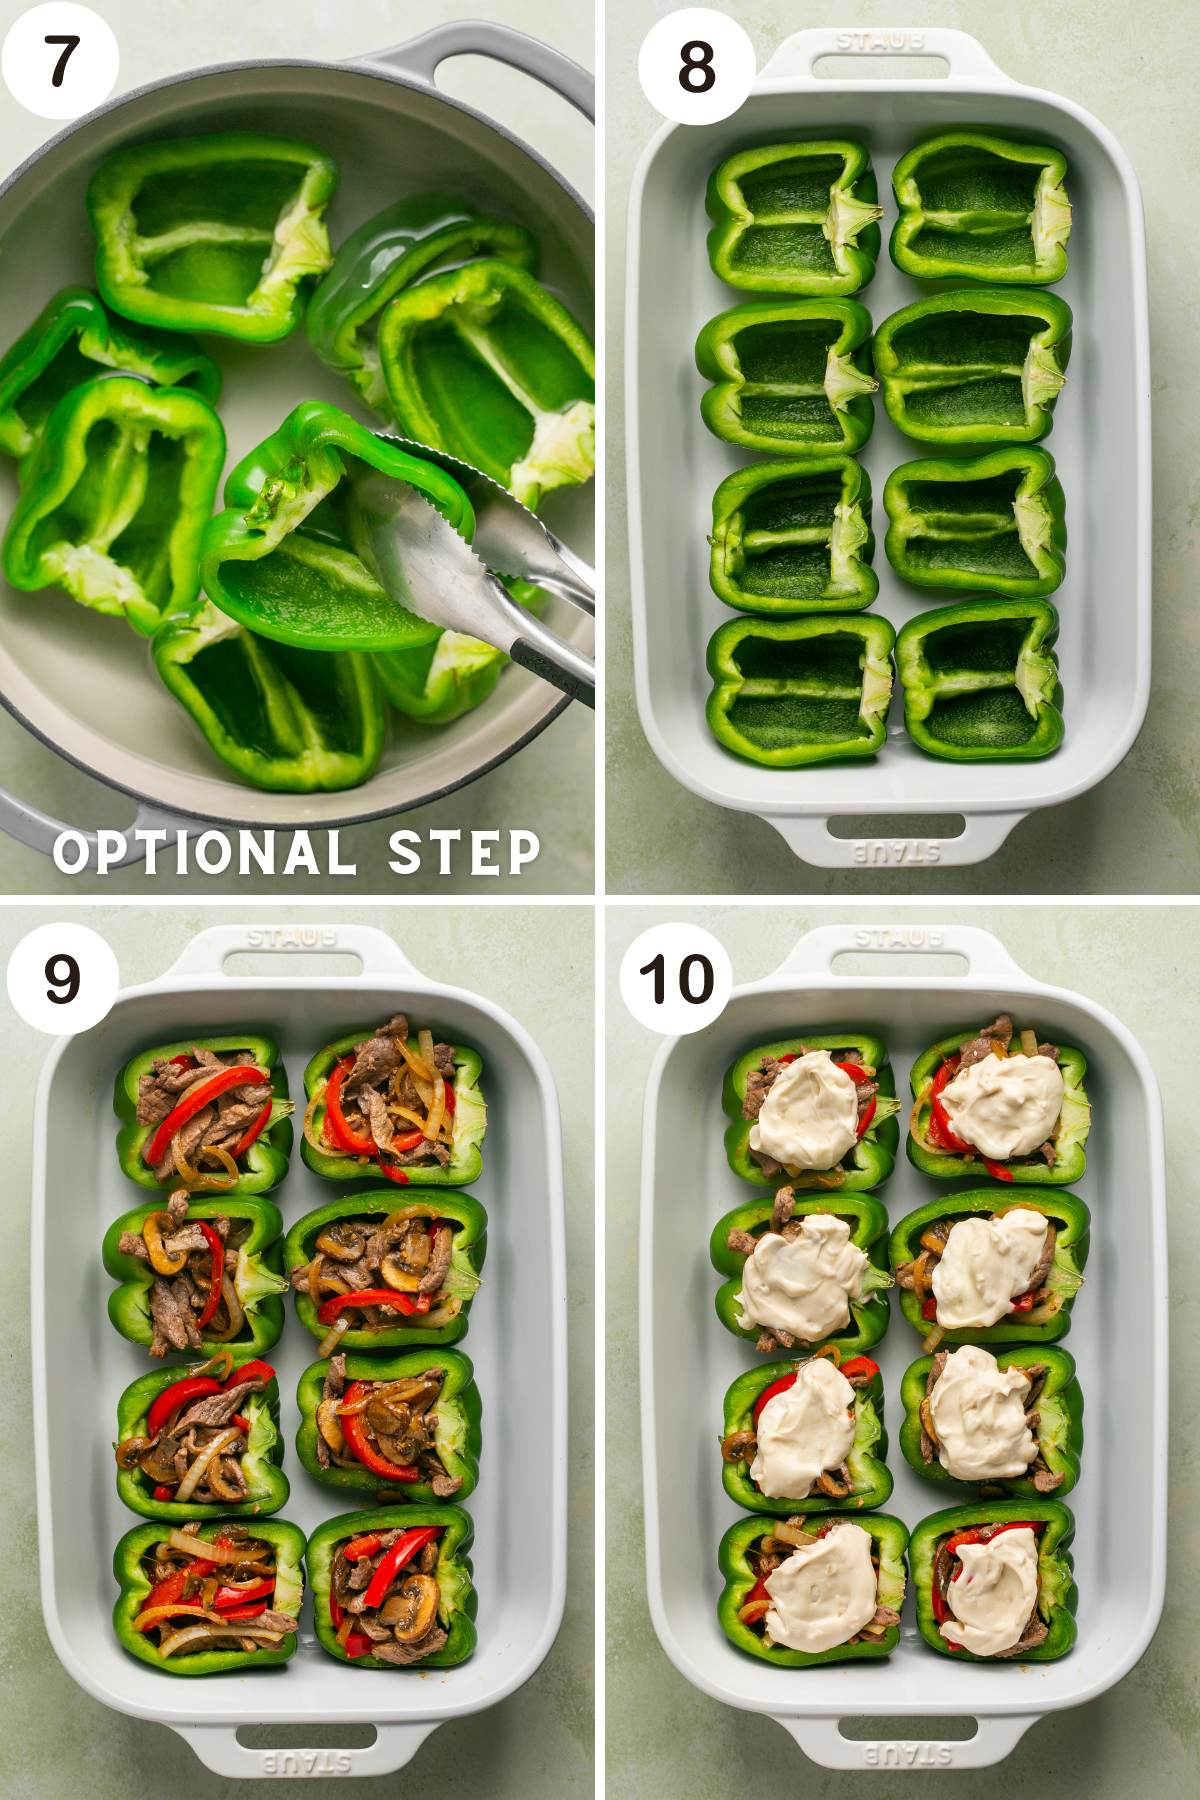
- Prepare Peppers: Preheat oven to 375°F (190°C). Cut the tops off the bell peppers and remove the seeds and membranes. Place the peppers upright in a baking dish and bake the peppers unstuffed for 10 minutes.
- OPTIONAL STEP: If you want to cook the peppers quicker, do this instead of baking the unstuffed peppers in the oven first. Fill a large pot with water and bring it to a boil over high heat. Place the peppers in the boiling water and let them cook for 3-4 minutes, or until slightly softening. Use tongs to remove the peppers from the boiling water and place them on a plate lined with paper towels to drain any excess water. Add to a baking dish upright.
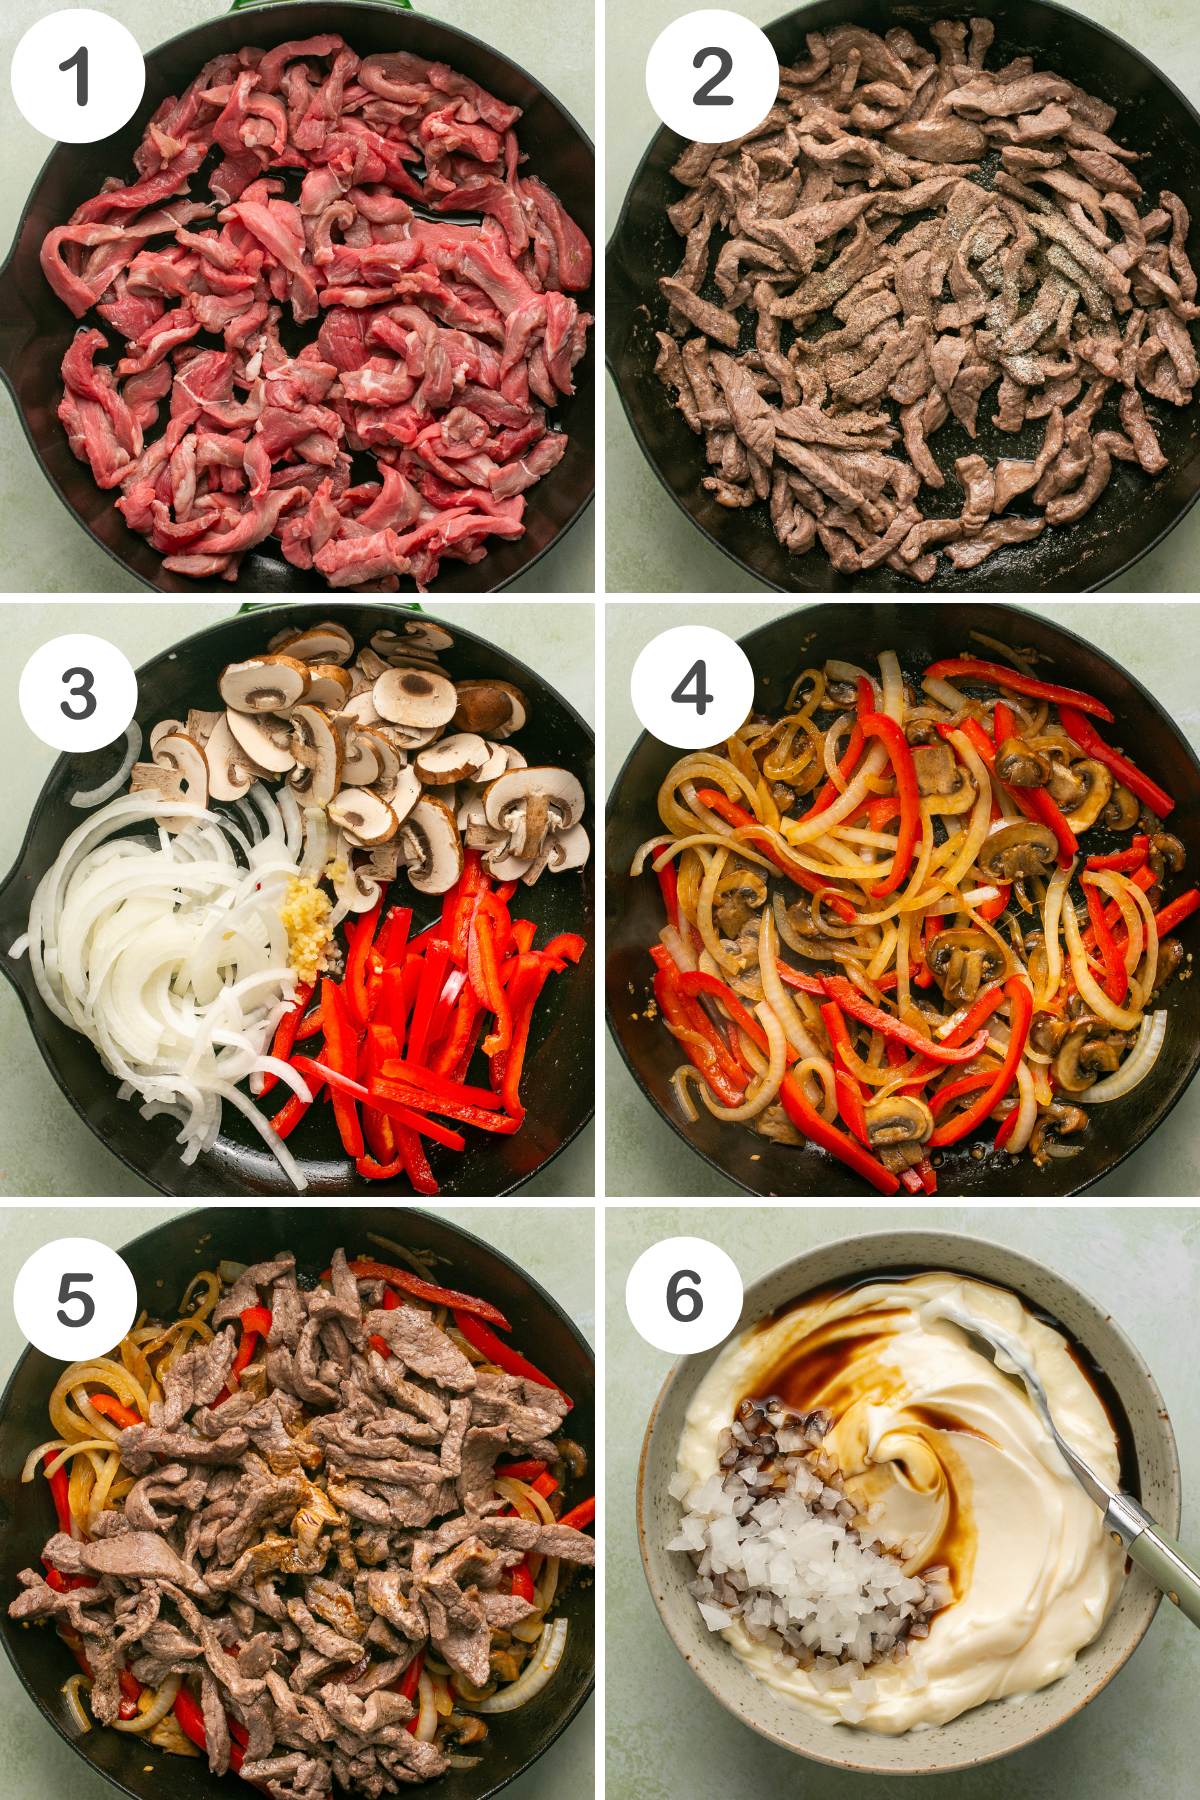
- Slice the onion into thin slices, julienne the red pepper, and slice and clean the mushrooms. Slice the steak against the grain into thin strips.
- In a large skillet, heat a drizzle of olive oil over medium-high heat. Add the thinly sliced steak to the skillet and cook until browned, about 2-3 minutes per side—season with salt and pepper to taste. Remove the steak from the pan and set aside.
- In the same skillet add another 1 tbsp of olive oil to the hot skillet. Add in the minced garlic, mushrooms, red peppers, and onions. Cook until tender for 4-5 minutes. Add the steak with the veggie mixture and a tablespoon of coconut aminos or Worcestershire sauce and cook for another minute or two.
- To a small bowl add all the sauce ingredients and mix until combined.
- Assemble each pepper by adding a big heaping spoonful of the veggie and beef mixture into each pepper. Once each pepper is filled, top with 2 tbsp of Mac’s Awesome Sauce or slice of cheese to each pepper.
- Place the stuffed peppers in the oven and bake for 15-20 minutes, or until the cheese is melted and bubbly, and the peppers are tender.
- Remove and garnish with chopped parsley.
Mac’s Pro Tip
Expert Tips
- Dairy-Free: If you’re dairy-free, omit any cheese and use the Mac’s Awesome sauce recipe I include in this recipe. Alternatively, you can substitute dairy-free cream cheese for creaminess if desired.
- Lower Calorie: If you are not dairy-free and you want a lower calorie option, sub Greek yogurt for the mayo in the sauce recipe.
Storage Tips
Store leftover Philly cheesesteak stuffed peppers in an airtight container for up to 4 days. Reheat in the microwave, air fryer, or oven.
If you have leftover sauce, store it in a separate airtight container for up to a week. Give it a good stir and serve with your stuffed peppers.
Recipe FAQs
While you don’t have to boil them first, this definitely speeds up the cooking process. Fill a large pot with water and bring it to a boil over high heat. Place the peppers in the boiling water and let them cook for 3-4 minutes, or until slightly softening. Use tongs to remove the peppers from the boiling water and place them on a plate lined with paper towels to drain any excess water. Then they are ready to be stuffed and baked!
The original cheese used on a Philly cheesesteak is Cheez Whiz. However, other common choices include American cheese and provolone.
More Recipes You’ll Love


Follow on Instagram
If you love this recipe, please give it a star rating and leave a comment below! Follow me on Pinterest, Facebook, and Instagram for more!


Philly Cheesesteak Stuffed Peppers Recipe
Ingredients
Stuffed Peppers
- 1 lb sirloin steak thinly sliced
- 4 green bell peppers cut in half and seeded
- 1 cup mushrooms sliced
- 3 garlic cloves minced
- 1 red bell pepper thinly sliced
- 1 yellow onion thinly sliced
- 2 tbsp avocado oil
- 1 tbsp Worcestershire sauce or coconut aminos
- parsley for garnish
- salt and pepper to taste
- 1/2 cup Mac's Awesome Sauce or sub mozzarella or dairy-free cheese
Mac's Awesome Sauce
- 1 cup mayo or Greek yogurt if not dairy-free
- 2 tbsp finely chopped onions
- 2 tsp Worcestershire sauce
- Salt and pepper to taste
Instructions
- Prepare Peppers: Preheat your oven to 375°F (190°C). Cut the tops off the bell peppers and remove the seeds and membranes. Place the peppers upright in a baking dish and bake the peppers unstuffed for 10 minutes.
- OPTIONAL STEP: If you want to cook the peppers quicker, do this instead of baking the unstuffed peppers in the oven first. Fill a large pot with water and bring it to a boil over high heat. Place the peppers in the boiling water and let them cook for 3-4 minutes, or until slightly softening. Use tongs to remove the peppers from the boiling water and place them on a plate lined with paper towels to drain any excess water. Add to a baking dish upright.
- Slice the onion in thin slices, julienne the red pepper, and slice and clean the mushrooms. Slice the steak against the grain into thin strips.
- In a large skillet, heat a drizzle of olive oil over medium-high heat. Add the thinly sliced steak to the skillet and cook until browned, about 2-3 minutes per side. Season with salt and pepper to taste. Remove the steak from the skillet and set aside.
- In the same skillet add another 1 tbsp of olive oil to the hot skillet. Add in the minced garlic, mushrooms, red peppers, and onions. Cook until tender for 4-5 minutes. Add the steak with the veggie mixture along with a tablespoon of coconut aminos or Worcestershire sauce and cook for another minute or two.
- To a small bowl add all the sauce ingredients and mix until combined.
- Assemble each pepper by adding a big heaping spoonful of the veggie and meat mixture into each pepper. Once each pepper is filled, top with 2 tbsp of Mac's Awesome Sauce OR cheese of choice to each filled pepper.
- Place the stuffed peppers in the oven and bake for 15-20 minutes, or until the cheese is melted and bubbly, and the peppers are tender.
- Remove and garnish with chopped parsley.
Notes
Expert Tips
- Dairy-Free: If you’re dairy-free, omit any cheese and use the Mac’s Awesome sauce recipe I include in this recipe. Alternatively, you can substitute dairy-free cream cheese for creaminess if desired.
Storage Tips
Store leftover Philly cheesesteak stuffed peppers in an airtight container for up to 4 days. Reheat in the microwave, air fryer, or oven. If you have leftover sauce, store it in a separate airtight container for up to a week. Give it a good stir and serve with your stuffed peppers.Equipment
Nutrition
Nutrition information is automatically calculated, so should only be used as an approximation.


This recipe is delicious! Will be making it again soon!
Awww that’s so great to hear Anna. Thrilled you liked it. Have a blessed and restful weekend!
This is my go to meal!!! So easy and so delicious!! The awesome sauce is life!!! Good for a week night meal!!! Love these!!!
Thanks so much Jenny for your awesome comment!! Love that I’ve made your life just a little easier as well as tasty. Thrilled to have made your favorite go-to list!!! Have a restful and blessed weekend:-)
I make this for supper regularly and love it!
Awww, thanks so much for letting me know Leigh-Ann. Isn’t it so fun to have a tasty go-to recipe that you love? Have a restful and blessed weekend 🙂
This recipe is on repeat in my house at least once every 2 weeks. So tasty & even better as leftovers. Ive been subbing in ground beef just cause it’s easier for me to prep.
Aww, thanks Lauren for the kind feedback. Love it when I hear that a simple recipe is pleasing and tasty and makes the family favorite lists. Have a restful and blessed weekend;-)
We live this recipe. Made it several times. Full of flavor and easy to make. My teenagers love it, so you know it’s good!
Hey Lisa,
Isn’t it joy when you find food teenagers love? So thrilled you love the recipe. Thanks for letting me know your thoughts!! Have a blessed weekend;-)
Slap yo mama GOOD! It’s been a minute since I made this one, but I’m going to put it back in the rotation this week!
Haha. Love this. So happy it was a hit.
These were so amazing! Can’t begin to describe how delicious they were. I was a little skeptical about putting the sauce on top and then in the oven but I did and it was so good! If I could give this more stars I would!! Sharing with everyone I know. Thank you!
This is so kind. Thank you so so much!
Great recipe and even better that my 11 year did all the work. Thank
This makes me so happy. Thank you
What are your thoughts on freezing this? Specifically the MAC Sauce?
I’m all about something I can keep in the freezer for a grab-and-go lunch during the school year.
Hi Rebekah,
You know I have never tried freezing this. If you do and it works let me know. I would love to share your results. Thanks so much for contacting me. Have a blessed weekend:-)
I FINALLY made these for my family this week and they were delish! I recommended them to a friend and my mom and so far, five stars all around!
YAY! This makes me so happy. So glad you loved them!