Easy Chicken Caesar Pasta Salad Recipe
Published Aug 04, 2024
This post may contain affiliate links. Please read our disclosure policy.
An easy, hearty, Chicken Caesar Pasta salad that doubles as the perfect side dish and a main course. This cold and refreshing summer salad comes together in under 30 minutes and makes the easiest meal for busy weeknights or hot summer weekends!
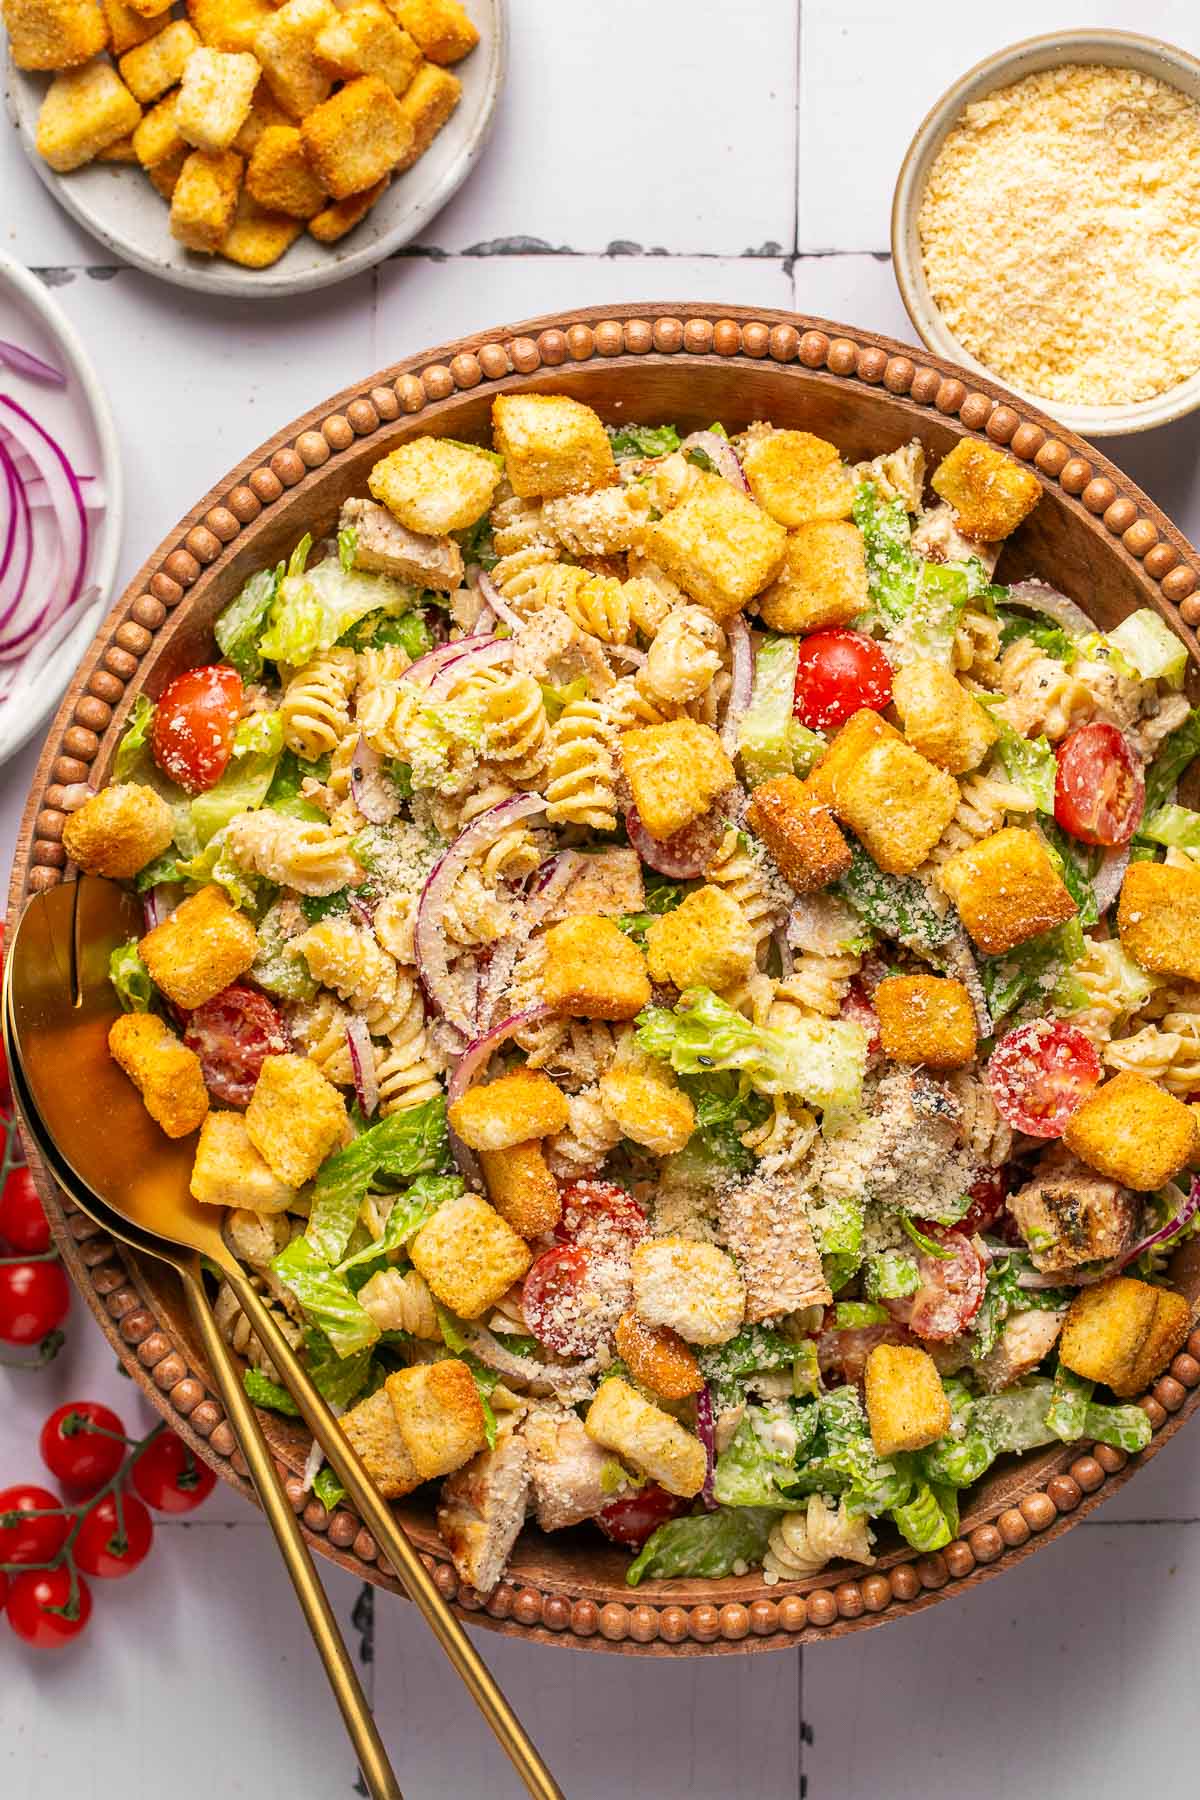
Table of Contents
Why You’ll Love This Chicken Caesar Pasta Salad
Think of your favorite, crunchy Caesar salad recipe combined with a creamy, tender pasta salad and you have this newest obsession of mine! Enter, my Easy Chicken Caesar Pasta Salad! You guys, it is so darn delicious, refreshing, and incredibly easy to make! In fact, you can speed it up using leftover chicken.
It features all of the classic Caesar salad ingredients like crisp lettuce, crunchy croutons, parmesan, and a homemade creamy Caesar dressing. Combined with tender chicken, cherry tomatoes, red onion, and cooked pasta, this hearty salad is divine!
I love this recipe because while it makes a delicious appetizer or side dish, it also makes a super hearty main dish for lunch or dinner. As with any pasta salad, feel free to customize it to your liking with additional ingredients or omit ingredients as needed.
I hope you love this simple salad as much as we do!
Ingredient Notes
Chicken
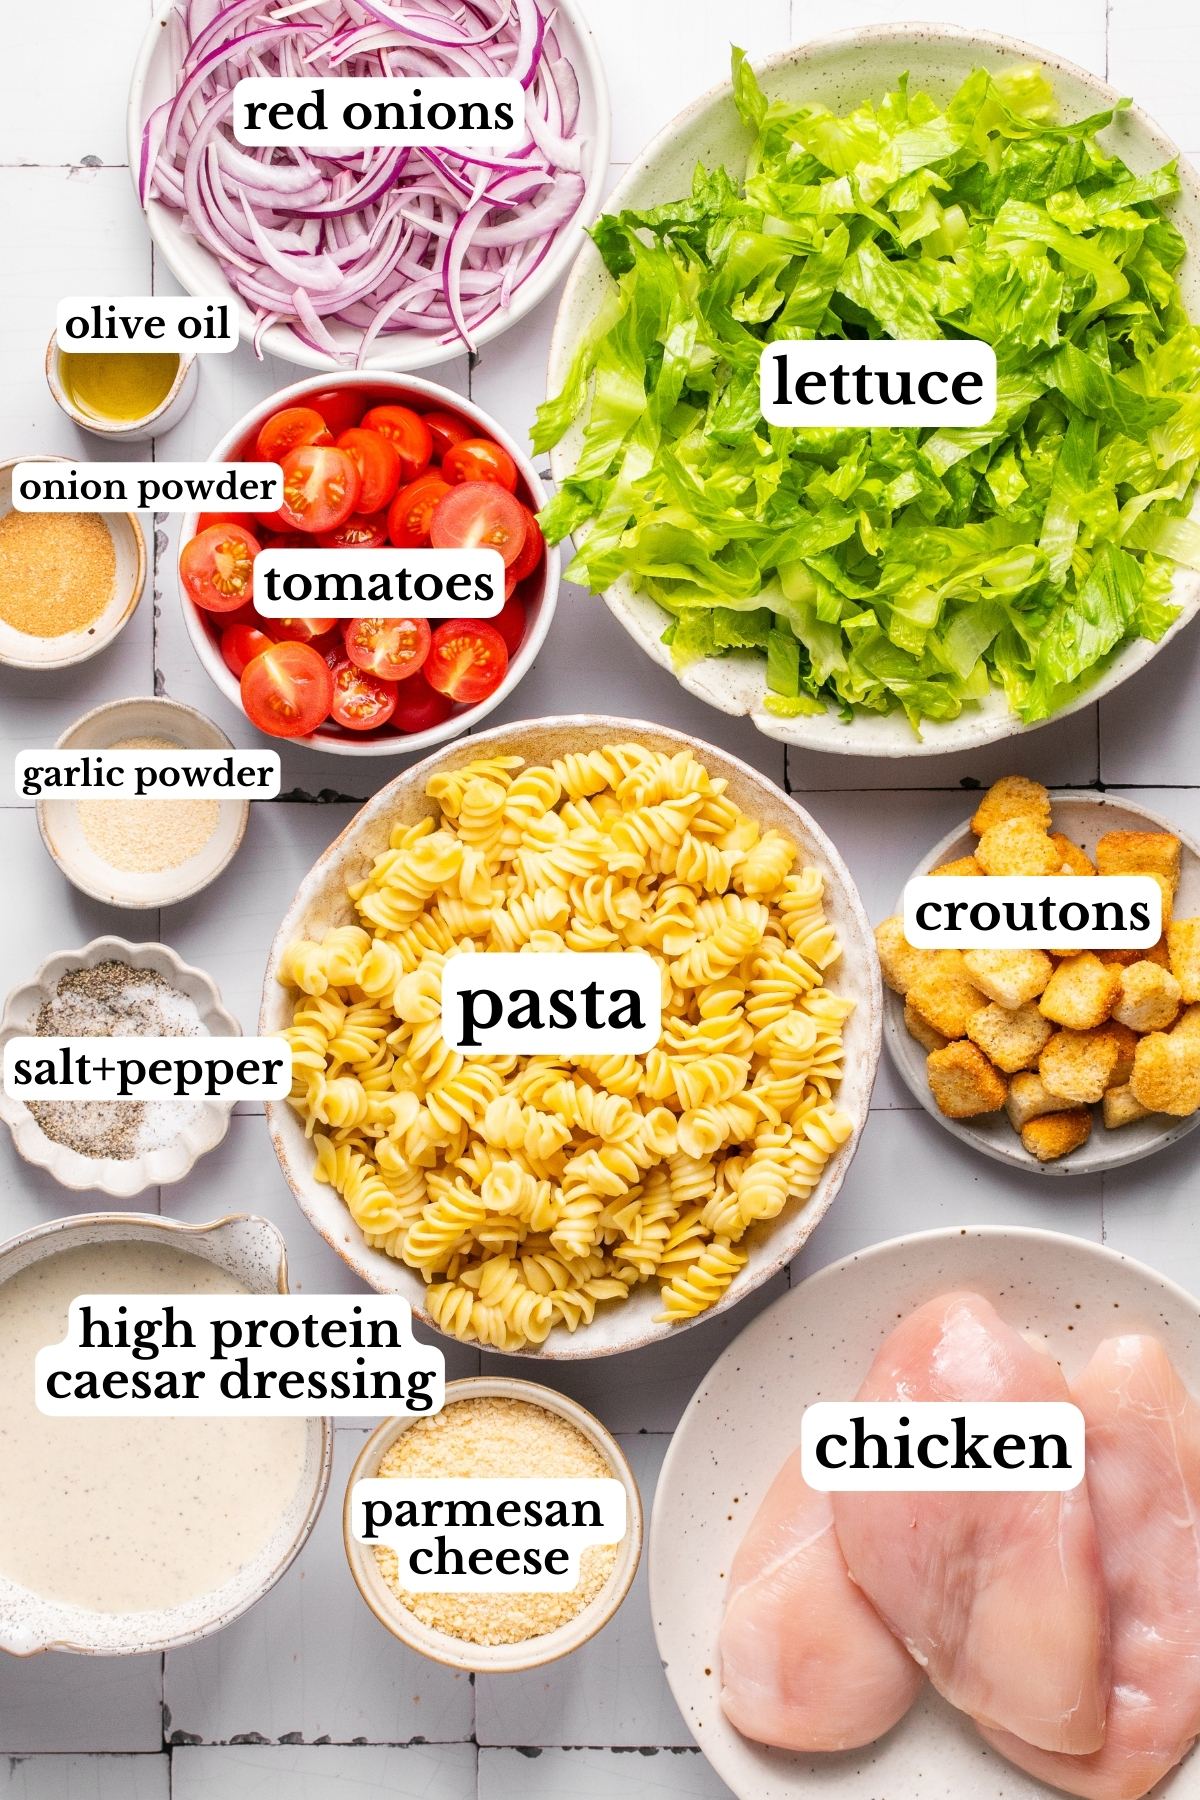
- chicken breast: I freshly cooked and chopped chicken breasts for this recipe, but to speed it up you can use a store-bought Rotisserie chicken or leftover chicken.
- Extra virgin olive oil
- garlic powder
- onion powder
- salt
- black pepper
Pasta Salad
- cooked pasta: Use any small pasta shape–Penne, rotini, or bow-tie pasta. I used rotini pasta for photos. Cook pasta according to package directions, drain, and set aside until ready to add to the salad. Use gluten-free pasta if desired.
- crisp Romaine lettuce
- fresh cherry tomatoes or grape tomatoes
- grated Parmesan cheese
- croutons
- red onion
Homemade Caesar Dressing
- Greek yogurt: Or dairy-free yogurt for a DF option.
- mayonnaise
- grated parmesan cheese
- olive oil
- Dijon mustard
- fresh lemon juice
- minced garlic
- Worcestershire sauce
- salt and pepper to taste
- anchovy filets: minced (optional for authentic flavor)
Step-by-Step Instructions
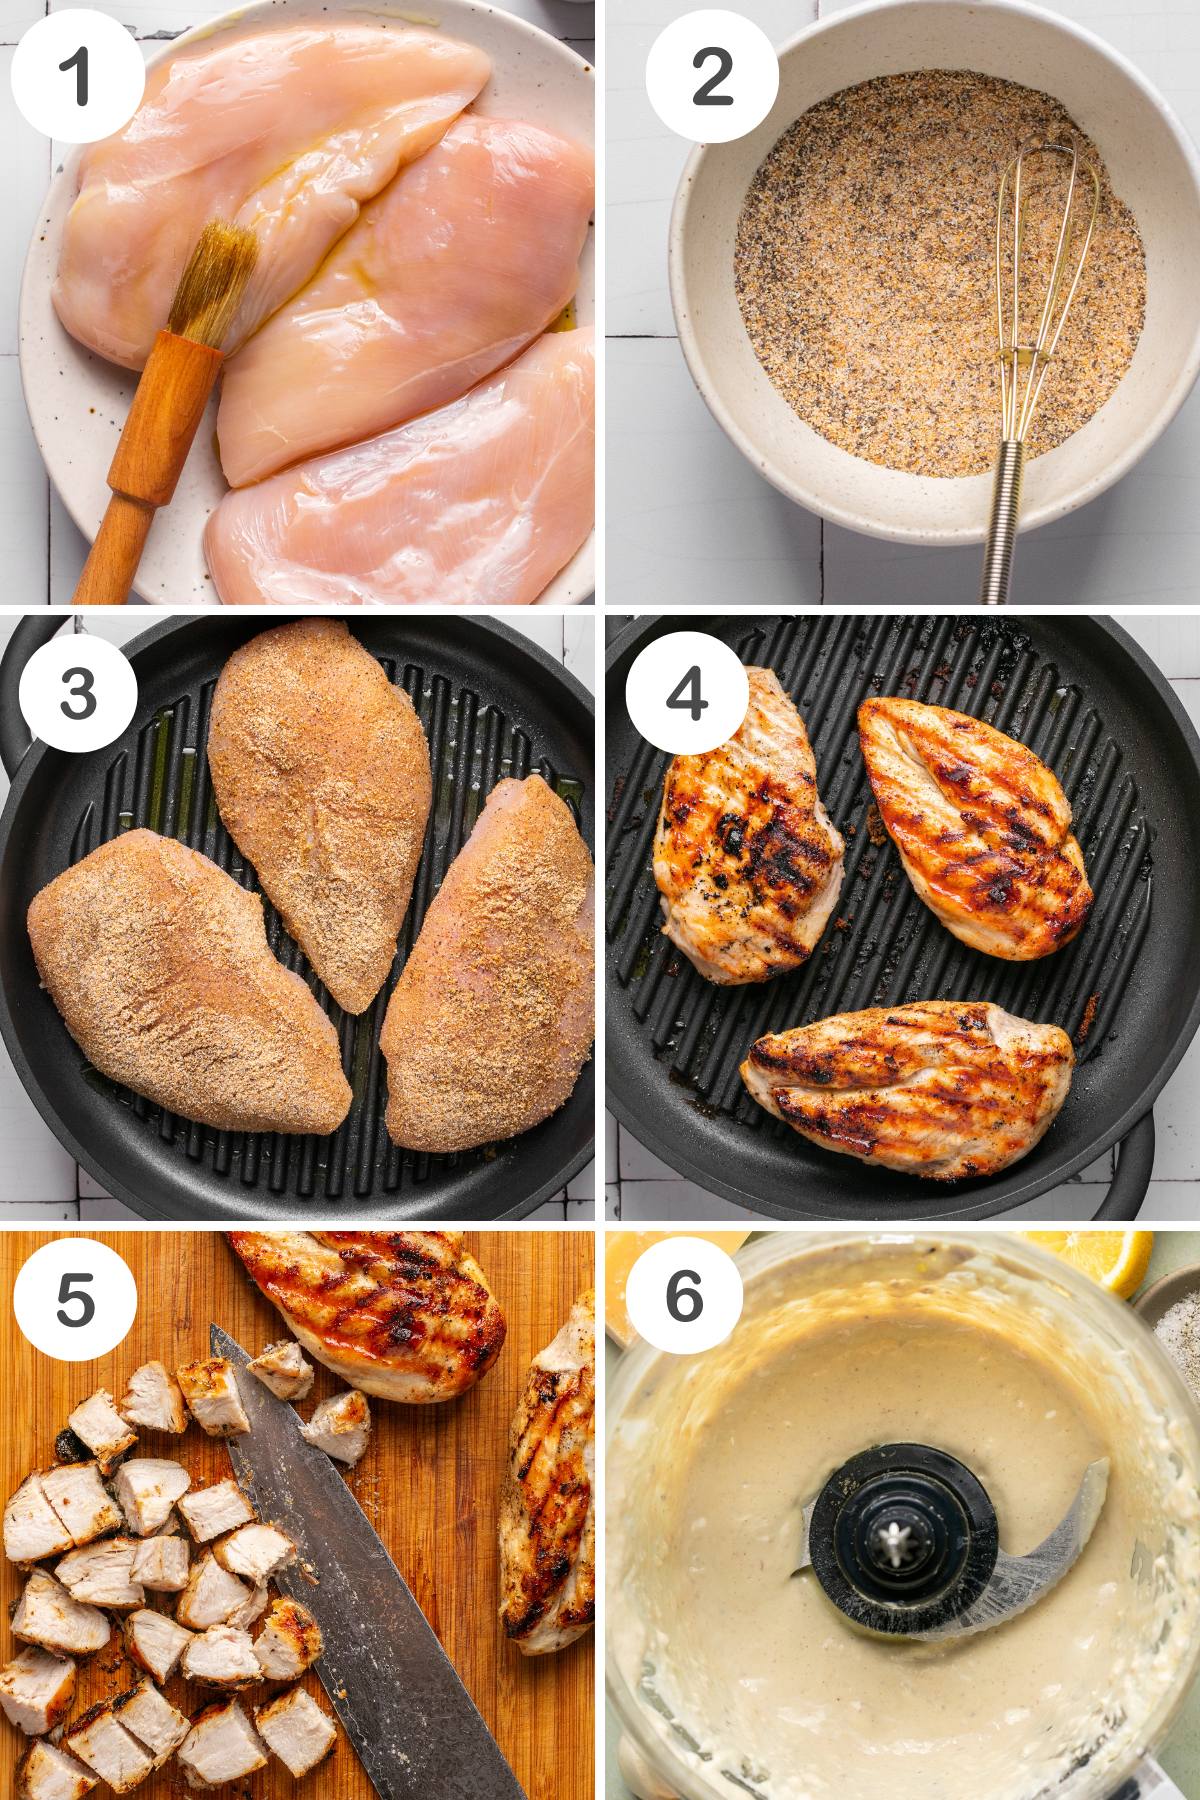
Prepare the Chicken: Pat the chicken breasts dry with paper towels to remove excess moisture. Brush both sides of the chicken breasts with olive oil. In a small bowl, mix together the garlic powder, onion powder, salt, and black pepper. Sprinkle the spice mixture evenly over both sides of the chicken breasts. Place the seasoned chicken breasts on a preheated (375F) grill or you use a grill pan on the stove over medium/high heat. Grill the chicken for 6-8 minutes per side, or until the internal temperature reaches 165°F and the chicken is no longer pink in the center. Cooking time may vary depending on the thickness of the chicken breasts.
Once cooked, remove the chicken from the grill and let it rest for 5 minutes. This helps retain the juices and keep the chicken moist. After resting, slice the chicken breasts into strips or chunks.
Caesar Salad Dressing: In a food processor, add in the Greek yogurt, grated parmesan cheese, olive oil, Dijon mustard, mayo, lemon juice, minced garlic, minced anchovies (if using), Worcestershire sauce, salt, and pepper pulse until smooth and well combined.
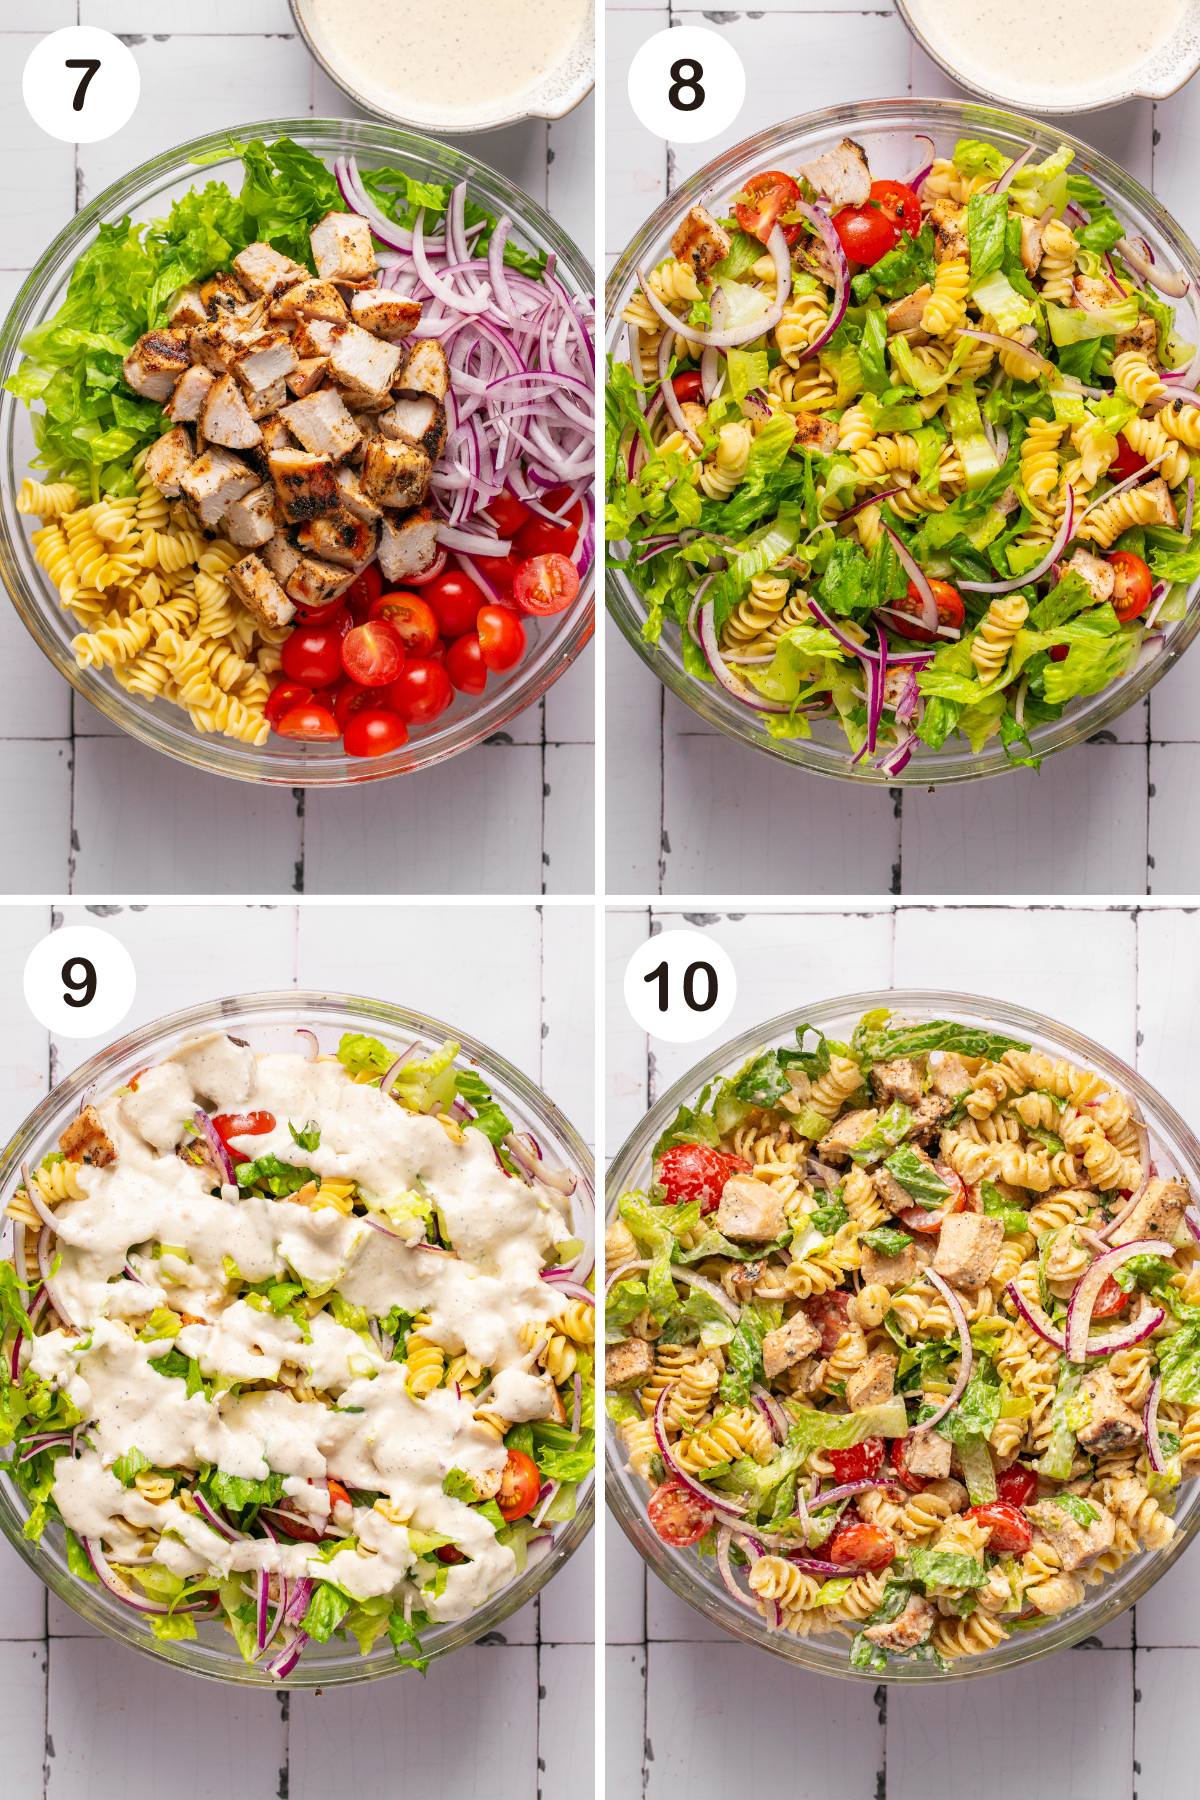
Salad: In a large bowl, combine the cooked pasta, diced chicken, cherry tomatoes, chopped romaine lettuce, and red onion. Add the Caesar dressing and toss until everything is well coated.
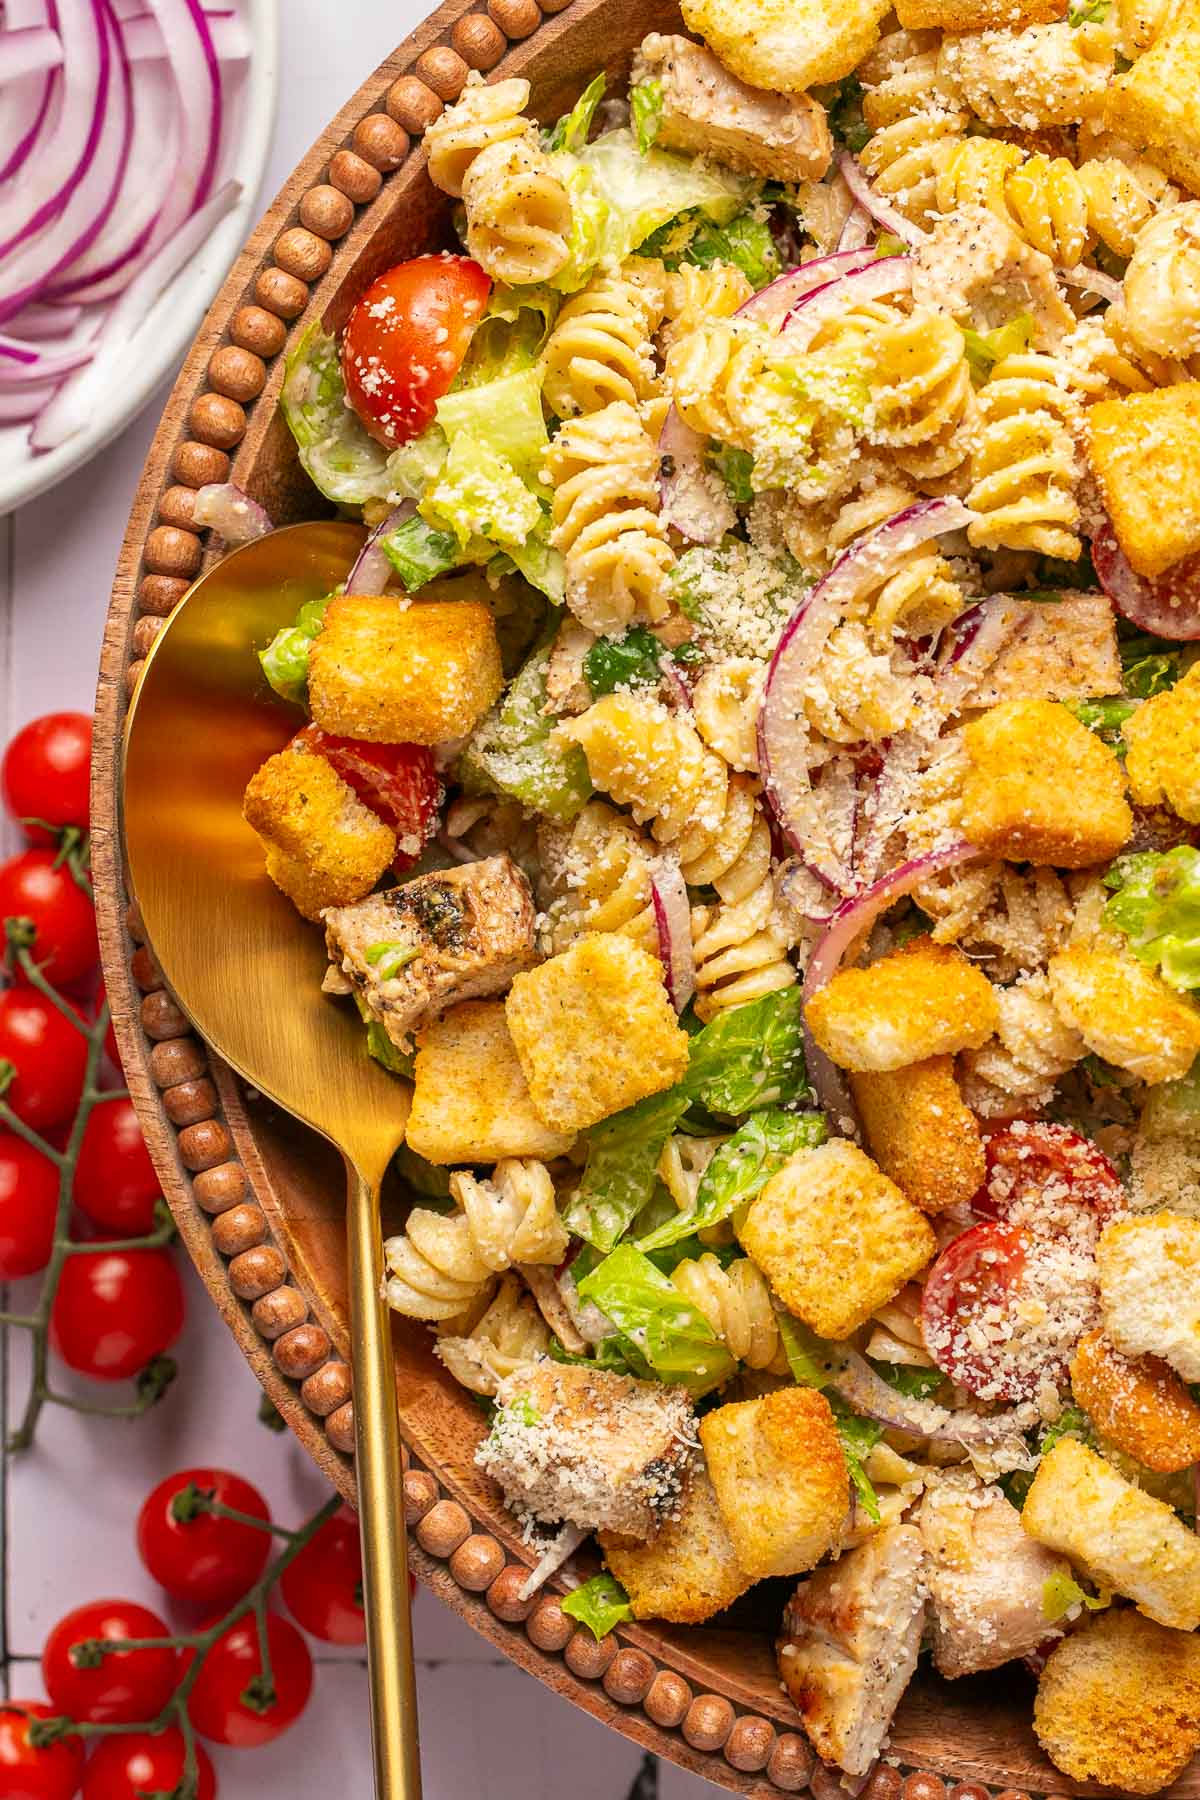
Transfer the salad to a serving bowl or platter. Top with additional grated Parmesan cheese, and croutons.
Mac’s Pro Tip
Expert Tips
- I freshly cooked and chopped chicken breasts for this recipe, but to speed it up you can use a Rotisserie chicken or leftover chicken. If you prefer chicken thighs, feel free to substitute them.
- Use any short pasta–Penne, rotini, or bowtie. I used rotini pasta for photos. Cook according to package directions, drain, and set aside until ready to add to the salad. Use gluten-free pasta if desired.
Serving & Storage Tips
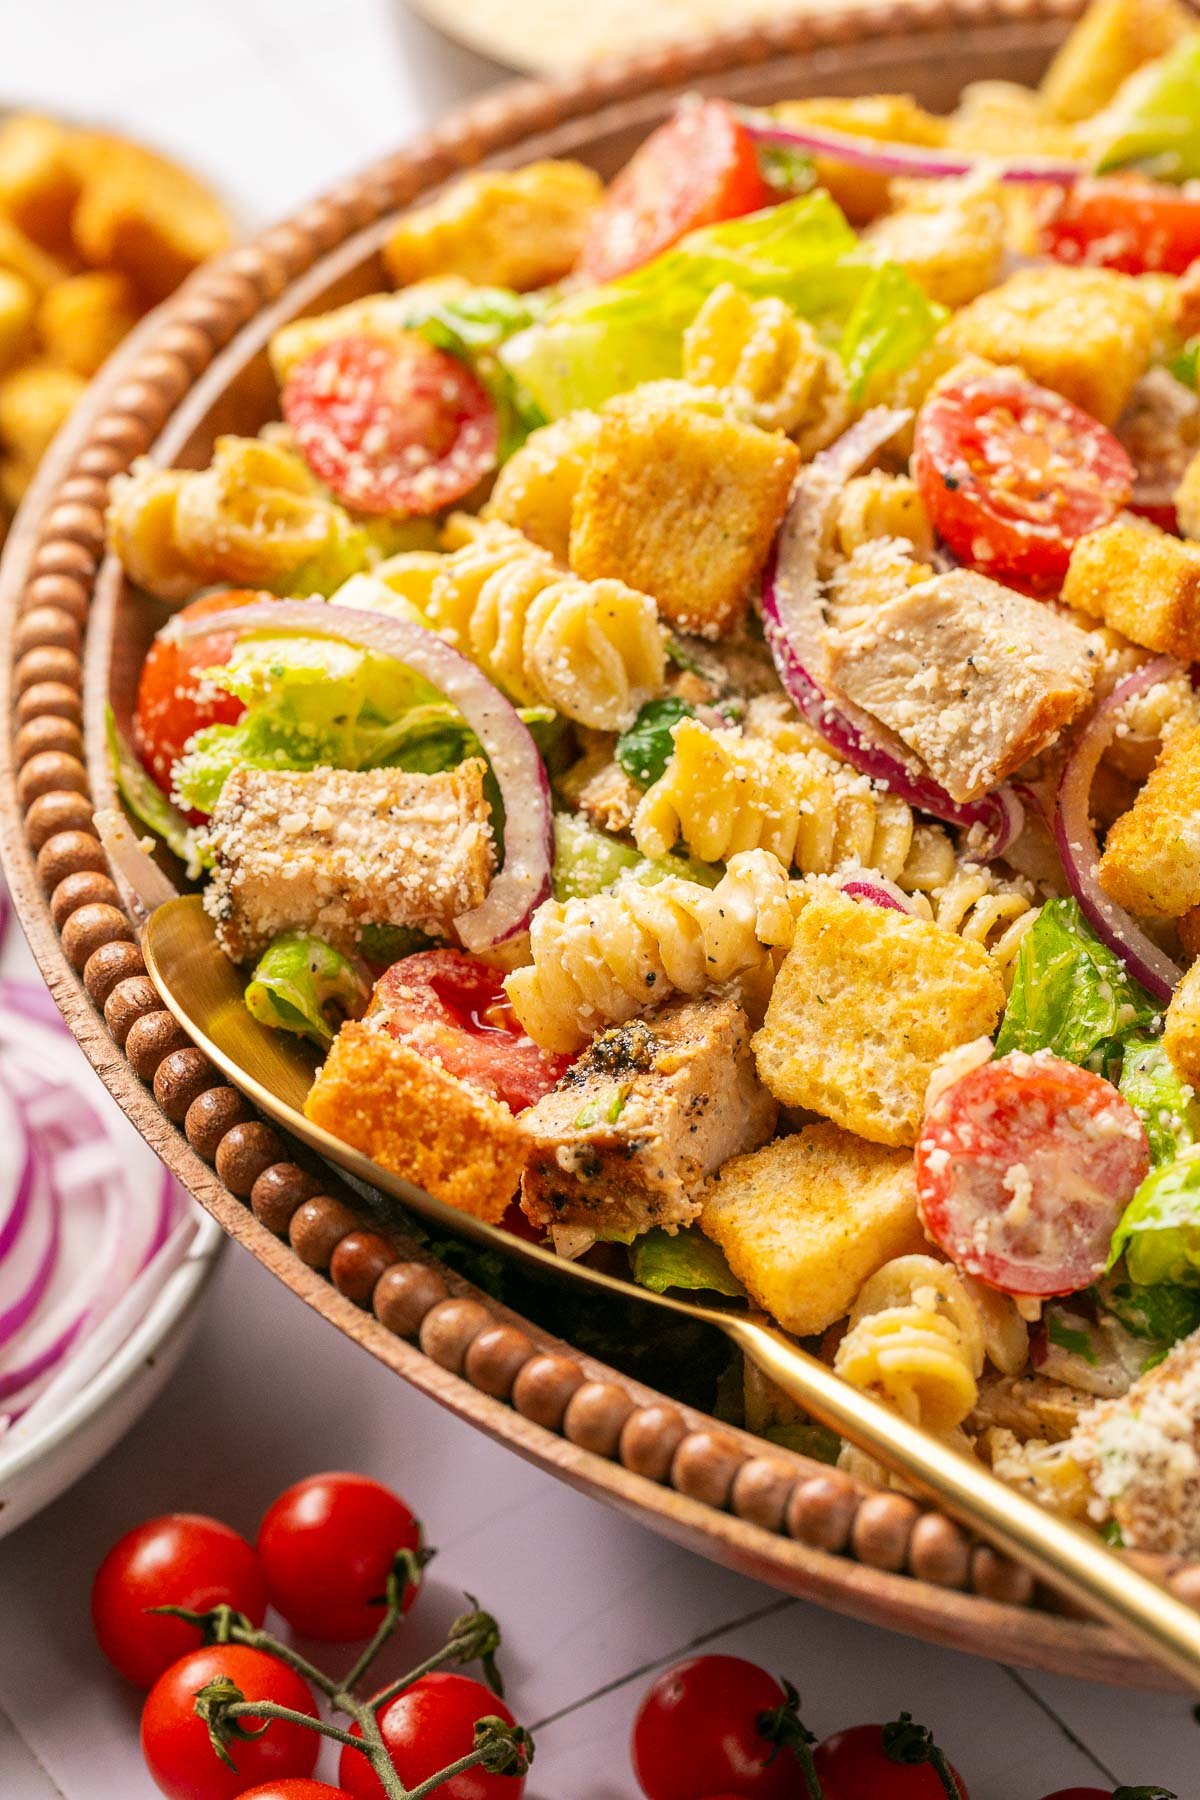
Transfer the salad to a serving bowl or platter to serve. Top with additional grated or shredded Parmesan cheese, and croutons.
Store leftovers in an airtight container in the refrigerator for up to 2 days. Keep in mind that the Romaine lettuce will lose its crunch over time. You can freshen up the salad by adding some more freshly chopped Romaine to your leftovers when serving.
Recipe FAQs
Yes! Give it a quick rinse under cold water to keep the pasta from sticking together and to speed up the cooling process.
It doesn’t need to be cold, but it’s best if it’s cooled down before tossing it with the rest of the ingredients.
More Summer Salad Recipes
Fall/Thanksgiving
HLP’s Southern Thanksgiving Roundup (60+ Recipes!)
Sauces, Dressings, & Dips
Easy Creamy Strawberry Balsamic Dressing Recipe
Follow on Instagram
If you love this recipe, please give it a star rating and leave a comment below! Follow me on Pinterest, Facebook, and Instagram for more!


Easy Chicken Caesar Pasta Salad Recipe
Ingredients
Chicken
- 3 large chicken breast
- 1 tablespoon olive oil
- 1 teaspoon garlic powder
- 1 teaspoon onion powder
- 1 teaspoon salt
- 1 teaspoon pepper
Salad
- 8 ounces pasta cooked according to package penne, rotini, or bowtie Use rotini for photos
- 3-4 cups Romaine lettuce chopped
- 1 cup cherry tomatoes halved
- 1/2 cup grated Parmesan cheese
- 1/3 cup croutons
- ½ red onion thinly sliced
Dressing
- 1/2 cup Greek yogurt or dairy-free yogurt for a DF option
- 1 tbsp mayo
- 1/3 cup grated Parmesan cheese
- 1 tablespoons olive oil
- 1 tablespoon Dijon mustard
- 2 tablespoons lemon juice
- 2 cloves garlic minced
- 1 teaspoon Worcestershire sauce
- Salt and pepper to taste
- 1-2 anchovy filets minced (optional for authentic flavor)
Instructions
- Prepare the Chicken: Pat the chicken breasts dry with paper towels to remove excess moisture. Brush both sides of the chicken breasts with olive oil. In a small bowl, mix together the garlic powder, onion powder, salt, and black pepper. Sprinkle the spice mixture evenly over both sides of the chicken breasts. Place the seasoned chicken breasts on a preheated (375F) grill or you use a grill pan on the stove over medium/high heat. Grill the chicken for 6-8 minutes per side, or until the internal temperature reaches 165°F and the chicken is no longer pink in the center. Cooking time may vary depending on the thickness of the chicken breasts.
- Once cooked, remove the chicken from the grill and let it rest for 5 minutes. This helps retain the juices and keep the chicken moist. After resting, slice the chicken breasts into strips or chunks.
- High-Protein Caesar Dressing: In a food processor, add in the Greek yogurt, grated parmesan cheese, olive oil, Dijon mustard, mayo, lemon juice, minced garlic, minced anchovies (if using), Worcestershire sauce, salt, and pepper pulse until smooth and well combined.
- Salad: In a large mixing bowl, combine the cooked pasta, diced chicken, cherry tomatoes, chopped romaine lettuce, and red onion. Add the Caesar dressing and toss until everything is well coated.
- Transfer the salad to a serving bowl or platter. Top with additional grated Parmesan cheese, and croutons.
Notes
Expert Tips
- I freshly cooked and chopped chicken breasts for this recipe, but to speed it up you can use a Rotisserie chicken or leftover chicken. If you prefer chicken thighs, feel free to substitute them.
- Use any short pasta–Penne, rotini, or bowtie. I used rotini pasta for photos. Cook according to package directions, drain, and set aside until ready to add to the salad. Use gluten-free pasta if desired.
Serving & Storage Tips
Transfer the salad to a serving bowl or platter to serve. Top with additional grated or shredded Parmesan cheese, and croutons. Store leftovers in an airtight container in the refrigerator for up to 2 days. Keep in mind that the Romaine lettuce will lose its crunch over time. You can freshen up the salad by adding some more freshly chopped Romaine to your leftovers when serving.Nutrition
Nutrition information is automatically calculated, so should only be used as an approximation.
This post may contain affiliate links

