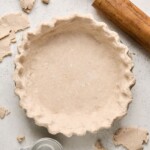
How to Make the Perfect Gluten-Free Pie Crust Recipe
Crafting the perfect homemade gluten-free pie crust can be a delightful journey, and I'm here to guide you every step of the way. Let's dive into creating a crust that's not only as buttery and flaky as the classic, but also versatile enough for all your pie-making adventures.
Servings: 1 pie crust (double or single)
Ingredients
Single Crust
- 1 1/2 cups gluten-free flour 180 grams King Arthur’s Measure for Measure
- 1 1/2 tbsp sugar
- ¼ cup cold water add more as needed (1 tbsp at a time)
- 8 tbsp cold salted butter 1 stick
- ½ tsp apple cider vinegar
Double Crust
- 2 1/2 cups gluten-free flour 300 grams King Arthur’s Measure for Measure
- 2 tbsp sugar
- 1/2 cup cold water add more as needed (1 tbsp at a time)
- 1 cup cold salted butter, cut into small cubes 2 sticks
- 1 tsp apple cider vinegar
Instructions
- Combine Dry Ingredients: In a food processor or mixing bowl, add the gluten-free flour and sugar. Pulse or whisk to combine.
- Add Cold Butter: Cut the cold, salted butter into small cubes. Add it to the flour mixture and pulse (or use a pastry cutter) until the mixture resembles coarse crumbs with pea-sized pieces of butter throughout.
- Add Vinegar and Water: Drizzle in the apple cider vinegar. Then, gradually add the cold water, 1 tablespoon at a time, pulsing or stirring gently after each addition. Use just enough water for the dough to hold together when pressed.
- Form Dough: Turn the dough out onto a piece of plastic wrap. Gather it into a ball, then flatten it into a disc. Wrap it tightly in the plastic wrap and refrigerate for at least 30 minutes (or up to 1 hour) to let it firm up.
- Roll Out Dough: Once chilled, place the dough between two pieces of parchment paper or on a floured surface. Roll it out into a circle about 1/8 inch thick and 1–2 inches larger than your pie pan.
- Transfer to Pie Pan: Carefully place the dough into your pie pan, pressing gently to fit it into the bottom and sides. Trim any excess dough around the edges and crimp or shape the edge as desired.
- Chill and Bake: If the recipe calls for a pre-baked crust, chill the shaped crust in the pie pan for 10–15 minutes. Then, prick the bottom with a fork OR don’t prick the bottom (always go according to your recipe's instructions) Bake according to the recipes instructions.
- Line the Crust: Cut a piece of parchment paper or aluminum foil large enough to cover the crust and extend up the sides. Gently press it down onto the crust, covering the bottom and edges.
- Add the Beans: Pour dried beans (or rice) onto the parchment or foil, filling the crust about halfway up the sides. Distribute the beans evenly so they press the crust down and hold it in
- Blind Bake: Bake the crust with the beans in the oven according to the recipe’s instructions—usually for 15-20 minutes at 375°F (190°C), or until the edges begin to turn golden.Do show the baked crust in the step-by-step.
Notes
-
- Double Crust: I always use a double crust when I make pies to ensure I have enough to work with and can create pretty edges. Freeze any leftovers.
- Use Very Cold Butter: Cold butter is essential for a flaky texture. Keep it in the fridge right up until you’re ready to cut it in.
-
- Add Water Gradually: Too much water makes a sticky dough, so add it slowly. The dough should hold together when pressed but shouldn’t be wet.
-
- Chilling the Dough: Chilling isn’t just for ease of rolling—it firms up the butter and makes for a flakier crust. This step is especially crucial for gluten-free baking, where the dough’s structure can be a bit looser.
-
- Roll Between Parchment Paper: Gluten-free dough can be more delicate, so parchment makes rolling and transferring easier.
-
- Handling Sticky Dough: If your dough feels sticky, add a light dusting of gluten-free flour as you roll it out. Rolling between two sheets of parchment paper also helps prevent sticking, making it easier to transfer to the pie pan.
-
- Preventing Cracks: Because gluten-free dough can be more delicate, rolling it between parchment paper helps keep it intact. If cracks do appear, press them back together gently with your fingers or use a touch of cold water as "glue."
Nutrition
Serving: 1single crust | Calories: 1473kcal | Carbohydrates: 149g | Protein: 19g | Fat: 97g | Saturated Fat: 58g | Polyunsaturated Fat: 4g | Monounsaturated Fat: 25g | Trans Fat: 4g | Cholesterol: 241mg | Sodium: 720mg | Potassium: 29mg | Fiber: 18g | Sugar: 24g | Vitamin A: 2799IU | Calcium: 147mg | Iron: 7mg
